 NestAffiliate
  NestScale Product Variants
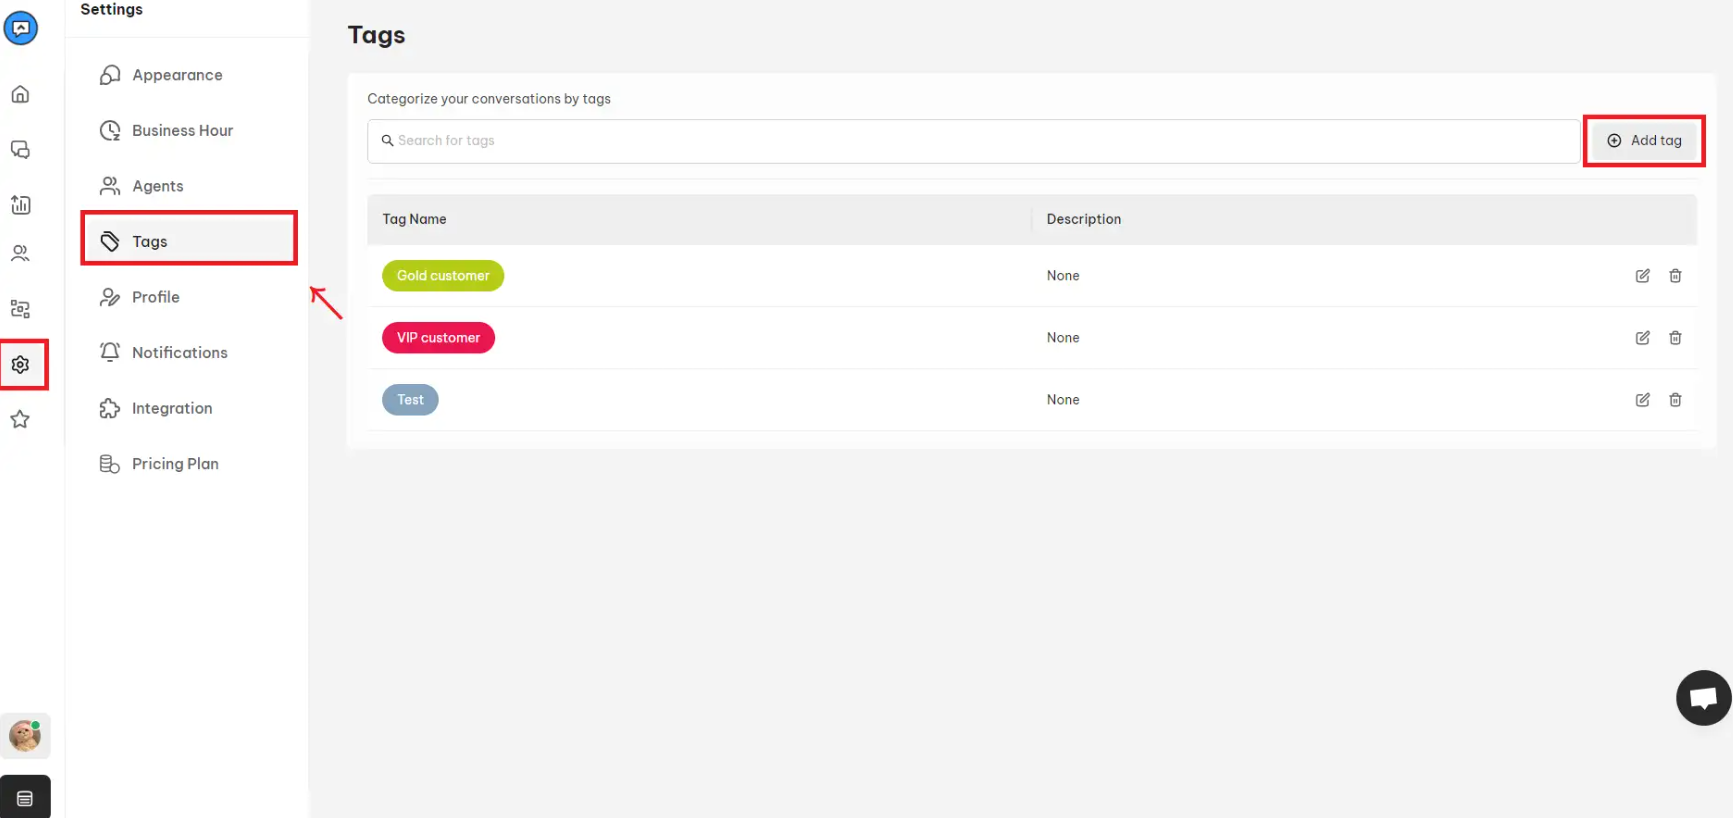
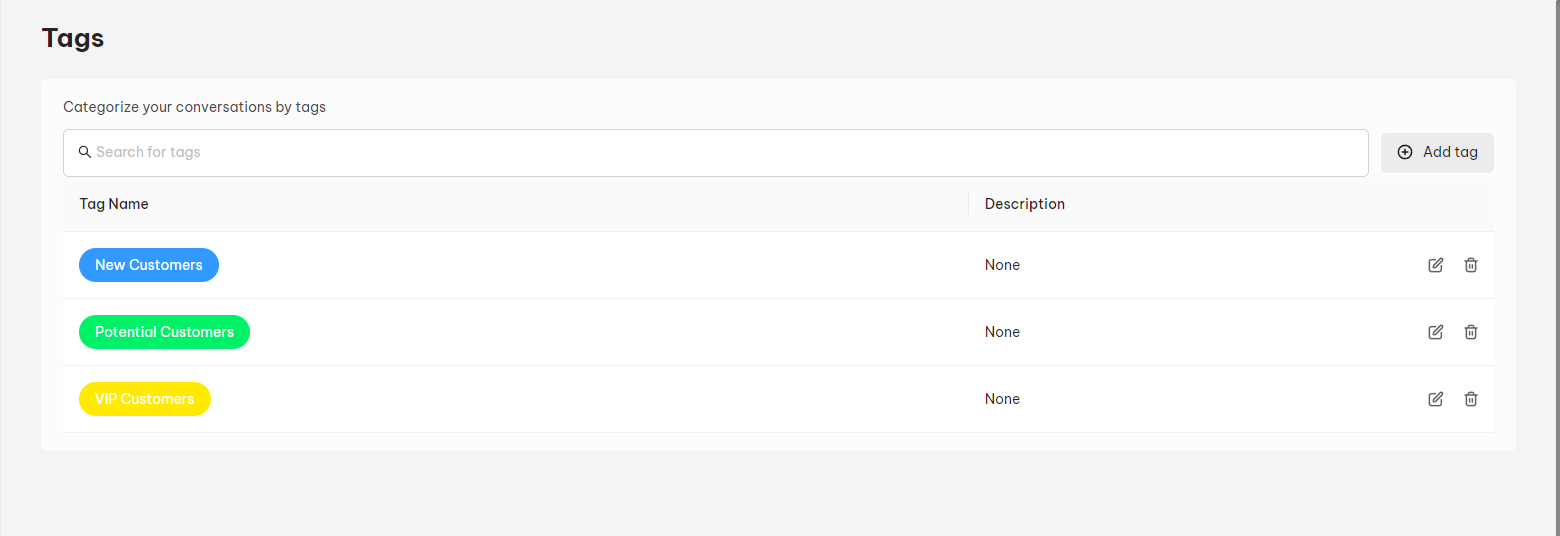
 Tags are the labels that help you to categorize and sort out customer messages. You can add more than one tag per message. In this article, you’ll learn how to create, edit and add tags in NestDesk.
How to create tag
First off, make sure you’ve already logged into NestDesk. If you don’t have a NestDesk account, please create a new one here.
- Navigate to Settings > click on Tags > click on Add tag button
- Set up your tag
Here you can add the tag name, tag description, and tag color.
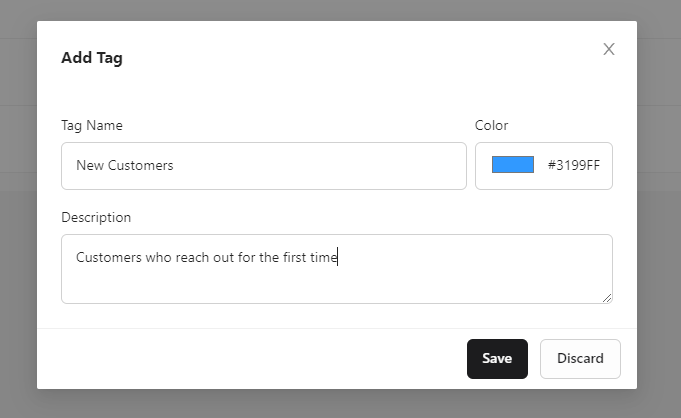
3. Hit on Save button to save your setup
>> Read more: How to add tags to the conversation?
Interested in learning more about NestDesk? Book a demo with us!
Need any help?
If you need any assistance with NestDesk, feel free to contact us via live chat in-app or email [email protected].
Our support team is happy to help.