Installing NestDesk live chat on Shopify store is easy and quick. In this post, you will learn how to install live chat widget on your Shopify store. Let’s get started!
How to install NestDesk live chat on website
To add NestDesk chat widget on website, please follow 3 simple steps below:
Step 1: Connect your Shopify store to NestDesk
Step 2: Enable chat widget visibility
Step 3: Enable NestDesk app embeds on your active theme
Now we will take a further look into every single step.
Connect Shopify store to NestDesk
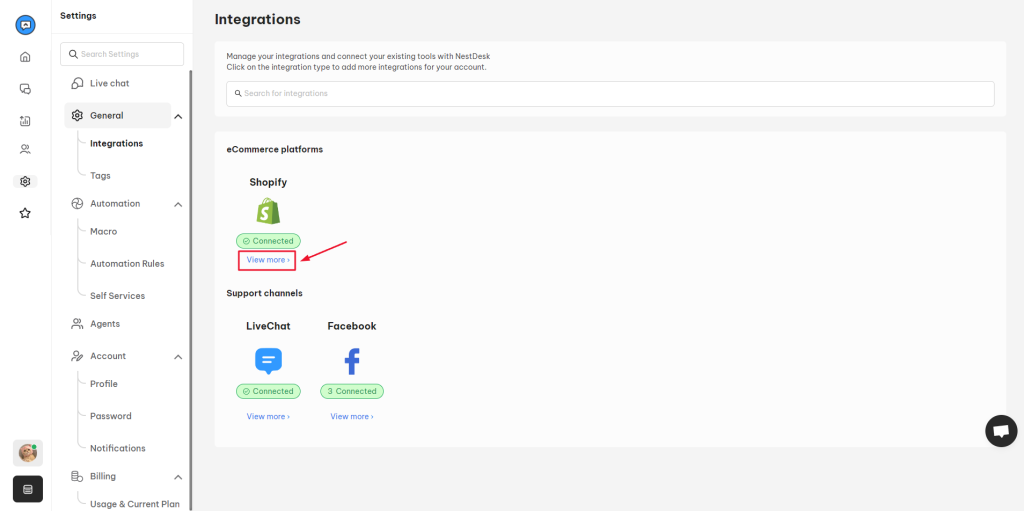
- On the left navigation menu, navigate to Settings
- Under General, please click on Integrations > click on View more in Shopify section
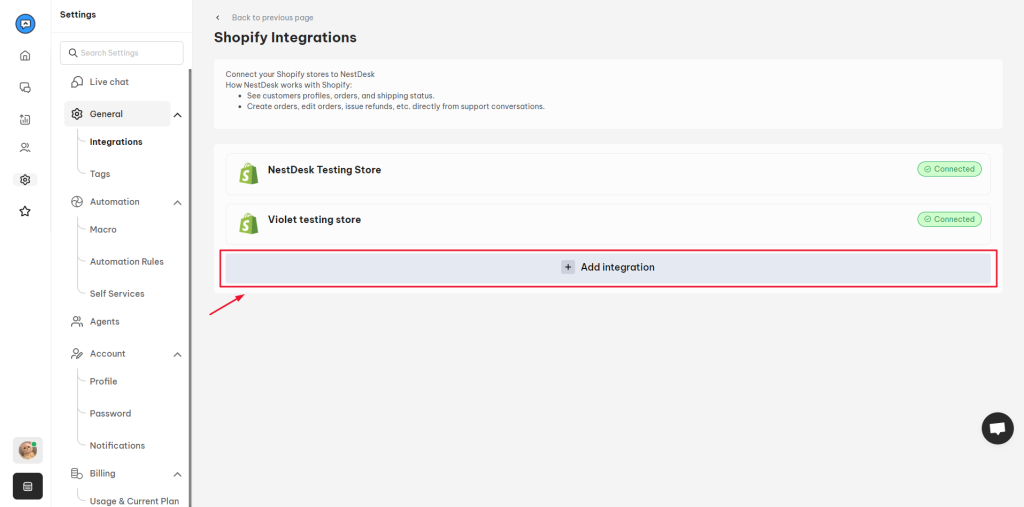
3. At Shopify integrations page, click on Add integration button
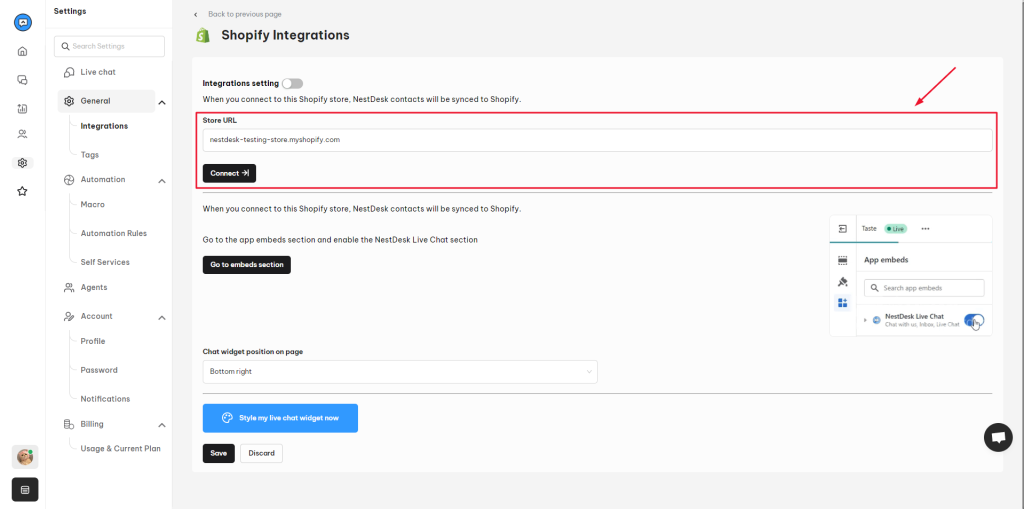
- Enter your Shopify store URL > click Connect button
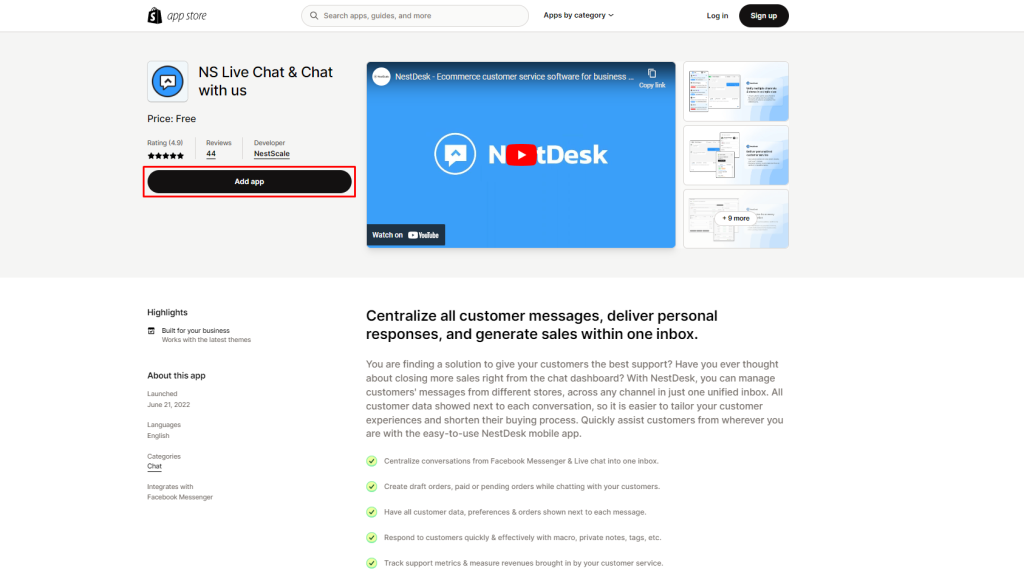
5. Now you will get directed to NestDesk app listing page on Shopify.
If you haven’t installed NestDesk app on your Shopify store, click on Add app button
Then you will be back to Shopify Integrations page in NestDesk.
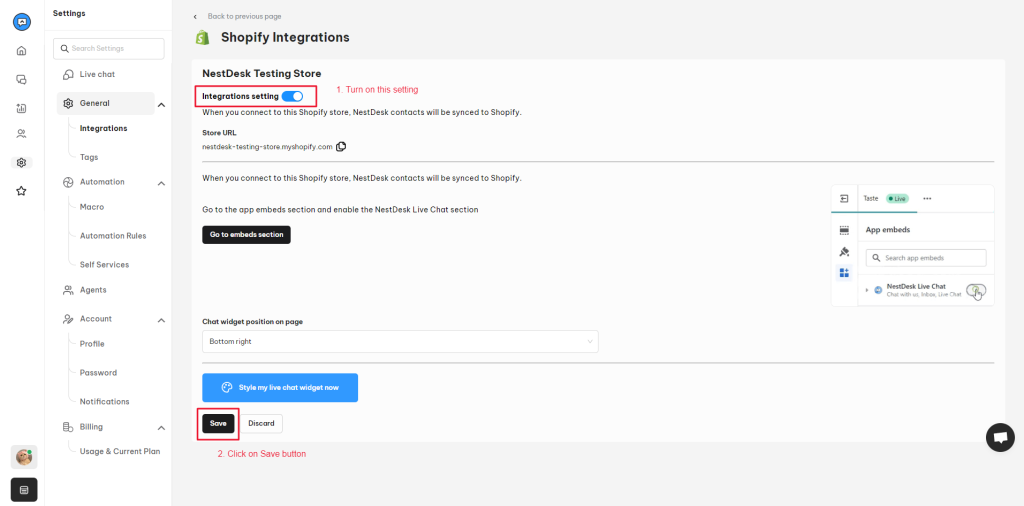
6. Now you enable Integration settings > Click on Save button
Enable chat widget visibility
After connecting Shopify store with NestDesk, your next step is enabling live chat visibility.
- Navigate to Settings > click on Live chat
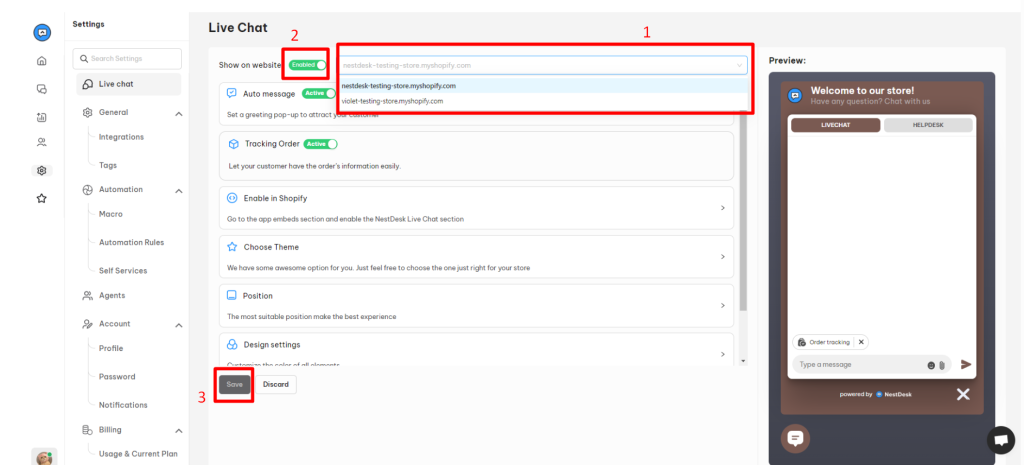
- On Live Chat page, you select the store > enable Visibility settings
- Click on Save button
Enable NestDesk app embeds on theme
To make sure the live chat widget is installed well, your last step is to enable NestDesk app embeds on your active theme.
- On Live Chat page, click on Enable in Shopify section
- Click on Go to Shopify Configuration button. Then you will get directed to your Shopify theme editor page.
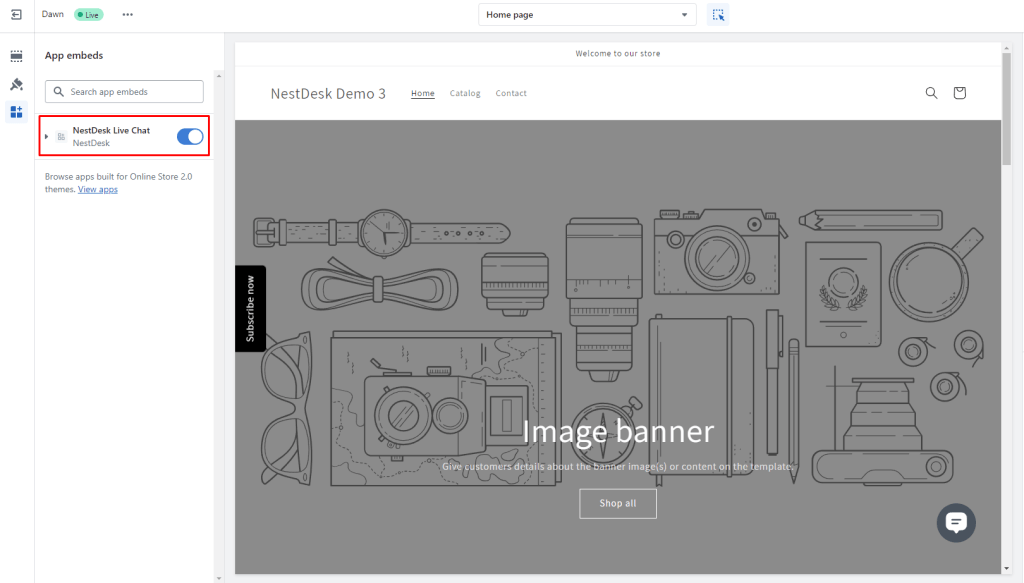
- Click on app embeds tab > Turn on NestDesk Live Chat block > click on Save button
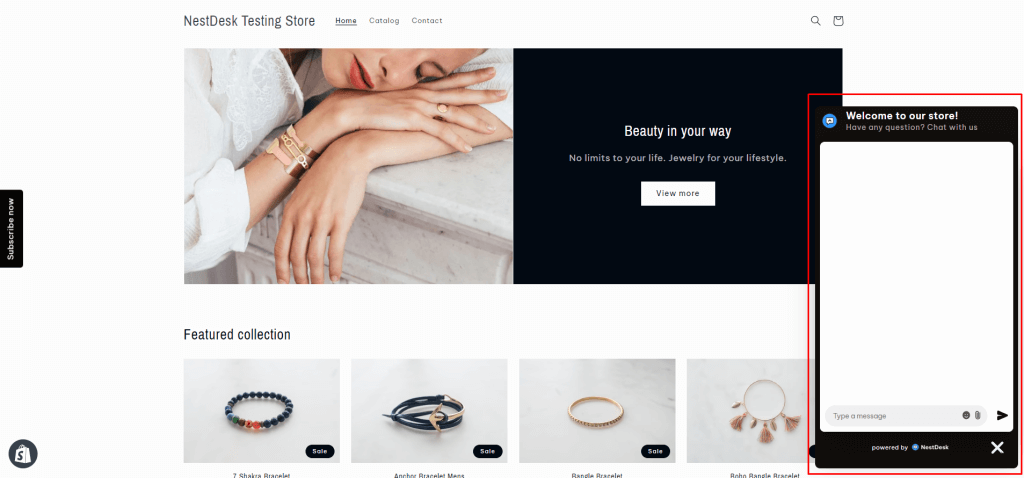
Here’s how the Live chat widget will be displayed on your site:
Video tutorials
Watch out the videoguide on How to install NestDesk live chat on Shopify store below.
Need any help?
Please contact our support team via live chat or email at [email protected]
We are happy to help you as soon as possible!
 NestAds
  NestAffiliate
  NestScale Bundles & Discounts
  NestScale Product Variants
  NestSend
  NestWidget