In this post, you will learn how to customize live chat widget to match your store’s look and feel. Let’s get started now!
First off, make sure you’ve already logged into NestDesk. If you don’t have NestDesk account, please create a new one here.
How to customize live chat widget
To customize your live chat widget, you first need to connect your eCommerce store to NestDesk.
Enable live chat widget
- Navigate to Settings > select Appearance
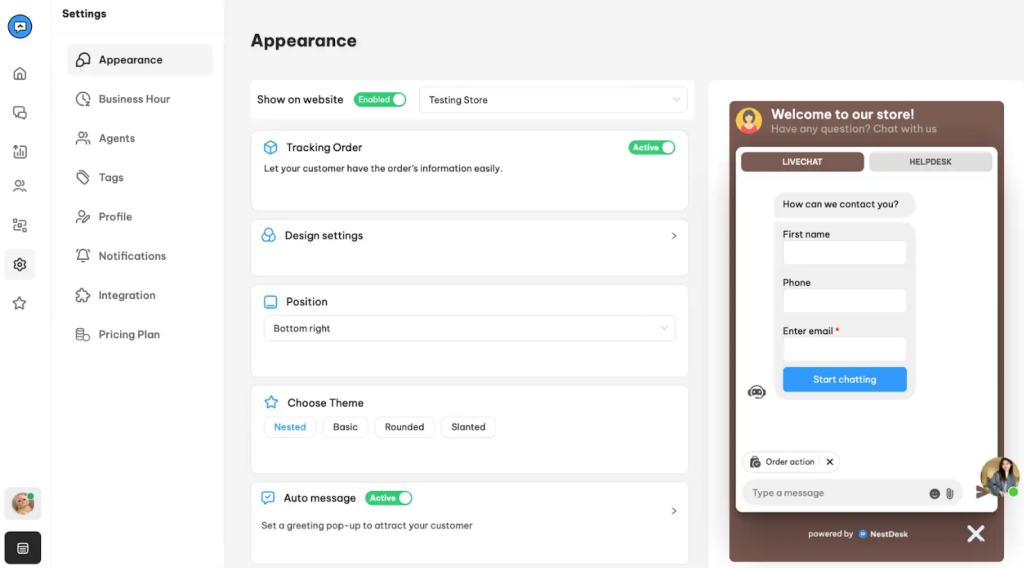
There will be 4 sections in Customization:
- Design settings
- Position
- Widget theme
- Auto message
Each customization will appear as pictured example right next to the setting part. Let’s take a walk through each!
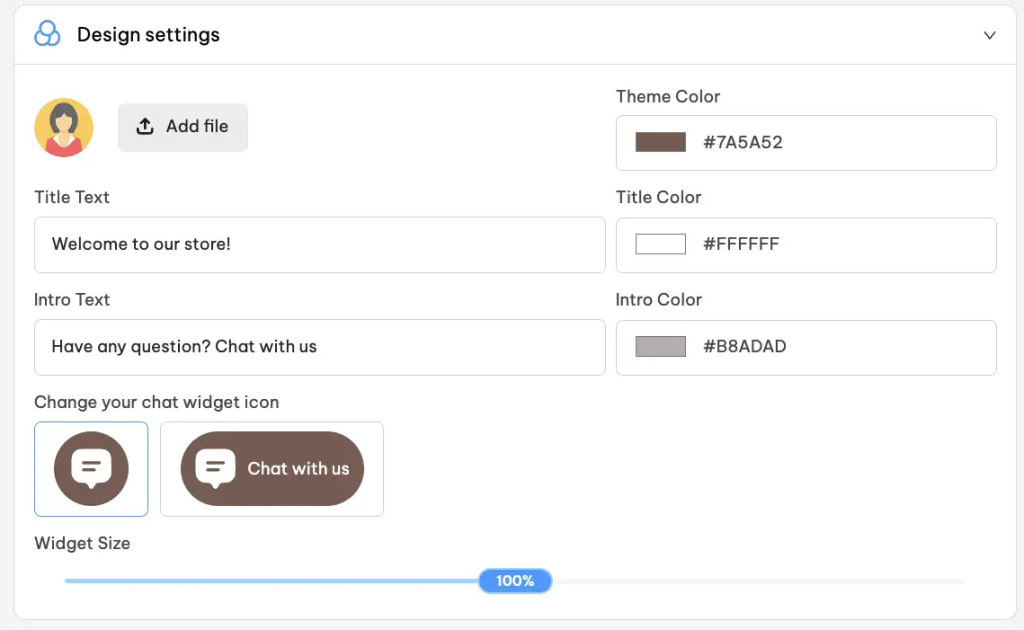
Design settings
- Primary color: This is the header color of the chat widget
- Title text: Greet your customers with a short text in title text
- Title color: Pick a color for your title from color palette or paste a color code
- Intro text: Motivate customers to contact us via live chat by adding a short intro text
- Intro color: Pick a color for your intro text from color palette or paste a color code
Position
What is the most suitable position for your chat widget? Select one from the drop down box
Note: NestDesk recommend you to choose either Bottom left or Bottom right depending on your website layout, which is easier for your customer to view
Widget theme
Here you could choose the theme that best suited to your site.
- Choose one theme, it will right away appear on the illustration widget
Auto message
Auto message helps to initiate conversations with visitors proactively when they first browse your website.
- Click on the arrow to start editing the auto-message
- Switch on the toggle to enable Auto message and click Save button

Interested in learning more about NestDesk? Book a demo with us!
Need any help?
Please contact our support team via live chat or email at [email protected]
We are happy to help you as soon as possible!
 NestAds
  NestAffiliate
  NestScale Bundles & Discounts
  NestScale Product Variants
  NestSend
  NestWidget

