 NestAffiliate
  NestScale Product Variants
 In this post, you will learn how to add an agent to your account. Let’s get started now!
📌 Note: Only admin can add agents to the account.
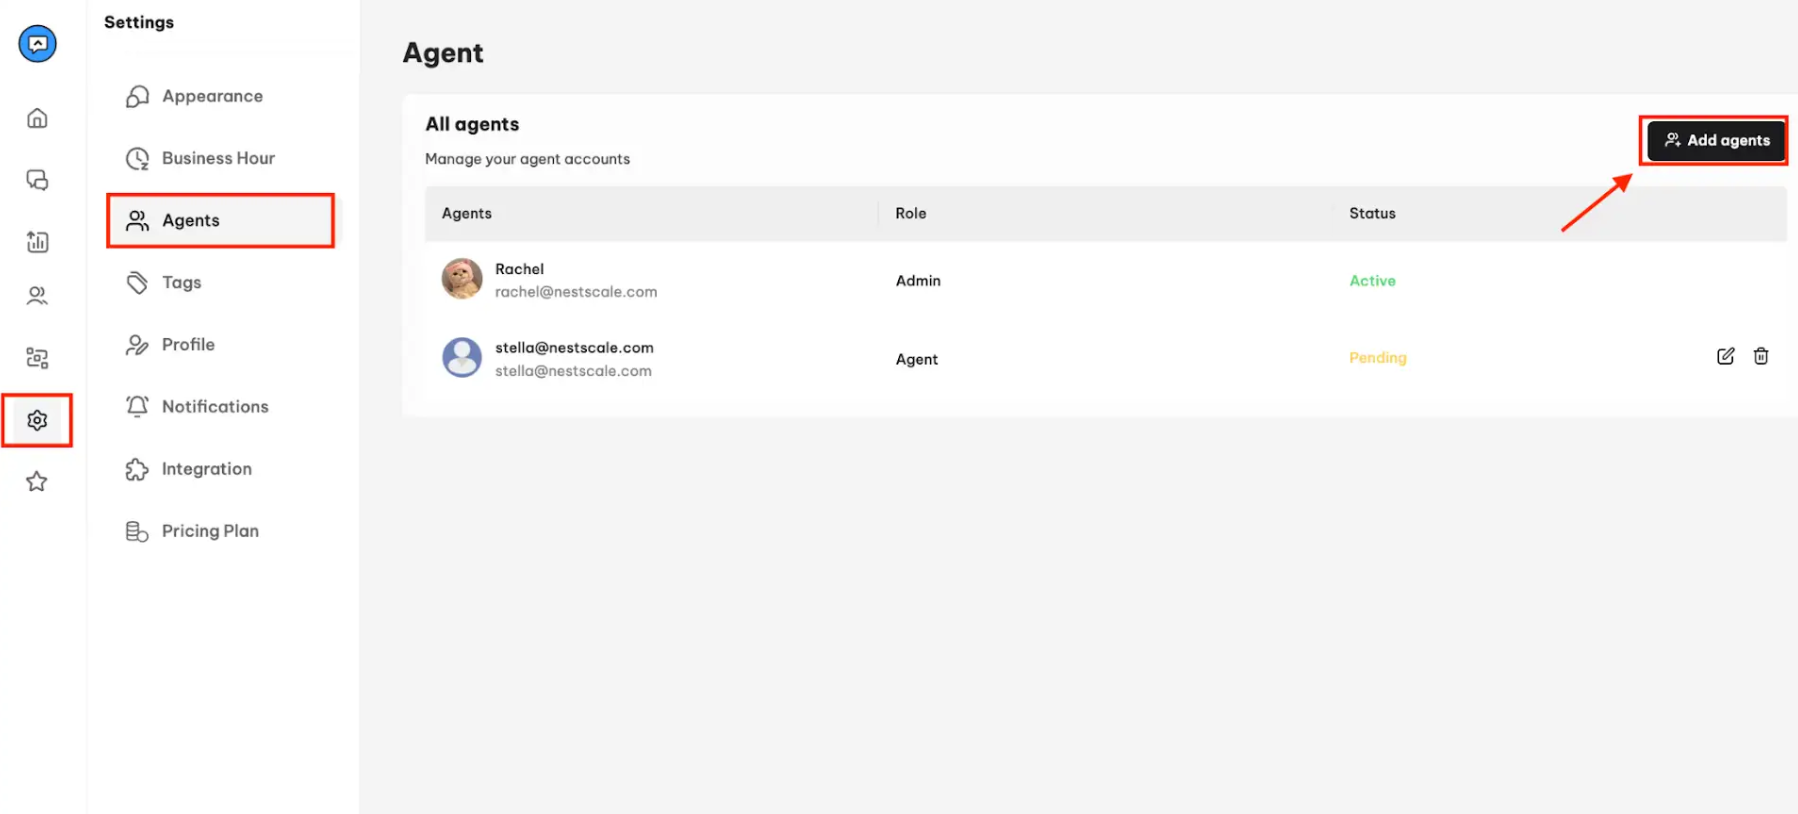
How to add an agent to your account
1. Log in NestDesk admin account
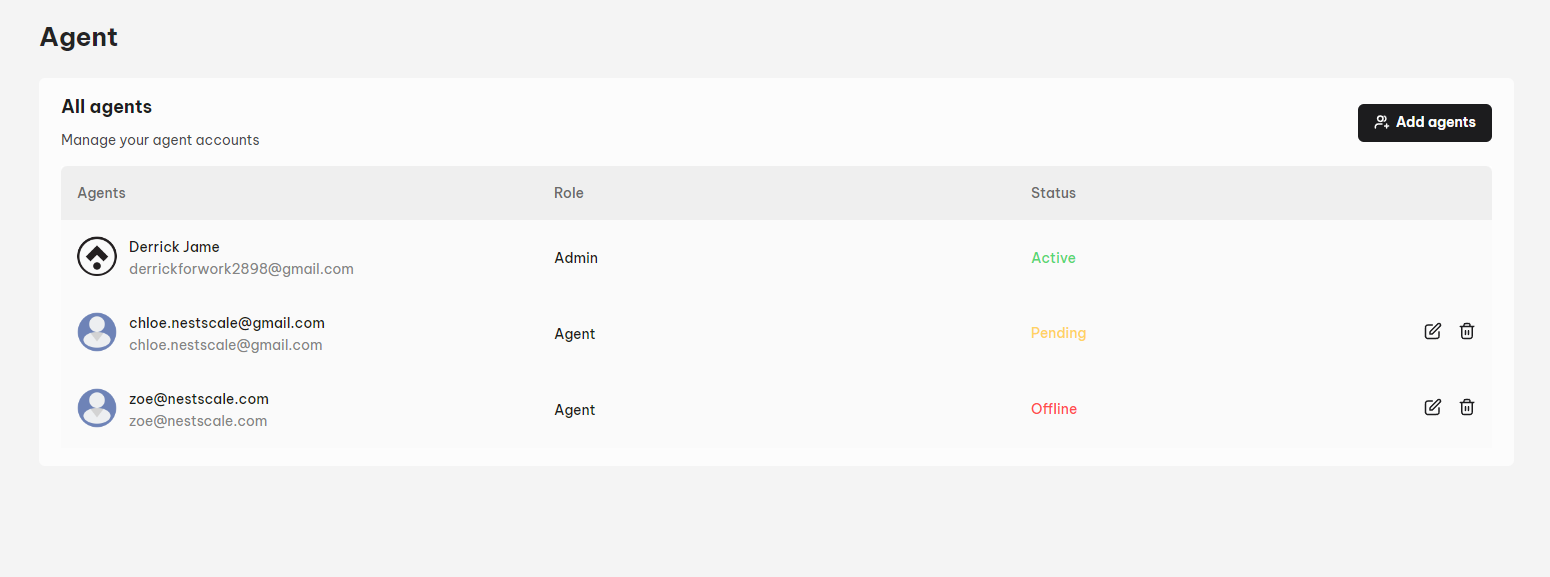
2. In the left sidebar, go to Settings > Agents, click Add agents button
3. There you need to type down the email address of the agent and click on Save button
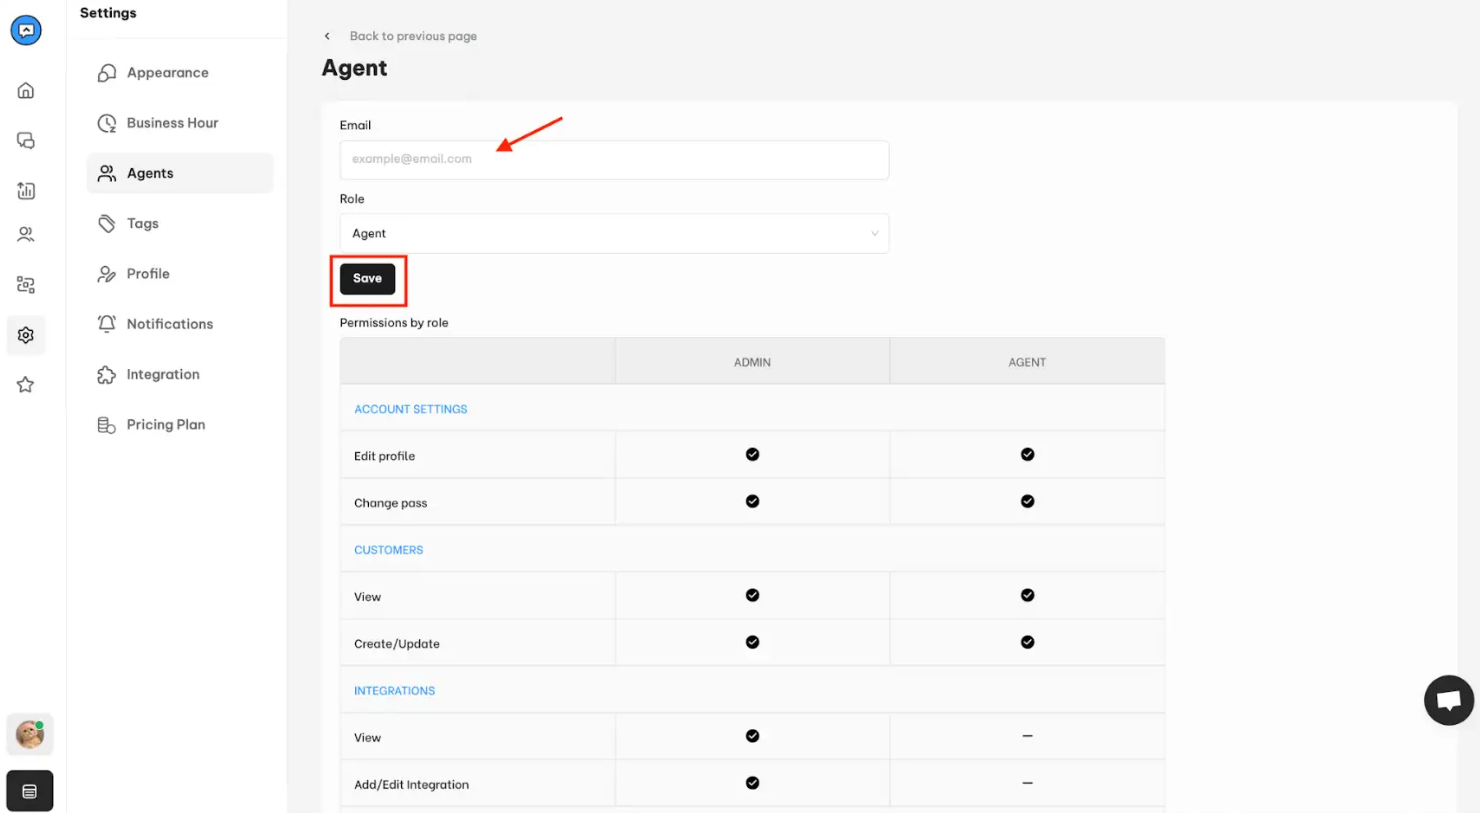
Then NestDesk will send a login instruction to the mailbox of that agent.
Here’s how the invitation email looks like:
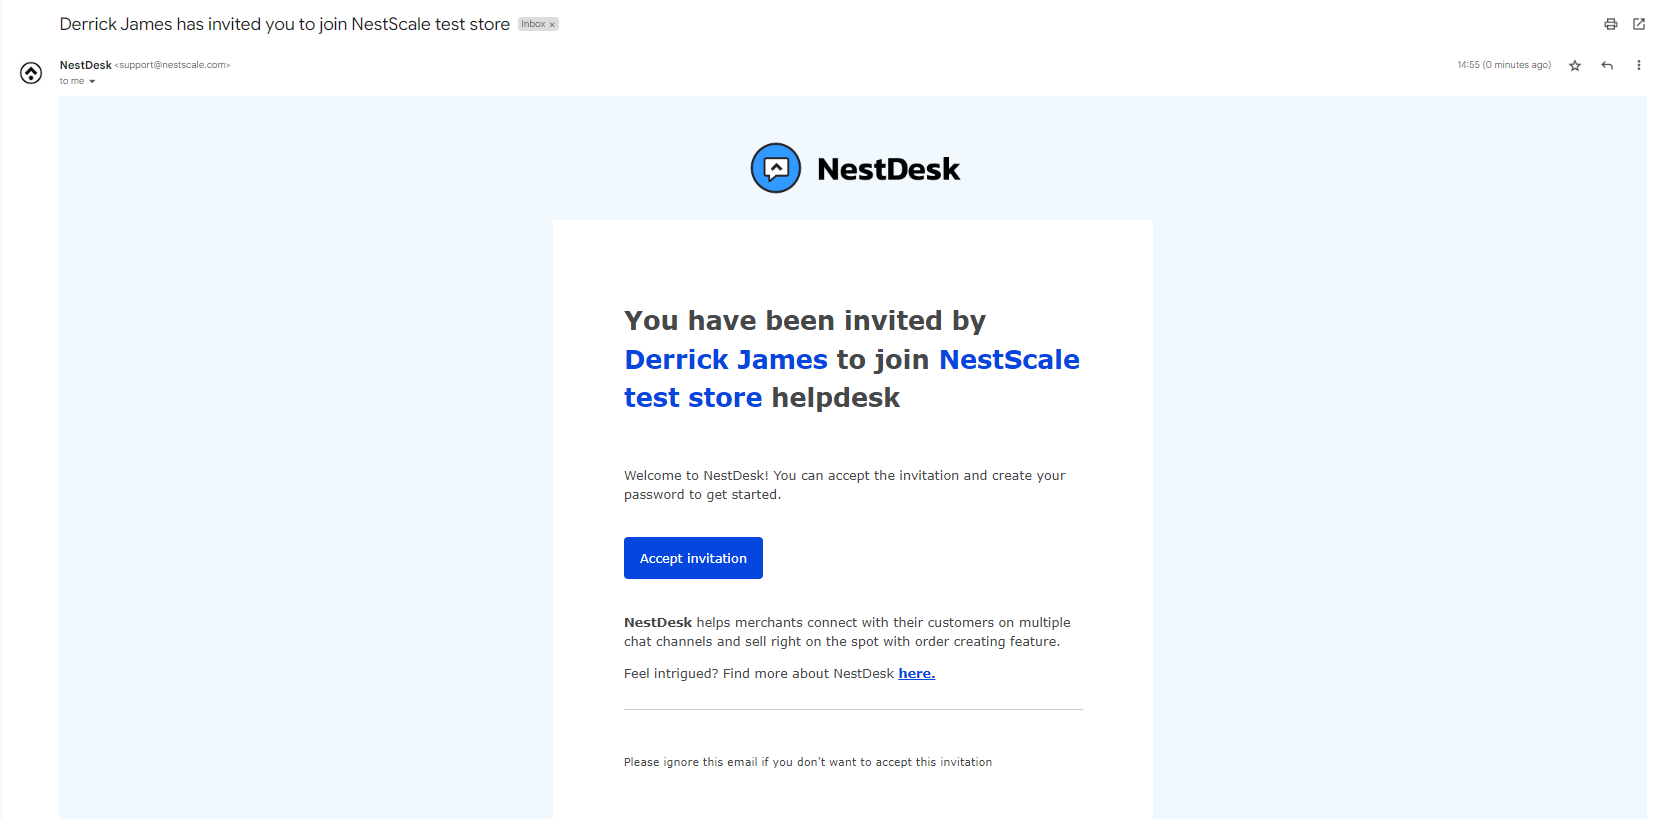
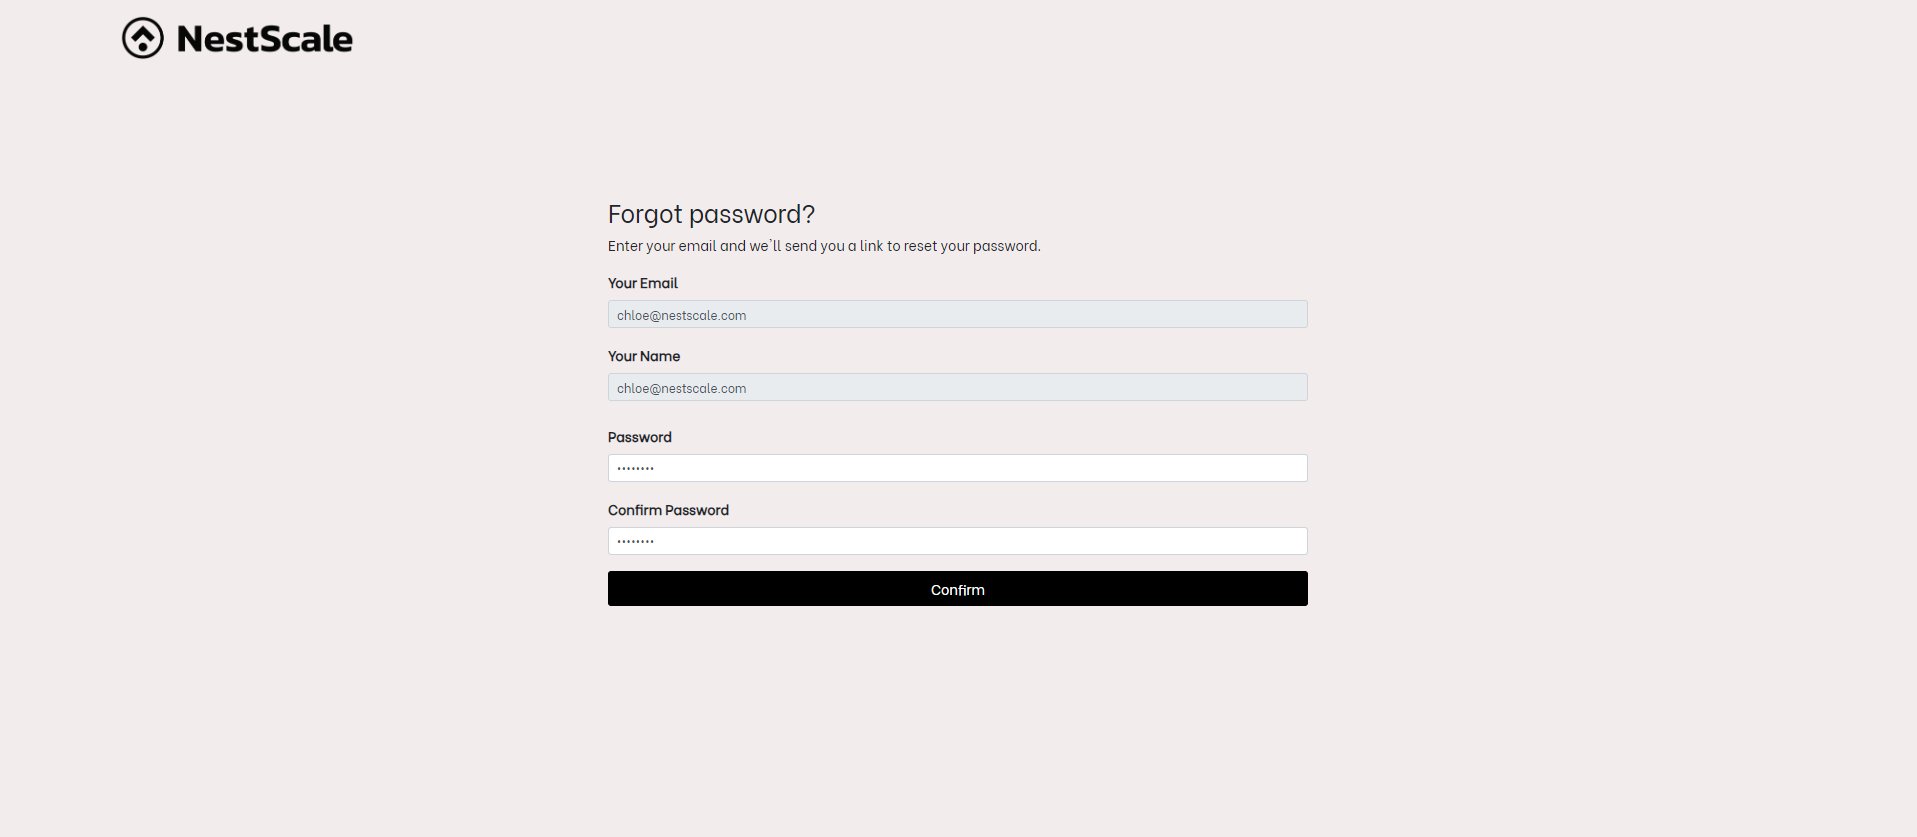
After clicking on the Accept Invitation button, a new page will appear to sign up
After the agent activates a new user account, his/ her status will display Active as shown below. There are 3 types of account status:
- Active: account has been activated and is online now
- Pending: invitation has been sent by admin but account hasn’t been verified.
- Offline: account has been activated and isn’t online now
Interested in learning more about NestDesk? Book a demo with us!
Need any help?
Please contact our support team via live chat or email at [email protected].
We are happy to help you as soon as possible! 😊😊😊