 NestAffiliate
  NestDesk
  NestScale Product Variants
 LAST UPDATED: 29/3/2023
In this post, you will learn how to create ad campaign in NestAds from scratch. Let’s get started!
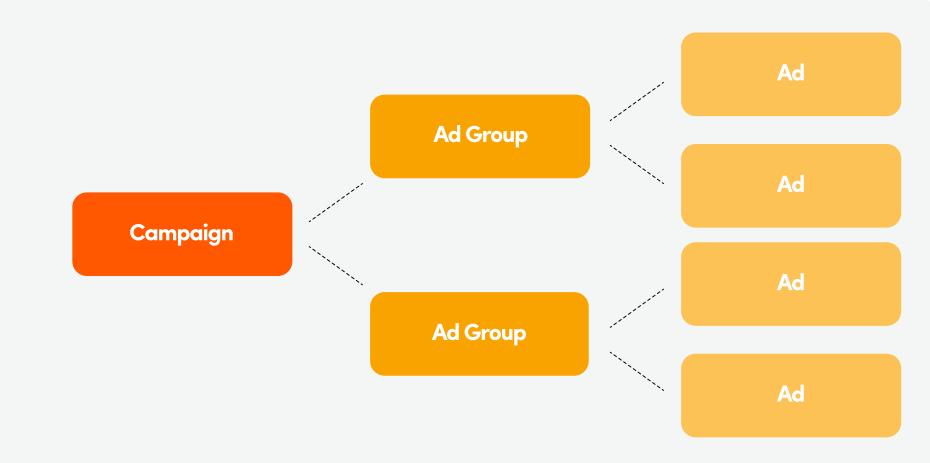
TikTok Ad Structure
TikTok Ad structure includes 3 main parts: Campaign, Ad Group and Ad.
A Campaign can consist of multiple Ad Groups. And an Ad Group can consist of multiple Ads. To publish a complete TikTok ad campaign, you need to set up each of these elements.
Before you begin
Make sure you finish these steps below before setting up TikTok ad campaign:
- Prepare Creative
Creative is the video that showcase your product or service to run ads
- Create TikTok pixel and install on website
TikTok pixel is a piece of code installed on your website to track ad performance
>>> Read more: TikTok Pixels
- Add Balance
Balance is the amount of money that remains in your ad account. It will be spent for running TikTok ads.
Once you get all steps above done, let’s set up TikTok ad campaign in NestAds
1. Login to your NestAds account
2. Navigate to Campaign section > click on Create button
3. Select Campaign type
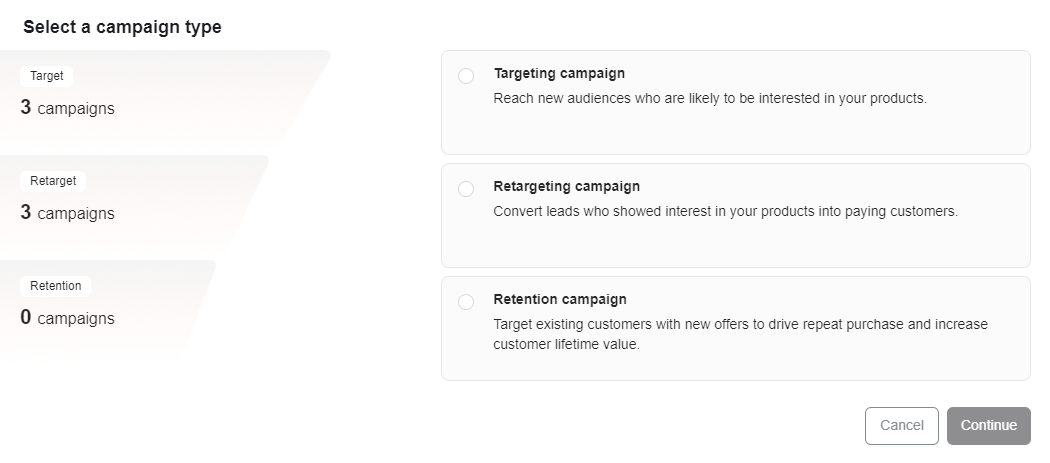
If you’re in Free plan, only targeting campaign type is available . If you want to create unlimited campaign in all campaign types, kindly upgrade to paid plans.
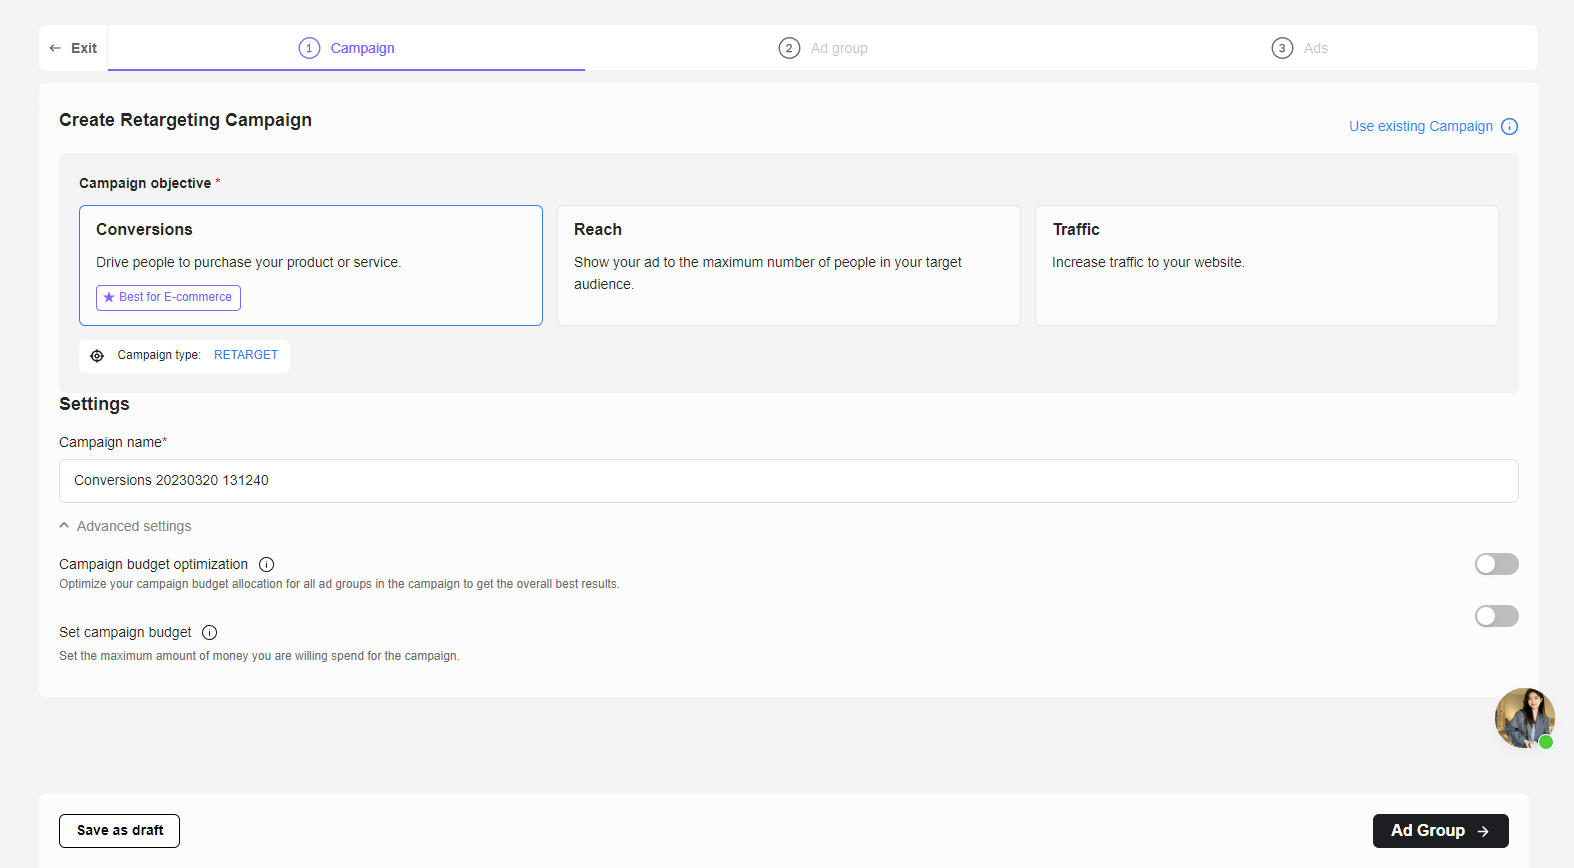
Create a Campaign
In Campaign level, you need to configure the following fields:
- Campaign Objective: Choose the advertising objective based on your business goal
If you’re running an eCommerce store and want to get sales, Conversions objective will be the best option
- Campaign name: Enter your unique campaign name. This name is internal and does not show up to TikTok viewers, only you can view it.
- Advanced settings:
- Campaign Budget Optimization:
Enable this feature only if you want to apply a single set of budget optimizations to all the ad groups that belong to campaign rather than setting them up individually.
Read more: Campaign Budget Optimization
- Set Campaign Budget
Campaign Budget is the total amount of money your all Ad Groups can use before reaching the spending limit. Here’re 3 options for setting campaign budget:
- No limit: No restrictions on how much the campaign will spend. (Simply turn off Set Campaign Budget)
- Lifetime budget: The maximum amount you are willing to spend during the entire period you run an ad.
- Daily budget: The maximum amount you are willing to spend on a campaign per day.
*Note: Both daily and lifetime campaign budget must exceed $50
Once you publish your campaign, you cannot change the budget type at the campaign or ad group level. Therefore, you will be unable to switch from a daily budget to a lifetime budget and vice versa.
>>> Read more: TikTok Ads Budget best practices
Create an Ad Group
After creating the campaign, you will click on the Ad Group button and keep setting up.
In Ad Group level, there are 4 main parts you need to configure:
- General
- Targeting
- Audience
- Budget & Optimization
General
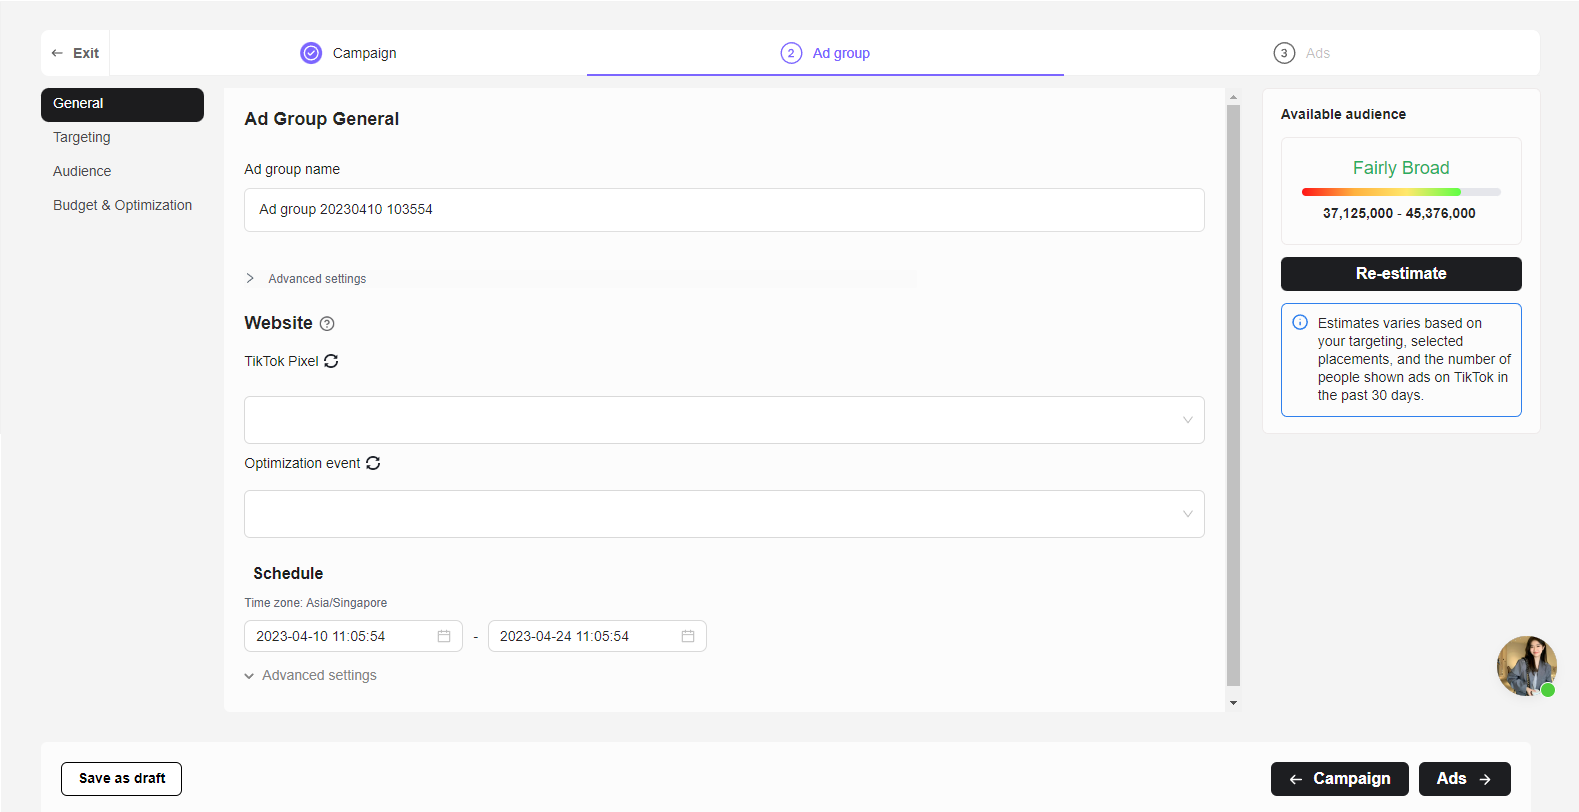
- Ad Group Name: Enter your unique ad group name. This name is internal and does not show up to TikTok viewers, only you can view it.
*Note: Each Ad Group name within a Campaign must be unique
Click on Advanced Settings and switch on toggle if you want to:
- Enable User Comment
- Enable Video Download
- TikTok Pixel: Select a specificTikTok pixel to track your ad performance
- Optimization Event: This helps you find audience who will perform a certain action on your ads.
There’re 4 available options for you: View content, Add to cart, Initiate checkout, Complete payment.
- Schedule: Set the time for your ads to run
You can choose a date range or run continuously the ads after a selected start date or when they are approved.
Click on Advanced Settings and switch on toggle if you want to:
- Run ad group continuously
- Show ads on specific days of the week
Targeting
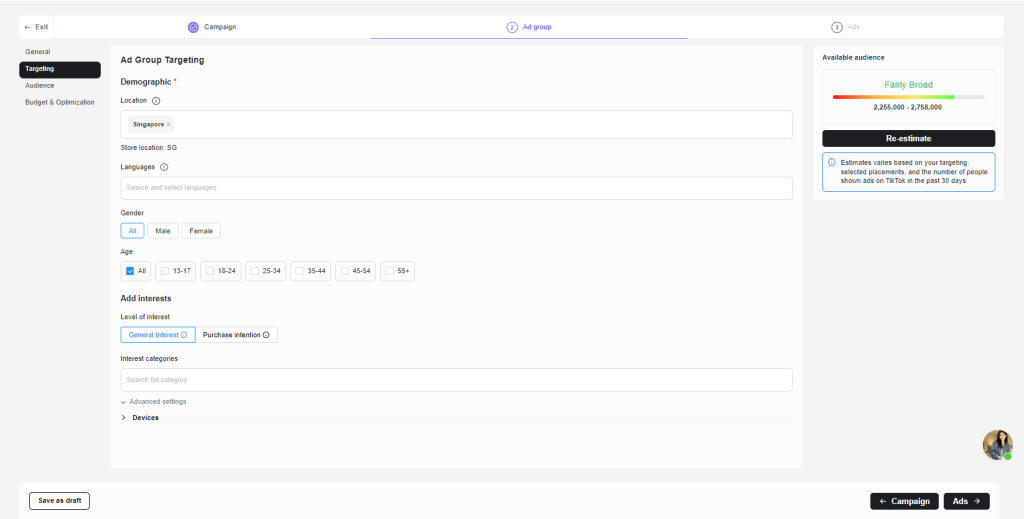
Here’s the place you describe the audience that you want to show your ads to:
- Demographic: This includes Location, Languages, Gender, Age
- Interests:
- Level of interest: Deliver ads to audience based on their interests and purchase intentions
- Interest categories: Select one or multiple interests of audience you want to reach to
Click on Advanced Settings and switch on toggle if you want to:
- Target by interaction behaviors
- Targeting expansion
- Devices:
This setting lets you deliver ads based on a customer’s devices. It includes Operating system, OS versions, Device model, Connection type, Carrier, and Device price.
>>> Read more: Default Targeting
Audience
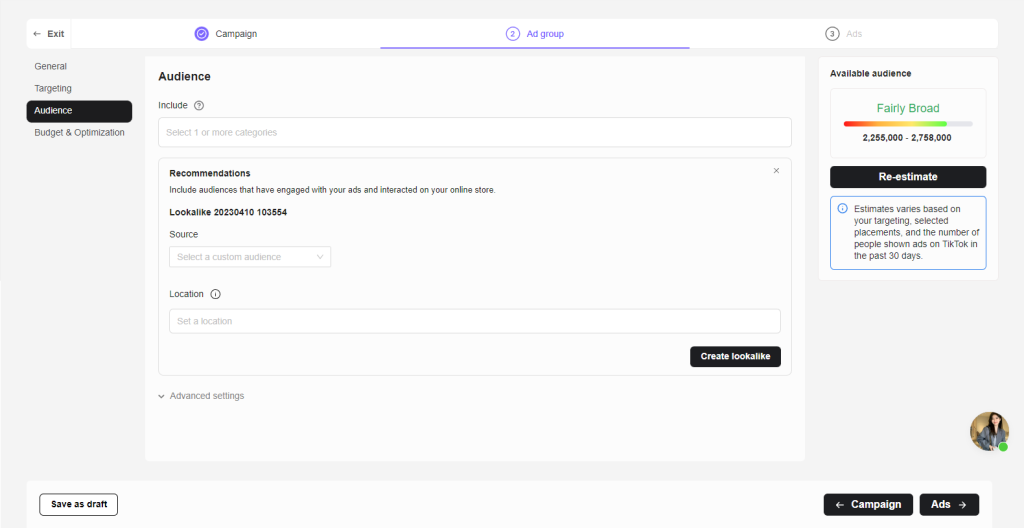
- Include: Select from your existing Custom Audience or Lookalike Audience.
- Exclude: Exclude existing Custom Audience or Lookalike Audience
>>> Read more: Create targeting audience
Budget & Optimization
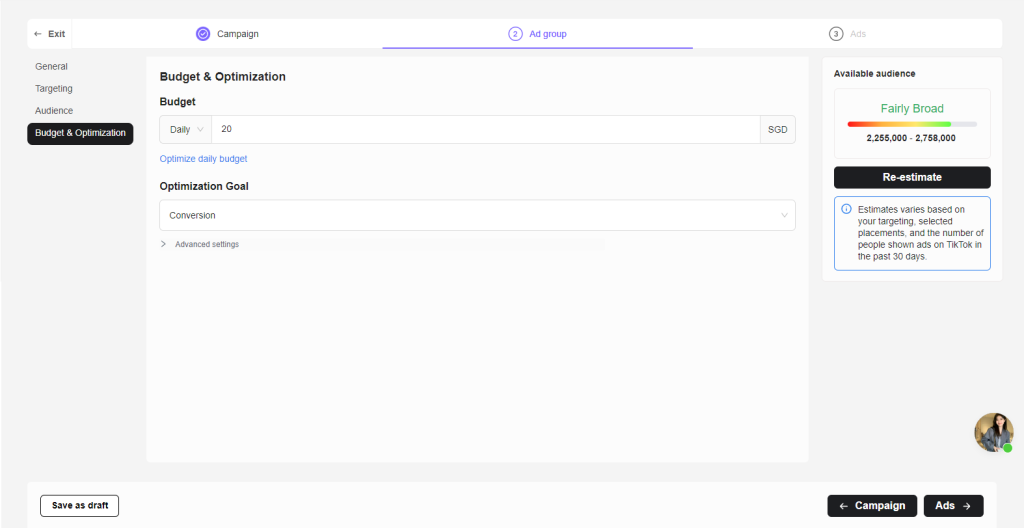
- Budget: Set the maximum amount of money you’re willing to spend for that ad group. Here’re 2 options for setting ad group budget:
- Lifetime budget: The maximum amount you are willing to spend on that ad group during the entire period.
- Daily budget: The maximum amount you are willing to spend on that ad group per day.
*Note: Both Daily and Lifetime ad group budget must be exceed $20
If you’re not sure how much budget you should set, we recommend you to use Optimize daily budget feature (Available in paid plans). It helps you to estimate daily budget for best ad performance based on ad groups
- Optimization Goal: This helps you find audience who will perform a certain action on your ads.
*Note: Optimization Goal should match with the Campaign objective you set in Campaign level
- Advanced Settings:
- Billing event: This will determine when you pay for your ad.
Impression (oCPM) is the default bidding method for Conversion campaign objective. Click (CPC) is is the default bidding method for Click campaign objective.
- Delivery type: Standard delivery is set in default. With standard delivery, your budget will be spent as evenly as possible within your ad delivery period.
- Bid control: Enable this feature if you want to keep your average cost per result around or lower than your bid.
After setting up Ad Group, you can click Re-estimate button to preview the audience size based on your settings.
>>> Read more: Campaign Budget Optimization
Create an Ad Creative
After creating Ad Group, you will click on the Ads button and keep setting up.
In Ad level, there are 2 main parts you need to configure:
- Ad Settings
- Ad Creative
- Ad List
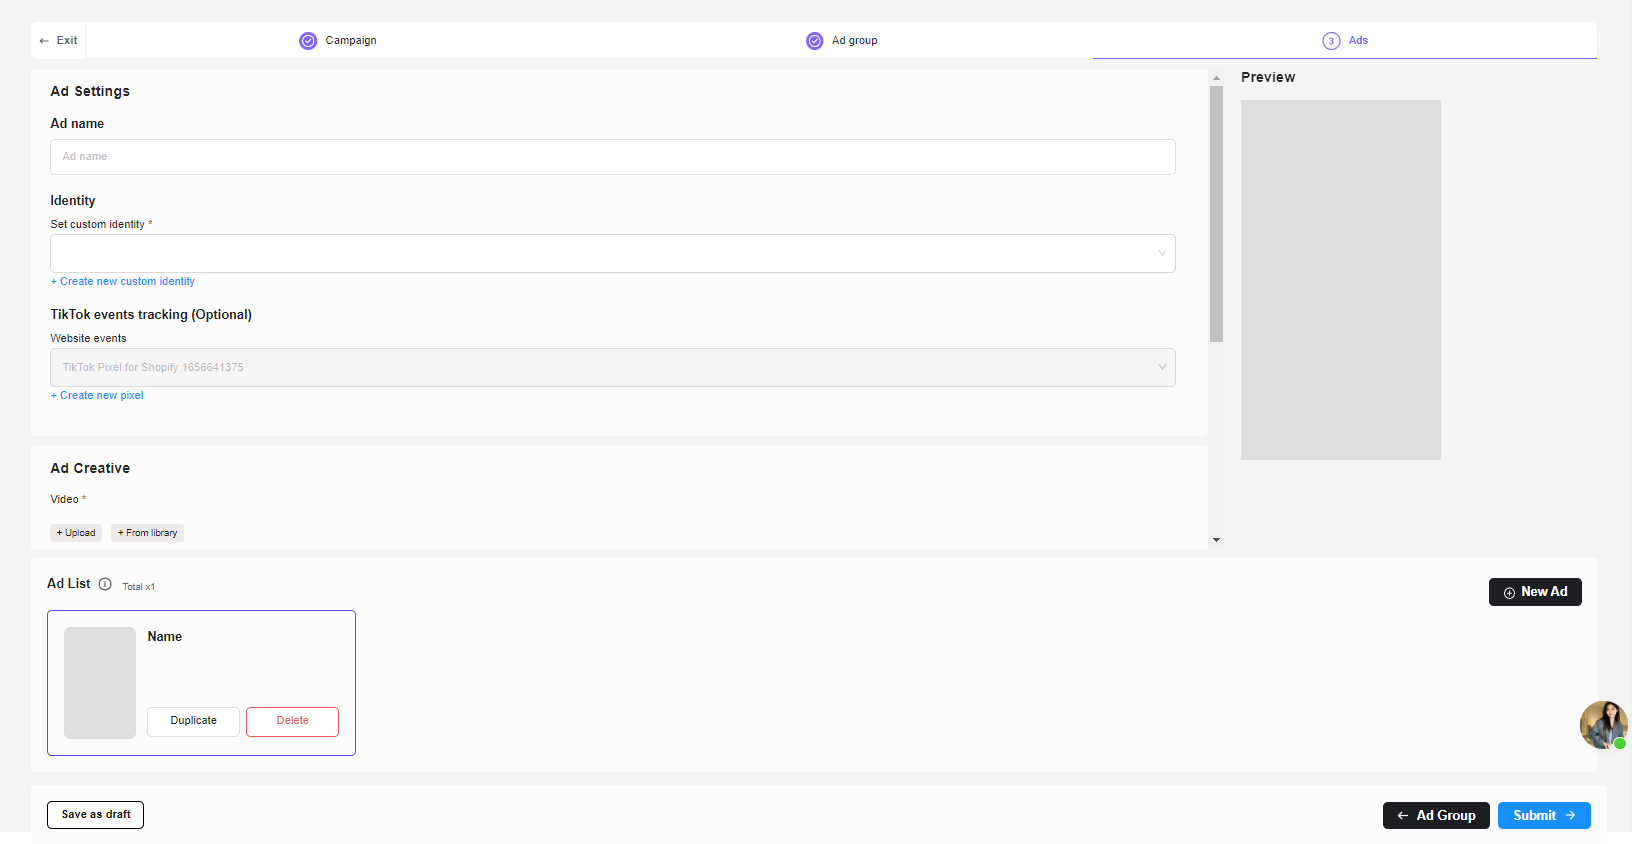
Ad Settings
- Ad Name: Enter your unique ad name. This name is internal and does not show up to TikTok viewers, only you can view it.
*Note: Each Ad name within a Ad Group must be unique
- Identity: Custom identity lets you present your brand name and profile image within the ad
- TikTok events tracking: Select pixel tracking if you set Conversion campaign objective
Ad Creative
- Video: Upload a video from your device or select from Library of TikTok Ads manager
- Text: Write a brief and catchy description about what product or service you a promoting. The ad text will display as a part if your ad
*Note: Text must be betwween 1 to 100 characters
- Destination page: Enter your website or a specific product link that you want to direct audience to. You can select from 3 options: Homepage, Product page, and Custom link.
- Call to action: Tell your audience what you’d like them to do when they see your ad. You can select an option from the available list.
Ad list
In this section, you will see the Ad you just created.
If you want to add more than one Ad in the current Ad group, simple click on New Ad button.
*Note: You can create/duplicate up to 20 Ad Creatives in an Ad Group
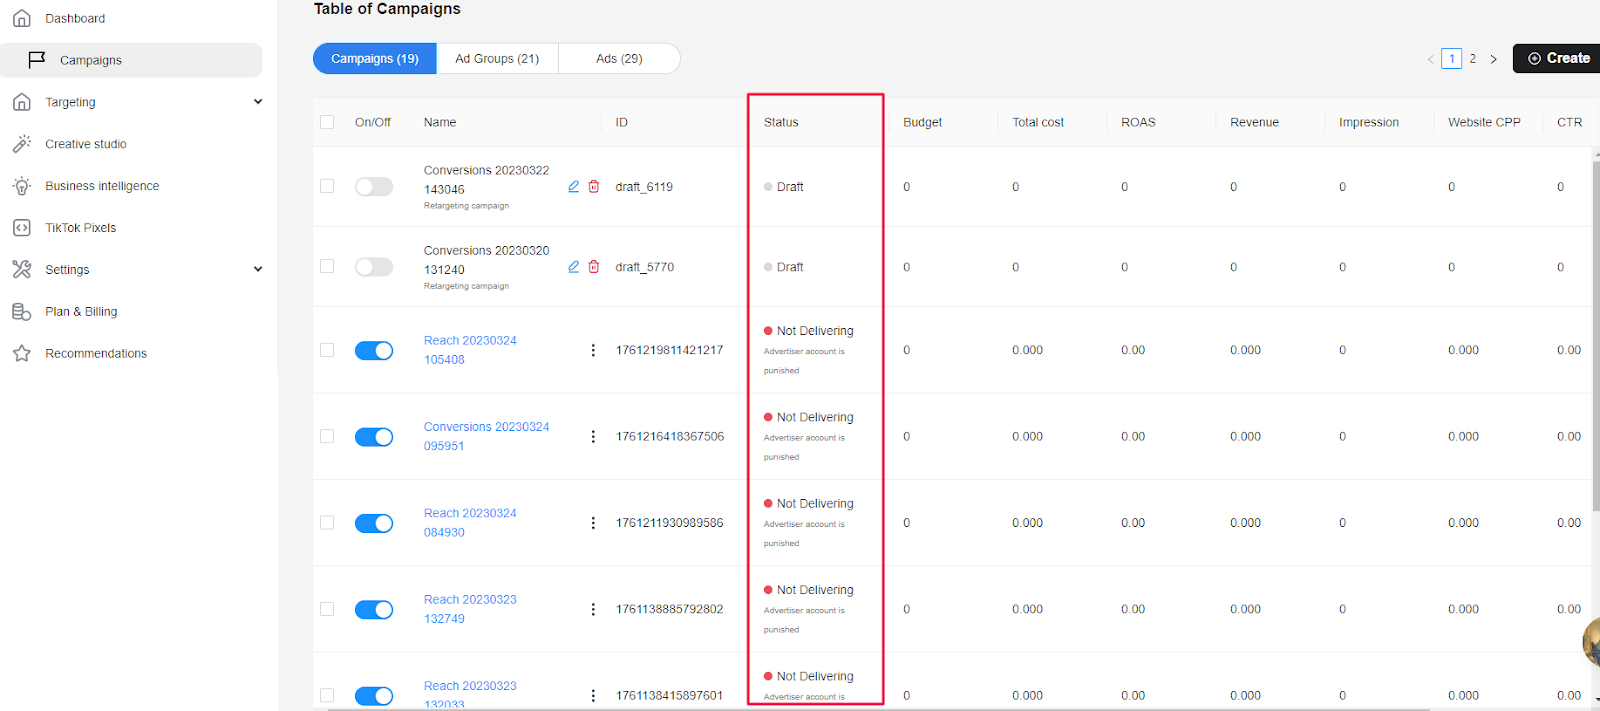
That’s done! Now you just need to click on Submit button. Your campaign will display in the Table of campaigns as shown below.

>>> Read more: TikTok ad creatives best practices
TikTok Ads Review
After you submit the ad campaign, it will undergo a review process to ensure compliance with TikTok Advertising Policies.
Most campaigns are typically reviewed within 24 hours. However, in some cases, the process may last longer.
If you want to quick check your ads status, you go to Campaigns section > Ad Group > Status.
Finally, in case your ads are rejected/ partially rejected, you should check the reasons in detail in your TikTok Ads manager account:
- Log in TikTok Ads manager account
- Go to Campaign > Ad Group/Ad List
- Click on the ⚠️ icon

>>> Read more: TikTok Ads Review process and how to pass it?
Need any help?
If you need any help with setting up ad campaign, don’t hesitate to contact us via live chat in app or email at [email protected].
Our support team is happy to assist you!