 NestAffiliate
  NestDesk
  NestScale Product Variants
 NestAds tracking parameters support the pixel in accurately tracking and attributing Google Ads performance. This allows you to see which campaigns are driving good traffic and sales results.
However, in some cases, you won’t need to edit your active campaigns or ad groups to add the new tracking parameters, which helps to avoid resetting the Google Ads learning phase.
In this post, you will learn how to accurately add UTM tracking parameters in Google Ads. Let’s get started!
How to add NestAds tracking parameter in Google Ads
First, make sure you are logged into your NestAds account. If you do not have an account, please register here.
After integrating your Google Ads account, check if you already have URL parameters set up at your account level.
There are some scenarios of the UTM tracking setting
1. Already have the URL parameters
In this case, your URL parameters field should include one of the following lines of parameters:
- The following Recognized and approved
adidparameters and values:gadid={creative} - At least one of the following recognized and approved Source & Campaign parameters and values:
utm_source=google AND utm_campaign={campaignid}utm_source=google.com AND utm_campaign={campaignid}utm_ source=google_ads AND utm_campaign={campaignid}utm_source=Google AND utm_campaign={campaignid}utm_source=google-ads AND utm_campaign={campaignid}utm_source=adwords AND utm_campaign={campaignid}
> If your existing URL parameters field does include them, there is no need to update your tracking settings as long as the UTMs are present on all active campaigns and ad groups. We will still track your ads with these in place.
> If your existing URL parameters field does not include at least one of the following, please add this one below the existing one:
&nads_source=google&nads_adid={creative}&nads_campaign={campaignid}
2. Do not have the URL parameters
There are two methods to add NestAds UTM tracking parameters in Google Ads:
- Method 1: Add tracking parameter for active Google Ads directly inside NestAds app (for campaign level configuration)
- Method 2: Copy tracking parameter & manually add it to your Google Ads
(for both ad account, campaign & ad group level configurations)
Method 1: Add tracking parameter directly in NestAds
To use this method, make sure you’ve already connected your Google Ads account to NestAds. Learn more here.
- Navigate to Pixel section > click on Tracking setup > Google Ads
- You will see a list of your current Google Ads campaign. Click on Add tracking parameter in the Action column

That’s done! UTM tracking parameter has been added to the Google Ads campaign you choose.
Method 2: Manually add tracking parameter
- Account level configuration
In Google Ads, UTM can be applied on multiple levels. You can set a tracking parameter for your entire Google account by using Tracking template parameters on your Google ad account.
- Navigate to Pixel section > click on Tracking setup > Google Ads
- Please click on Copy button to copy tracking parameter

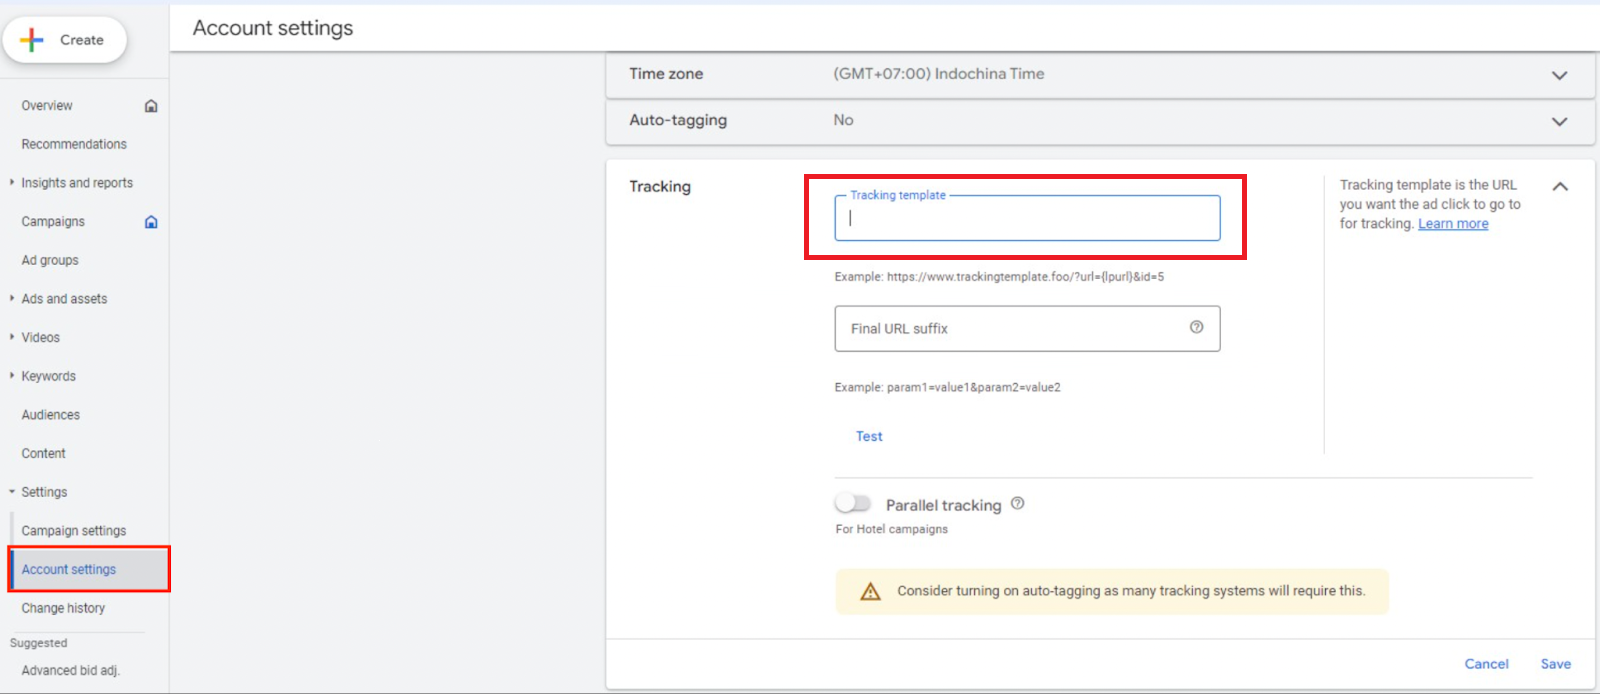
- In Google Ads account, click on Settings section > Account settings
- Click on Tracking > Paste NestAds tracking parameters into the Tracking template field
- Campaign level configuration
- Navigate to Pixel section > click on Tracking setup > Google Ads
- Please click on Copy button to copy tracking parameter
- In Google Ads account, click on Settings section > Campaign settings
- Check the boxes of any campaigns you want to edit. Or click the top checkbox to select all.
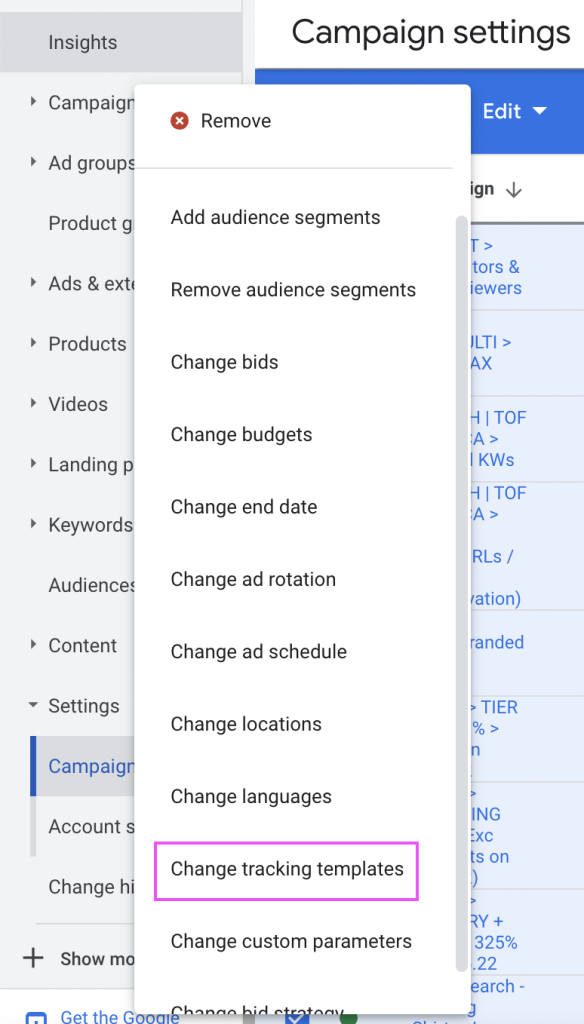
- Click on Edit > select Change Tracking Templates
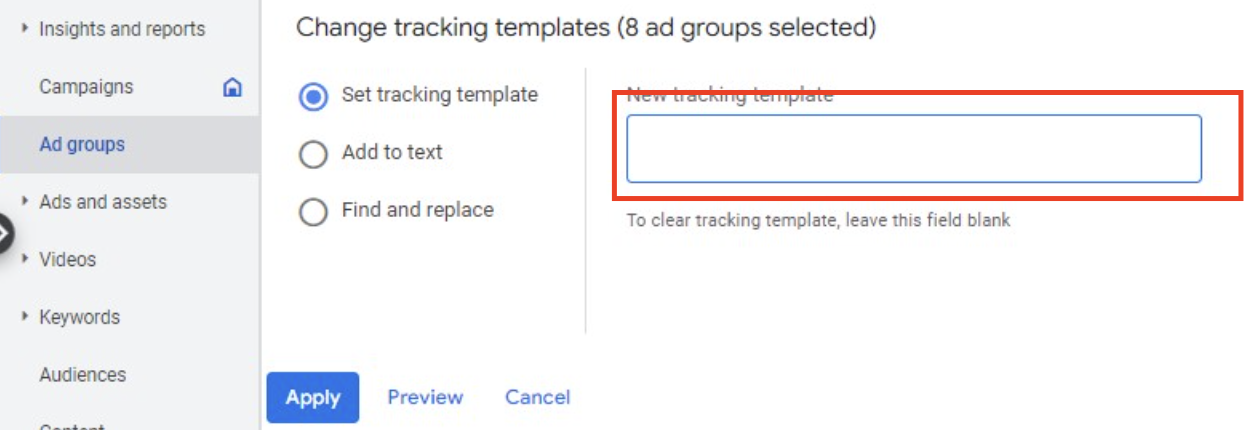
- Paste the tracking parameter into the Tracking Parameter field > click Apply
Note: If you want to update a single campaign, click on that campaign, click settings > additional settings > campaign URL options, then paste our UTMs into the Tracking Template Field.
3. Ad groups level configuration
- Navigate to Pixel section > click on Tracking setup > Google Ads
- Please click on Copy button to copy tracking parameter
- In Google Ads account, click on Ad Groups in the left-hand panel

- Check the boxes of any ad groups you want to edit. Or click the top checkbox to select all.
- Click on Edit > select Change Tracking Templates
- Paste the tracking parameter into the Tracking Parameter field > click Apply
Note: The changes to previously scheduled or running ads will trigger a new review process. Most ads are reviewed within 24 hours, although in some cases it may take longer.
Need any help?
Feel free to contact us via live chat or email at [email protected]. Our support team is happy to assist!