 NestAffiliate
  NestDesk
  NestScale Product Variants
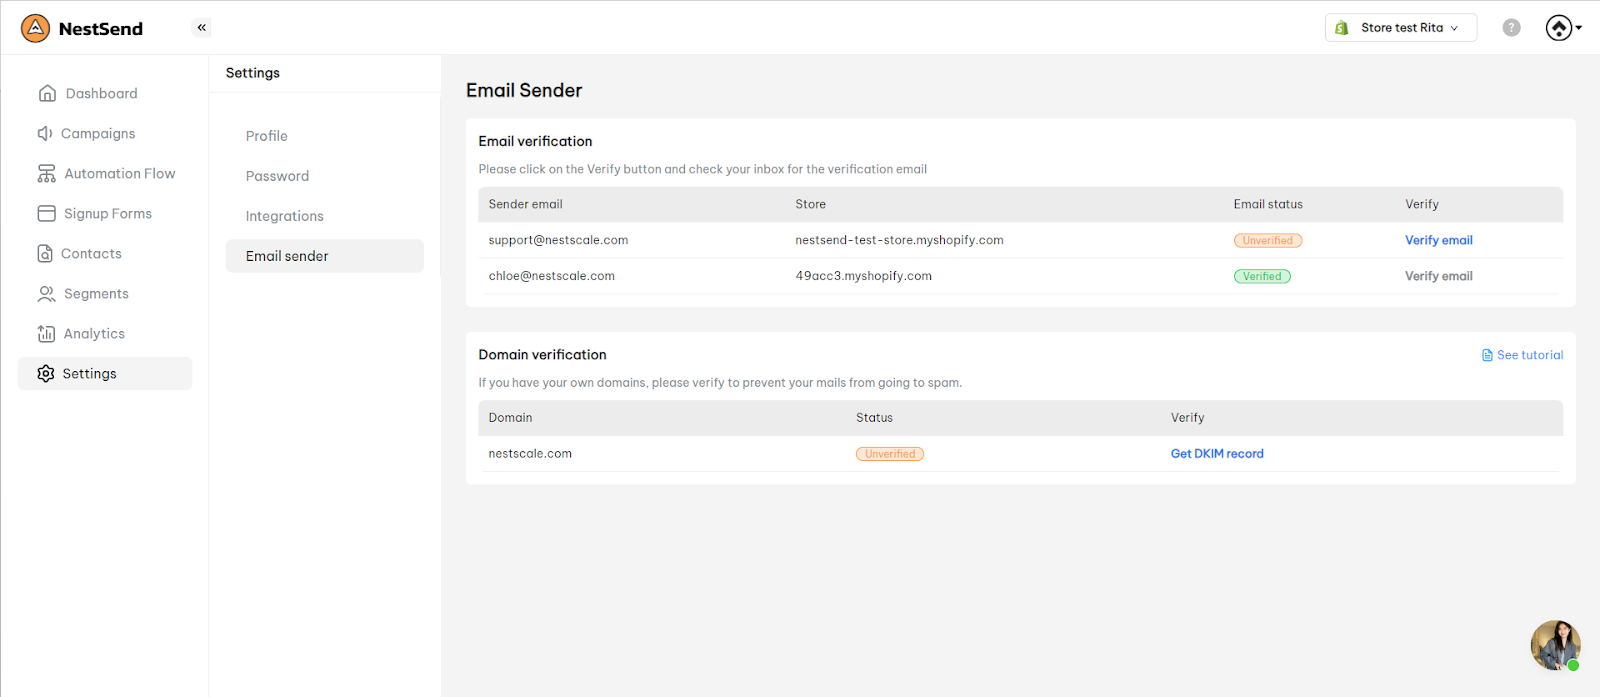
 Once you integrate a new Shopify store into NestSend, you need to verify your Shopify admin email address. This email will be the email sender in your NestSend account by default.
Email verification helps to prevent your emails from going to spam.
📌 Note: Before verifying the email sender, make sure you’ve integrated a Shopify store into NestSend. If you haven’t, please check out the guideline here.
How to verify email sender in NestSend
- Navigate to Settings > Click on Email Sender > click on Verify button
- Check the verification email sent to your mailbox
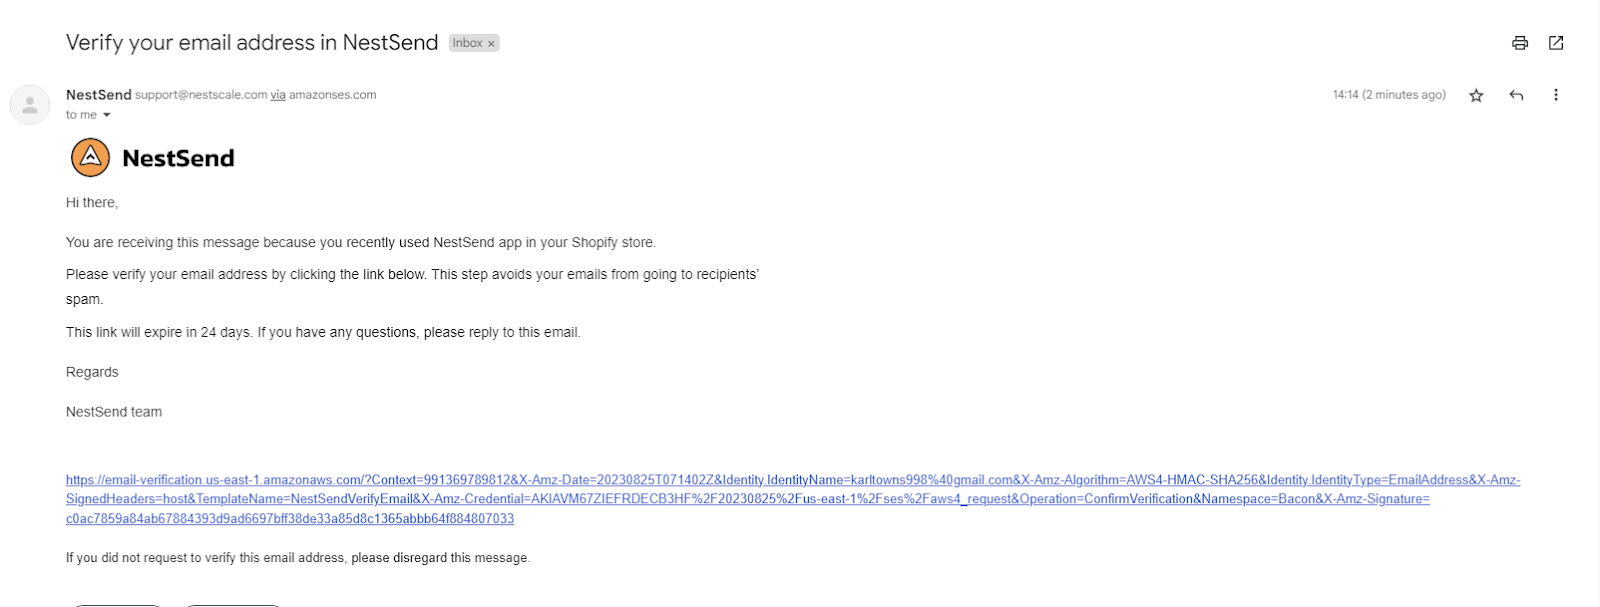
- Click on the link below. It will navigate you to the Confirmation page
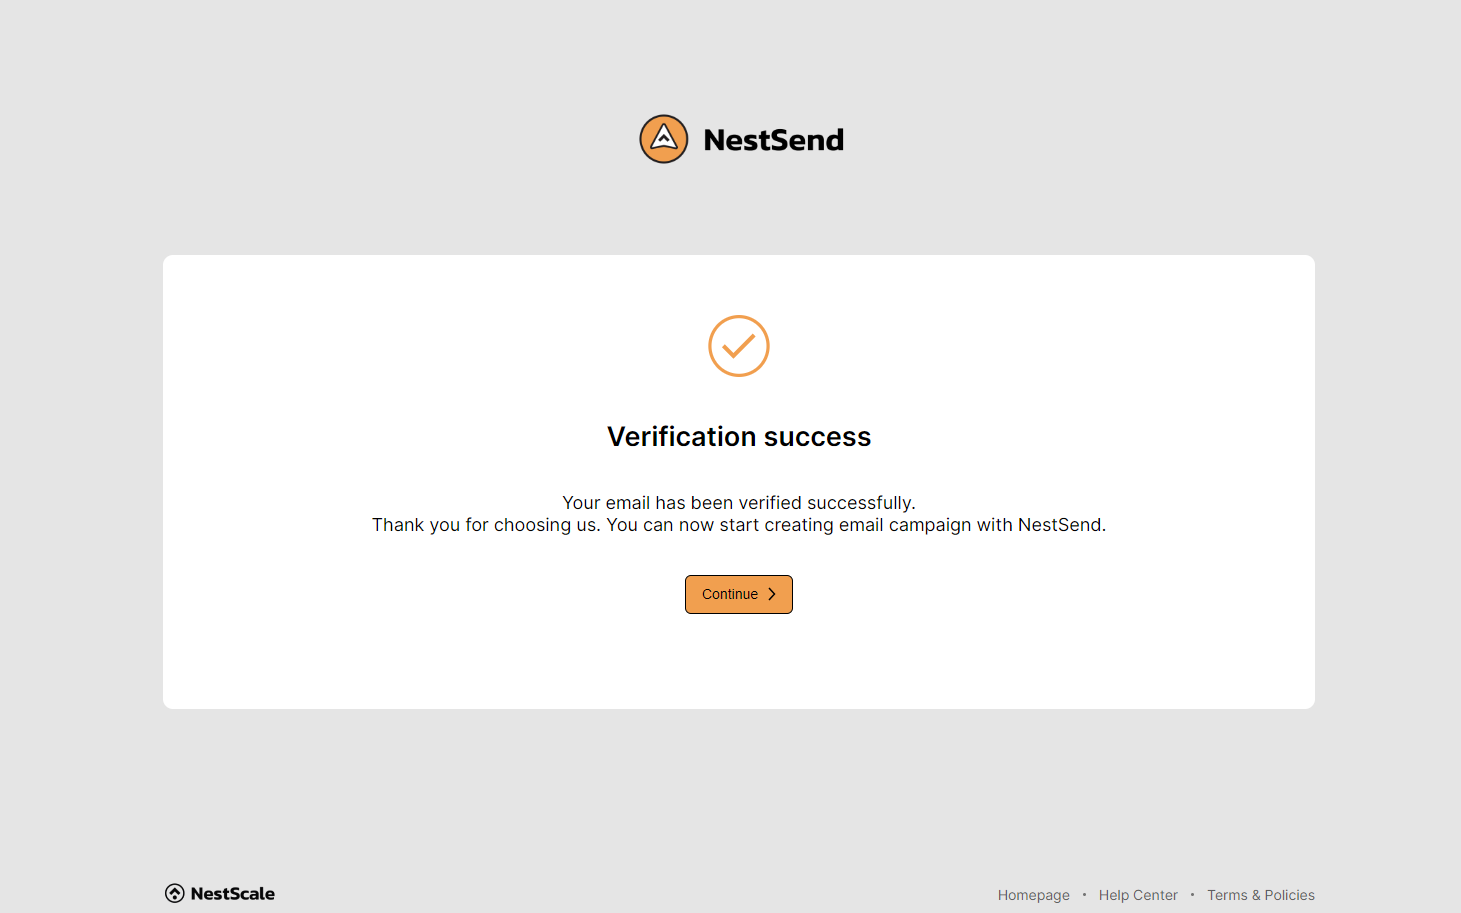
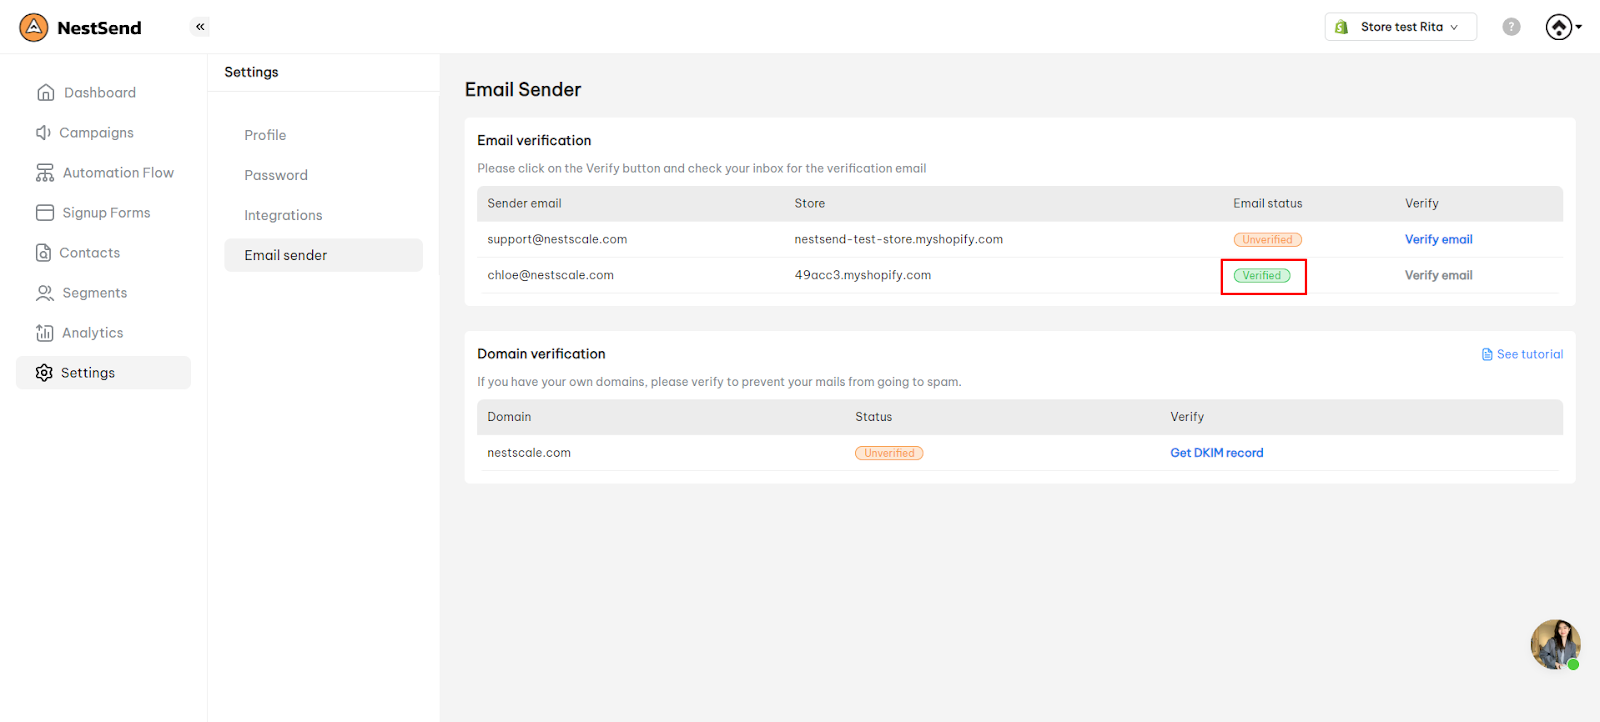
4. Come back to Email Sender page in your NestSend account
Please wait 15 minutes then the email sender status will be Verified
Need more help?
Feel free to contact us via live chat or email at [email protected]. Our support team is happy to assist you!