 NestAffiliate
  NestDesk
  NestScale Product Variants
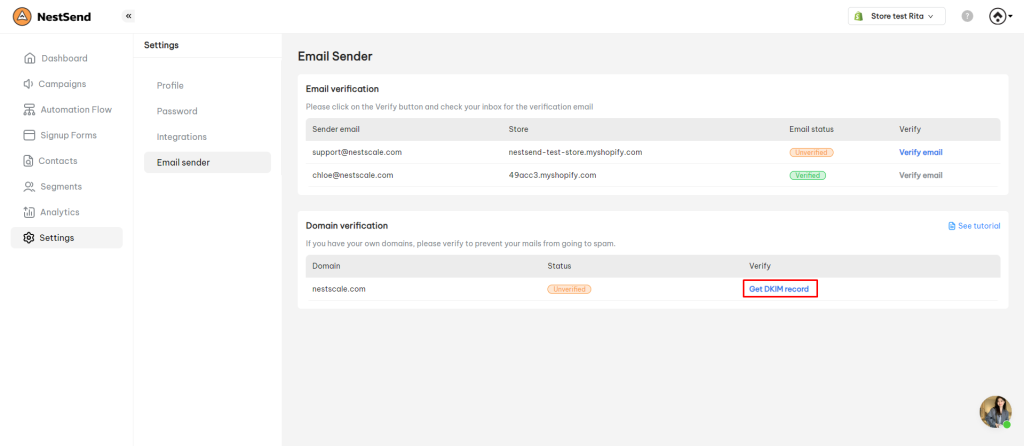
 Verifying your sending domain adds an authenticity mark to your emails. It’s a method for recipient mail filters to connect your company domain with your email server’s identity, strengthening the trust of your email marketing campaigns.
This article will demonstrate the process of verifying your email domain with several widely used email domain providers.
How to verify email domain in NestSend
Step 1: Under Domain verification, click on Get DKIM record
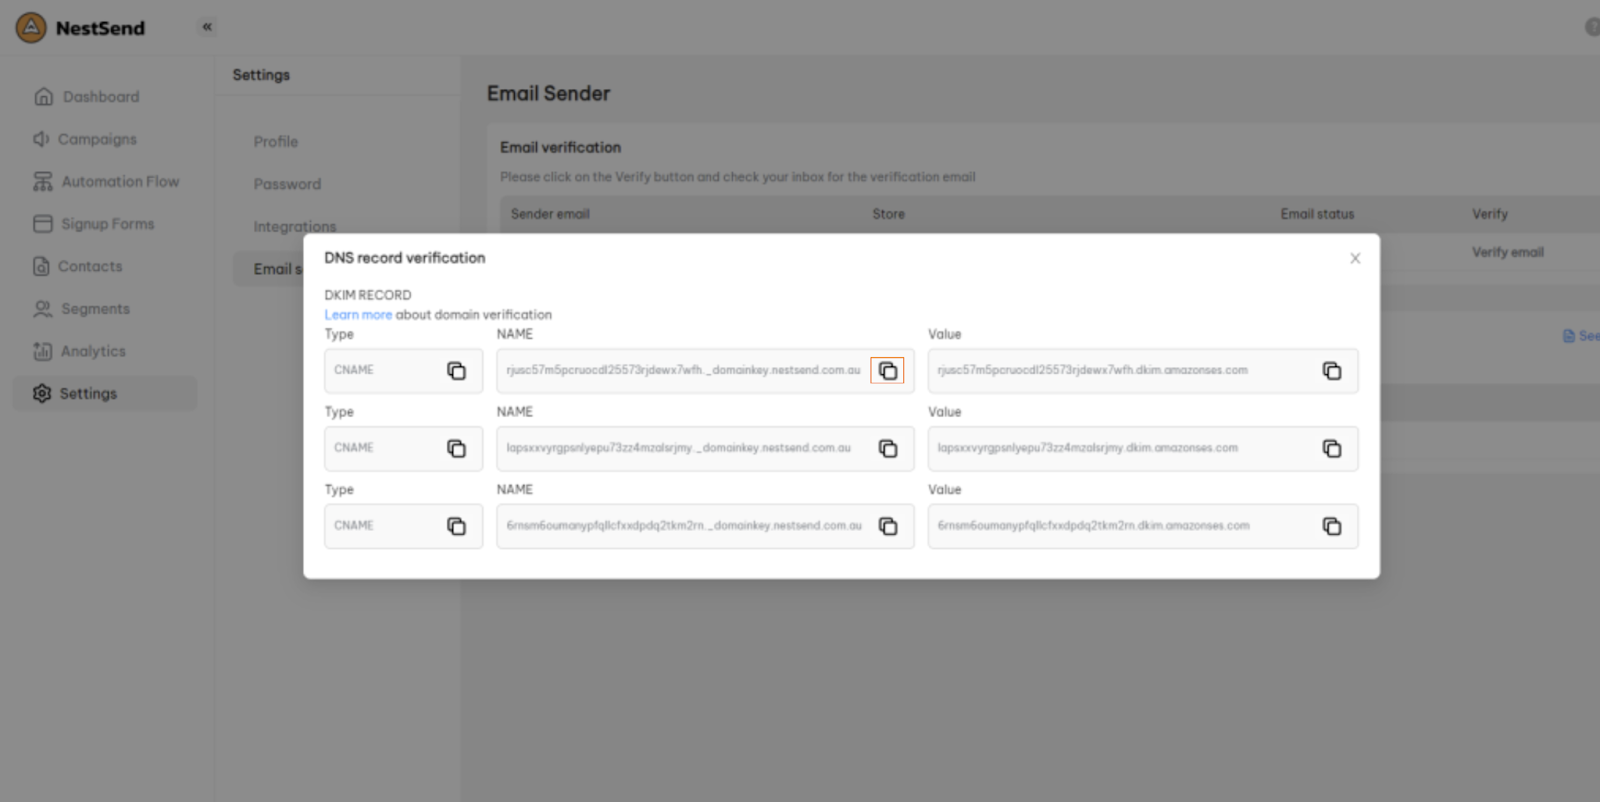
Step 2: Copy the DKIM records
Remember click on Copy icon to copy, do not select and copy it.
Step 3: Please follow the user guide of these widely used email domain providers below to paste the DKIM record into your domain host configuration
Several widely used email domain providers:
- Shopify
- Sign in to your Shopify store
- Navigate to the Store Settings > Domains
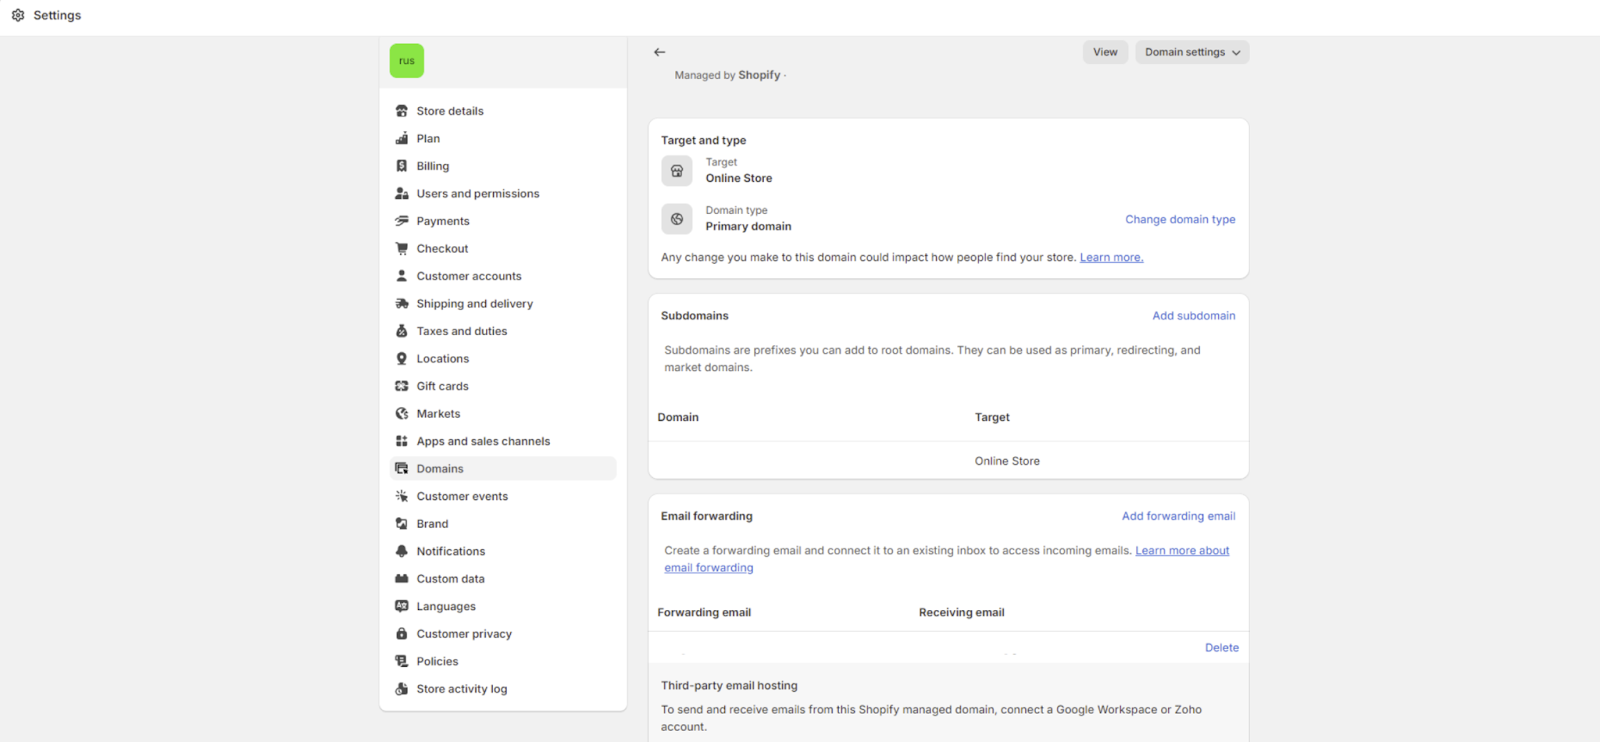
- Click on Domains Settings > Select Edit DNS settings
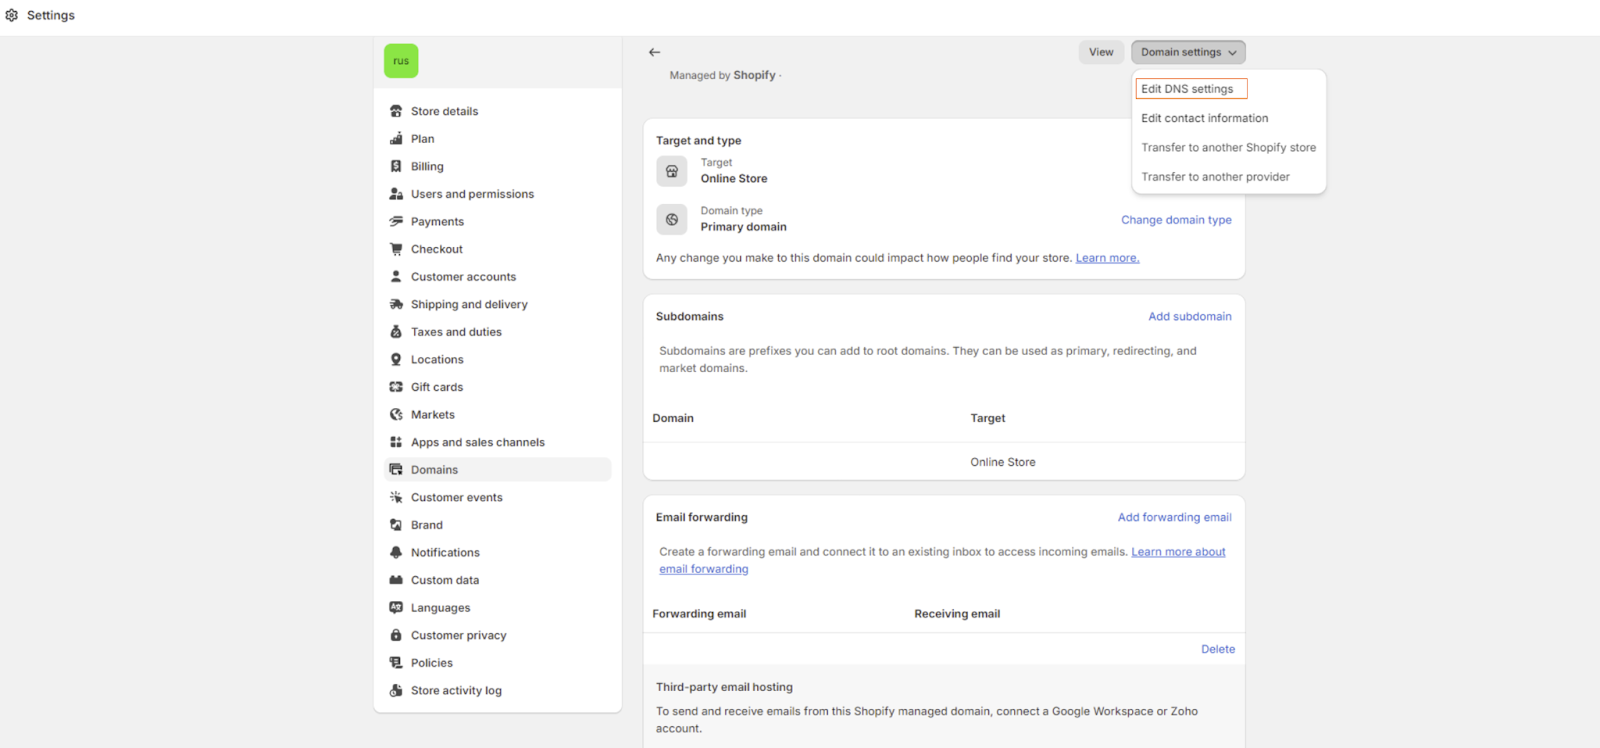
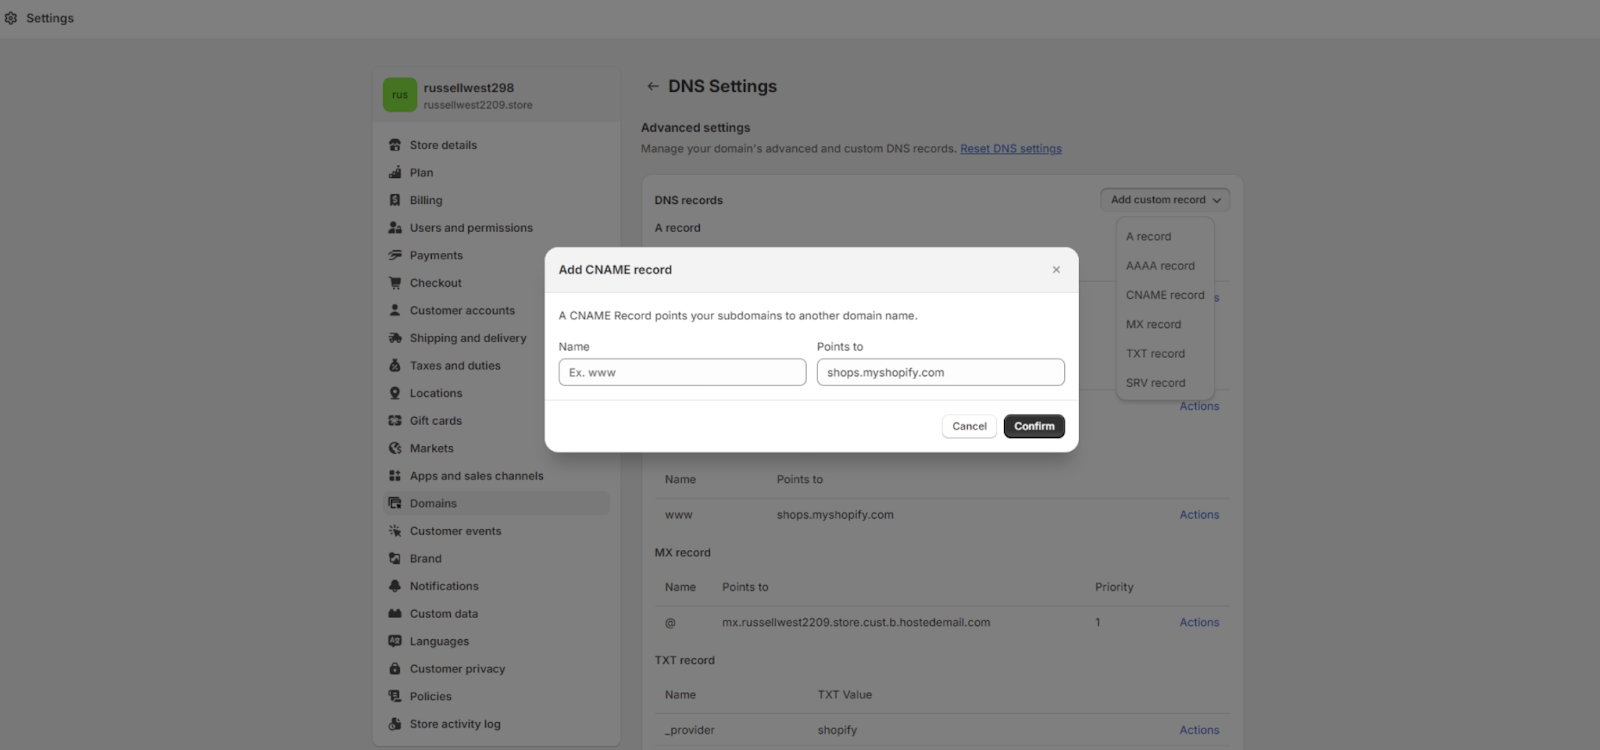
- Click on Add custom record > Select CNAME record
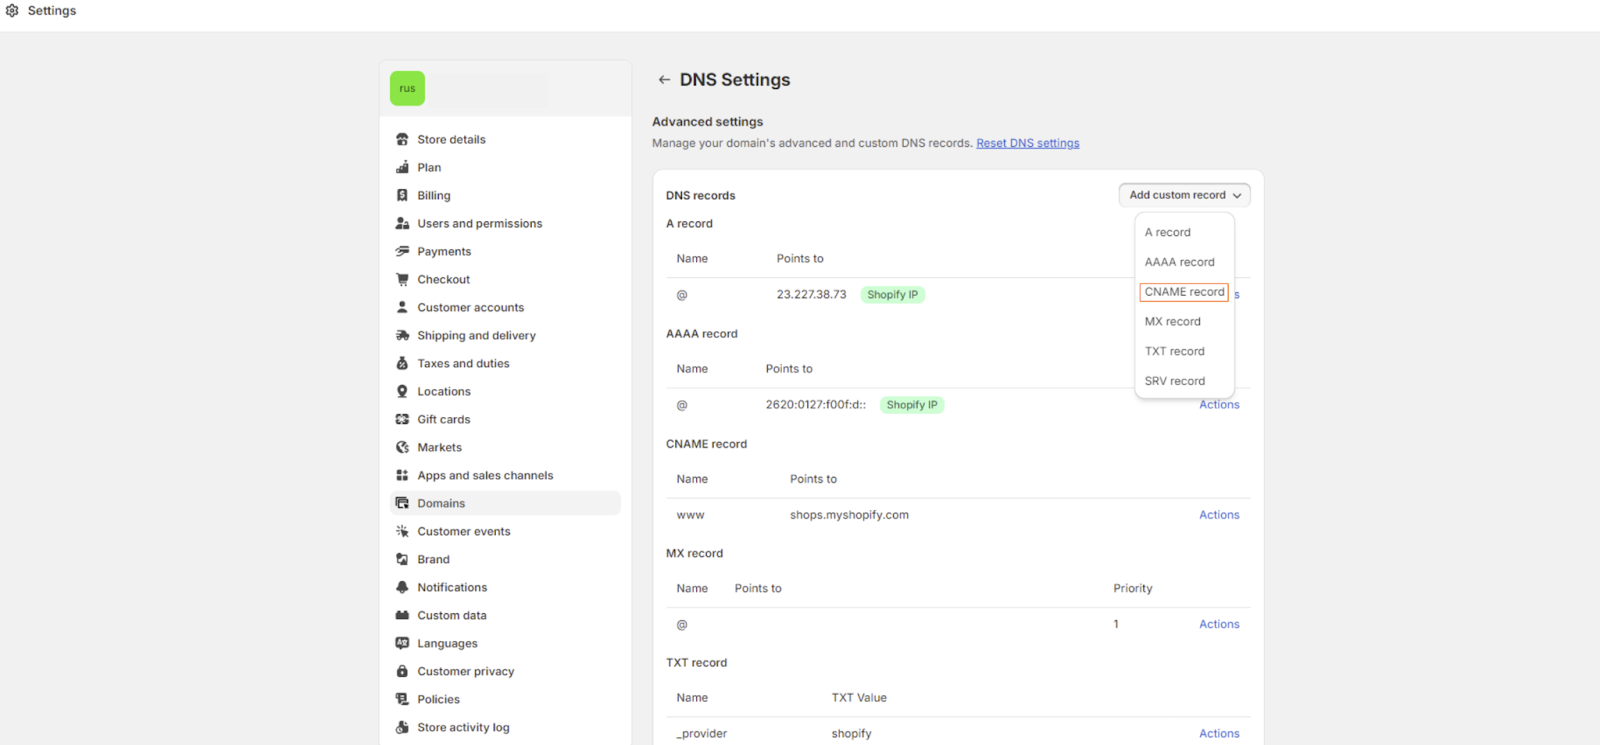
- Enter the details for your new CNAME record > Confirm
- Add more 2 CNAME records and do the same as the previous step
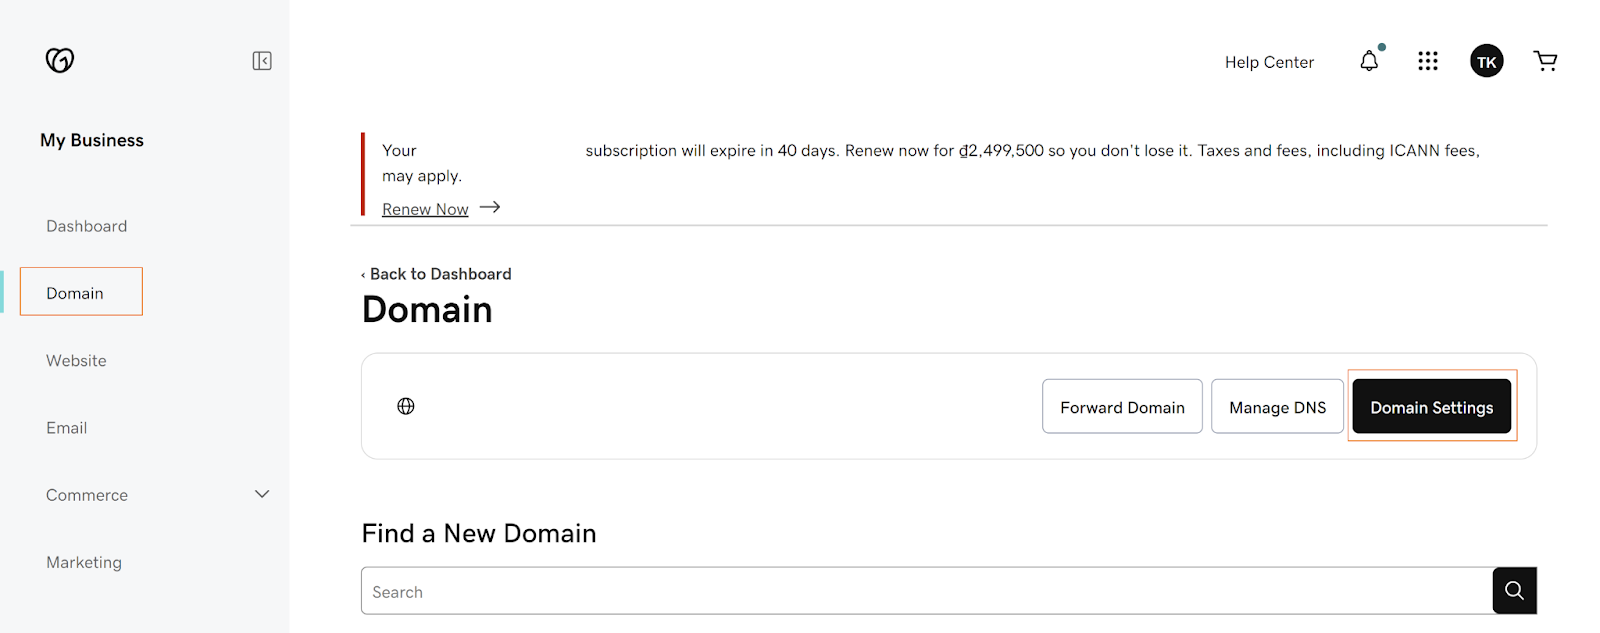
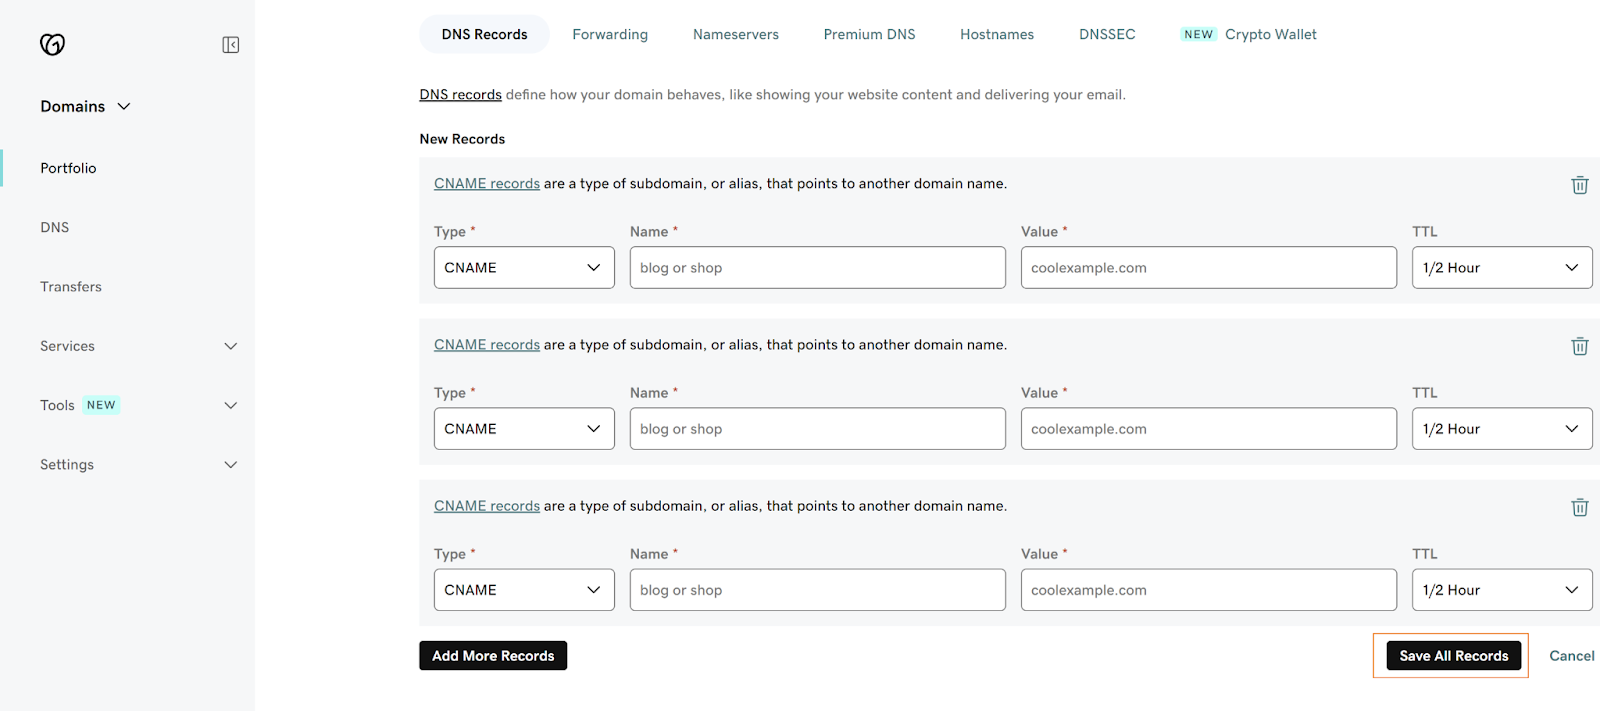
- Sign in to your GoDaddy
- From Dashboard, navigate to Domain > Select Domain Settings to access the Domain Settings page
- Select DNS to view your DNS records

- Select Add New Record and then select CNAME from the Type menu
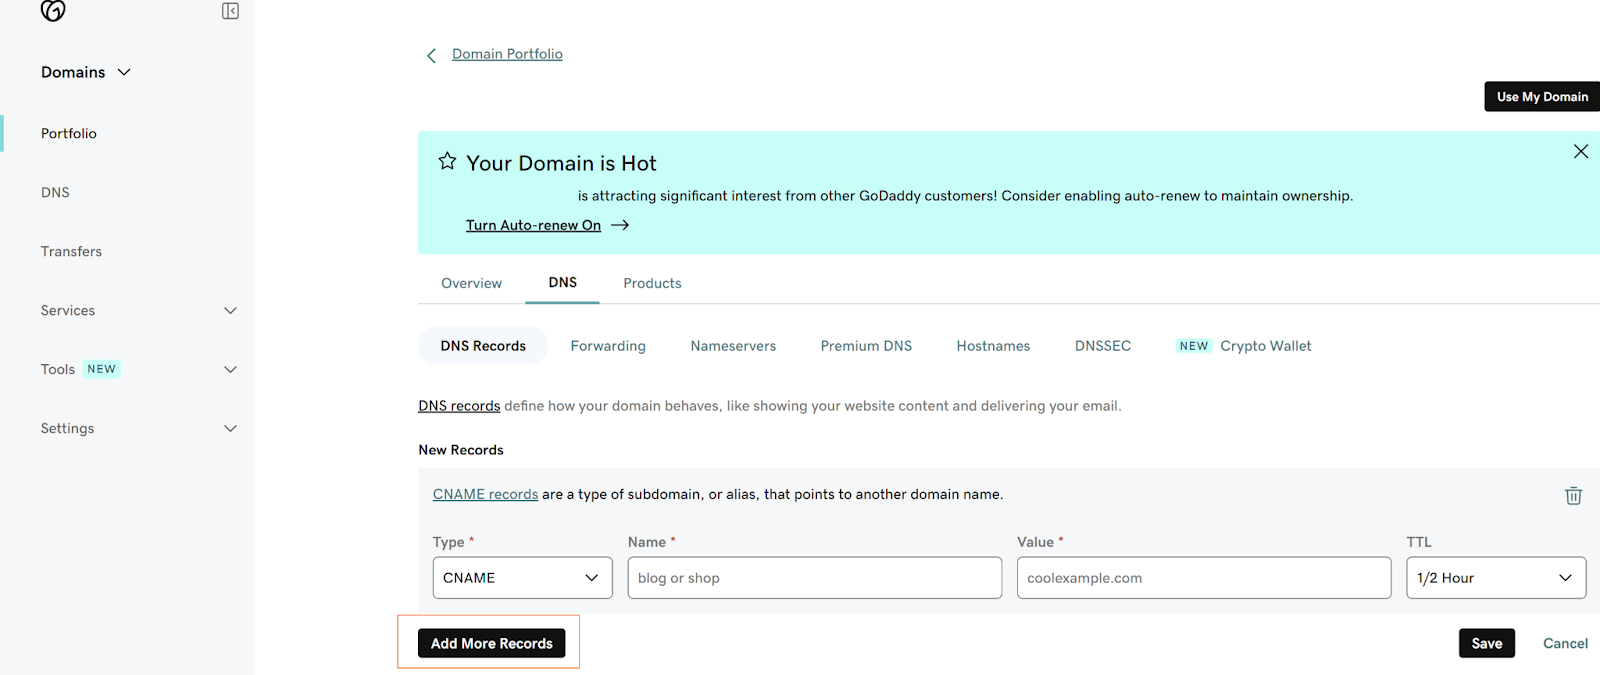
- Enter the details for your new CNAME record (paste all 3 records)
- Save to add your new record. If you added multiple records at the same time, select Save All Records
For these email domain providers below, they will have similar workflow like Godaddy
(to be updated – please contact us if your domain provider is not listed above)
Need more help?
Feel free to contact us via live chat or email at [email protected]