 NestAffiliate
  NestDesk
  NestScale Product Variants
 The dashboard is the first thing you’ll see when you log in to your NestSend account. It helps users stay updated with current email performance and get shortcuts to some key features.
In this post, you’ll discover all the basic things inside NestSend dashboard and how you utilize it effectively. Let’s get started now!
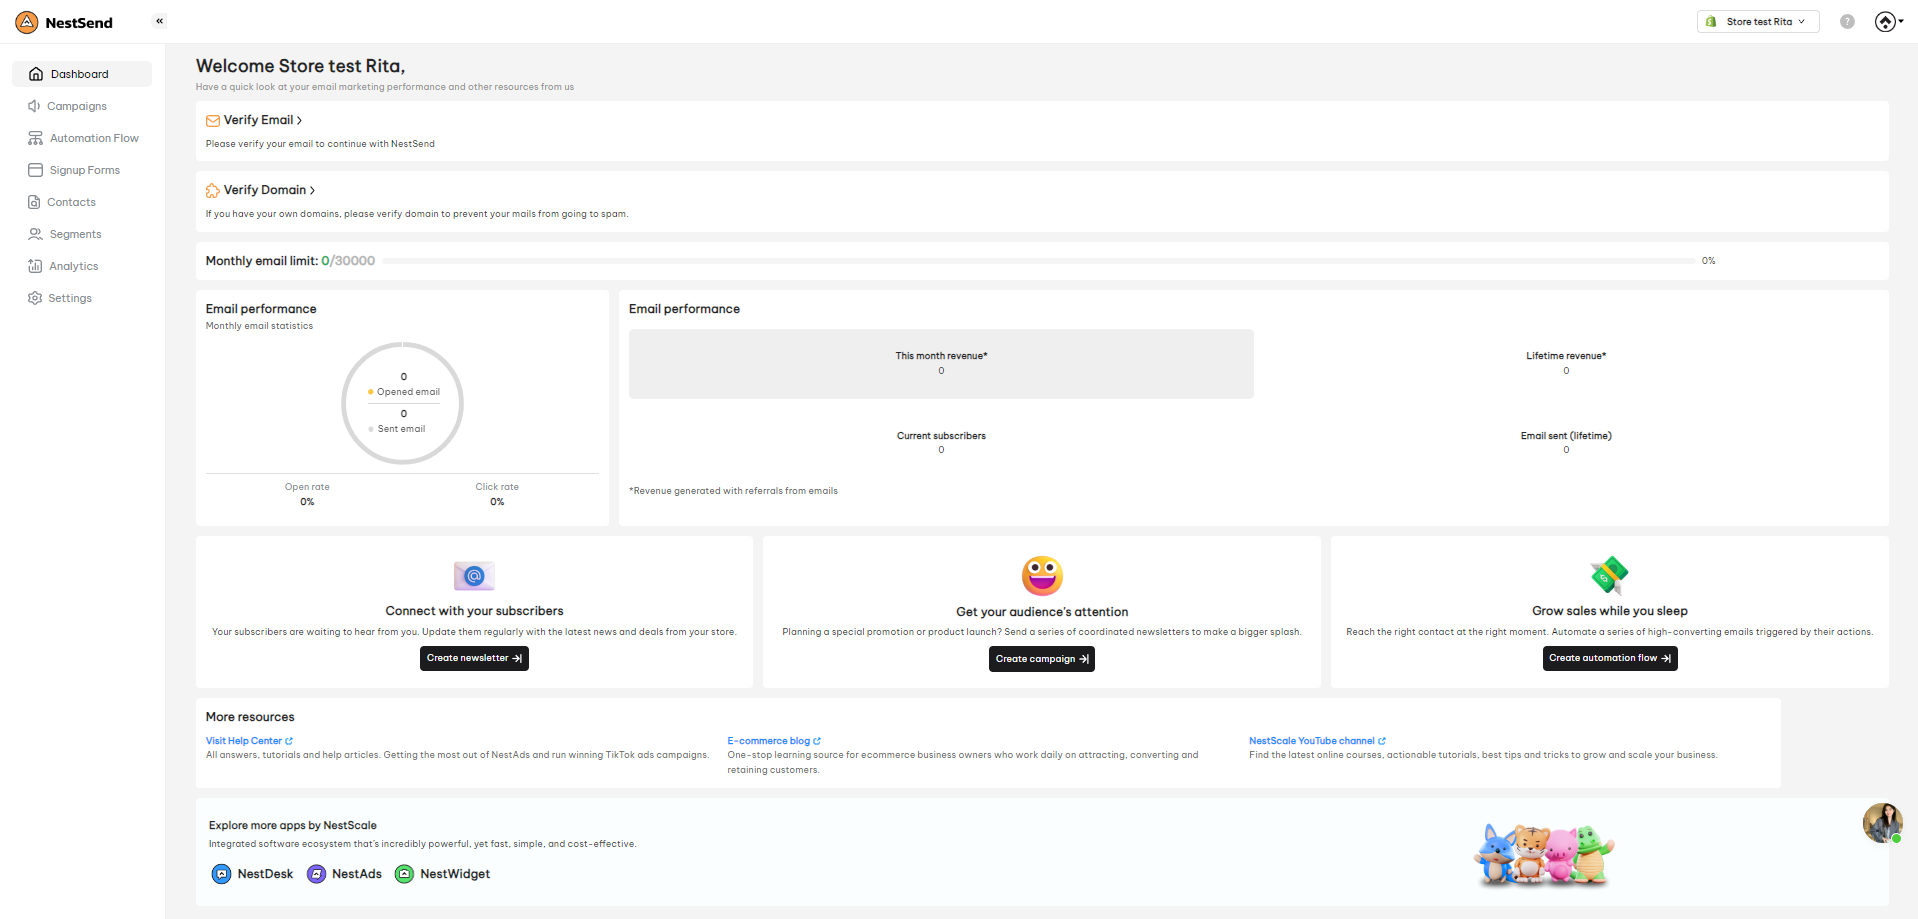
Verify Email/ Verify Domain
If you haven’t verified your sender email and domain, click on these shortcuts to go to the settings.
Monthly Email Limit
The progress bar shows you the number of emails you have sent so far and how many are left. Email limitation is 30,000 emails per month per NestSend account.
If you wish to extend the email limitation, please contact our support team.
Email performance
This section gives you a snapshot of your email performance in the current month. Some metrics are showcased, including:
- Opened email
- Sent email
- Open rate
- Click rate
- This month revenue
- Lifetime revenue
- Current subscribers
- Email sent (lifetime)
Connect with your subscribers
Click on this section to jump into Campaign where you can create & send various email campaigns.
Get your audience’s attention
Click on this section to jump into Sign-up form where you can create & show sign-up form on website to collect leads’ information.
Grow sales while you sleep
Click on this section to jump into Automation Flow where you can create & send automatic email flows for various purposes.
More resources
This section gives you a shortcut to NestSend help center, blog, and Youtube channel.
Need any help?
If you need any assistance, feel free to contact us via live chat in-app or email at [email protected] Our support team is glad to assist you!