Schedule email campaign

  • 01/03/2023
  • 102
  • 0

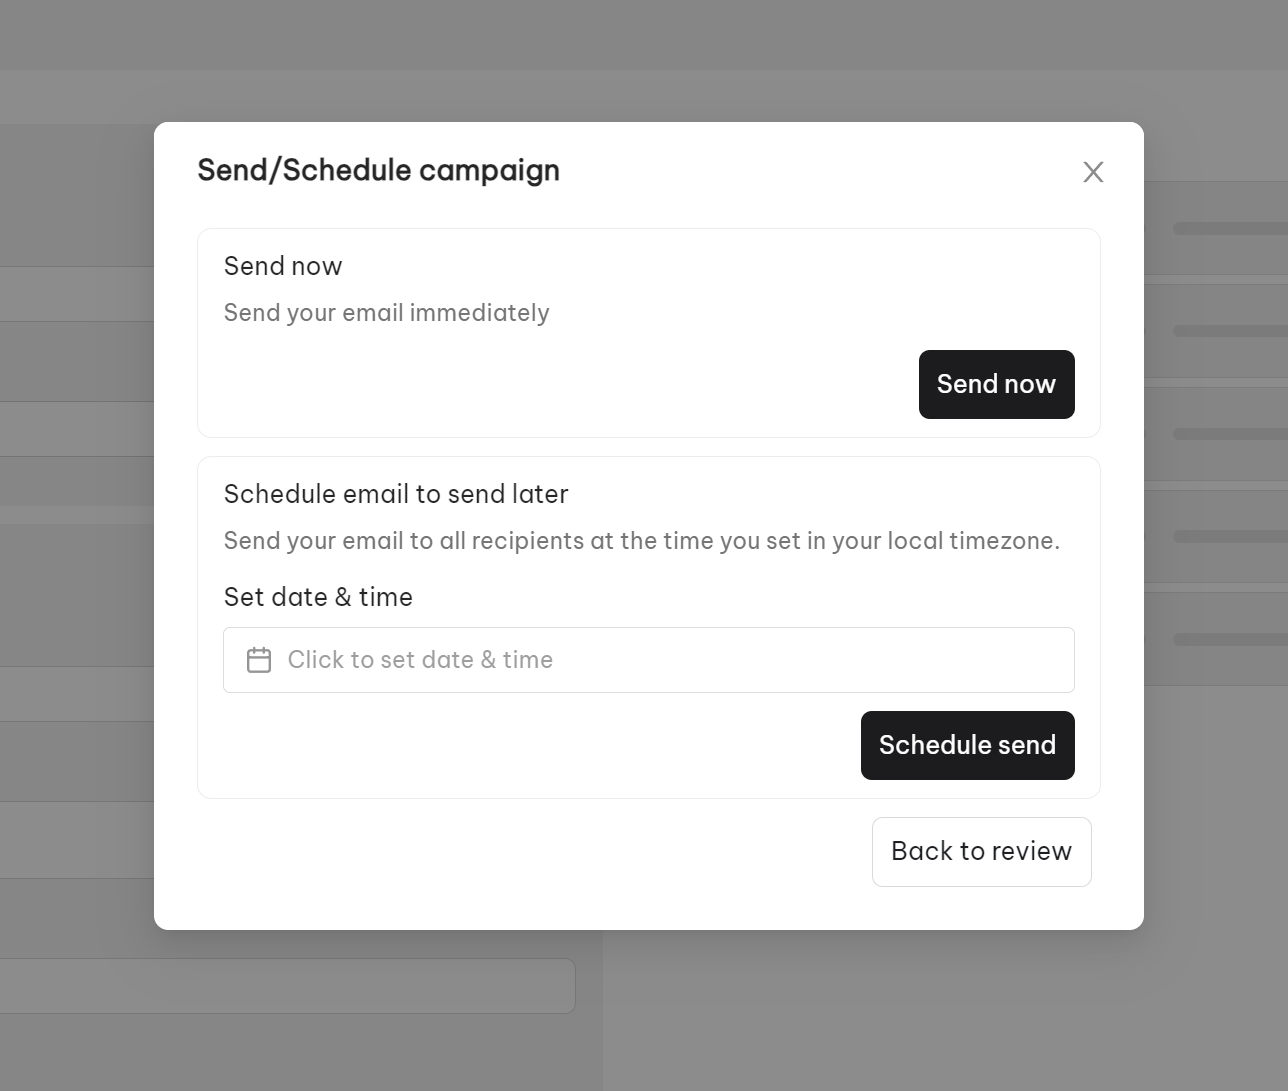
Choosing the best time to send your campaign is important. You don’t have to leave what you’re doing or set an alarm to send an email just to send a message. With NestSend, you can choose to Send now or Schedule to send at a specific time. 

In this post, you will learn how to schedule an email campaign in NestSend. Let’s dive into it now!

Schedule to send a campaign

  1. On the left sidebar, click on Campaigns > Create a campaign 
  1. Insert Internal information
  • Campaign name
  • Tag(s)
  • and Recipients: In email marketing, a recipient is a person who gives his or her permission to send them emails. In the app, recipients are known as customer segments. 
Create new campaign

>>> Learn more about How to create Segment in NestSend

  1. Finish Campaign content
  • Sender name: Sender name (also known as from name) is the name displayed in your recipients’ inboxes.
  • Subject: An email subject line is the first text recipients see after your sender name when an email reaches their inbox. 
  • Preview text: Email preview text is the one line of text recipients can see before opening an email
  • Reply-to Email Address: Select the email address to receive the customer’s reply.
Create new campaign
Create new campaign
  1. Next, we will edit the email content by choosing the design type. There are 4 types like below: 
Choose campaign template
  • Drag and drop: Create your email using our drag and drop editor
Choose campaign template
  • Template Library: Pick one from our library and customize it into your own design
Choose campaign template
  • Text only: Compose a plain text email
Email Builder NestSend
  • HTML: Build a custom-coded email template with HTML
HTML editor NestSend
  • After completing your email content, click the Review to send button to double-check the email again. You can change other design types, customize it, or edit the email content. 
  • When you completed all the check points, and are ready to send out your email, click Send/ Schedule 
  • Send Now: Send right after going live.
  • Schedule: You can set the time for the email to be sent out. Scheduled time will be based on recipients’ local time zones.

E.g: If you set the time as 10 AM, the email will be sent to the recipients in Australia at 10 AM. 9 hours later, the email will land in the inbox of UK recipients at 10 AM in their time. The same applies to recipients in other time zones.

Need any help? 

If you need any assistance, feel free to contact us via live chat or send an email to [email protected]. Our support team is happy to help you! 

Help us improve our Support Center. Was this article helpful?

Featured articles