 NestAffiliate
  NestDesk
  NestScale Product Variants
 Welcome to NestSend! It’s so glad to have you onboard.
This post includes all the basic steps to help you get up and running fast with NestSend.
Let’s get started now!
Watch the demo video
NestSend onboarding checklist
Follow some simple steps below to get started with NestSend.
- Create a NestSend account
Register NestSend account here
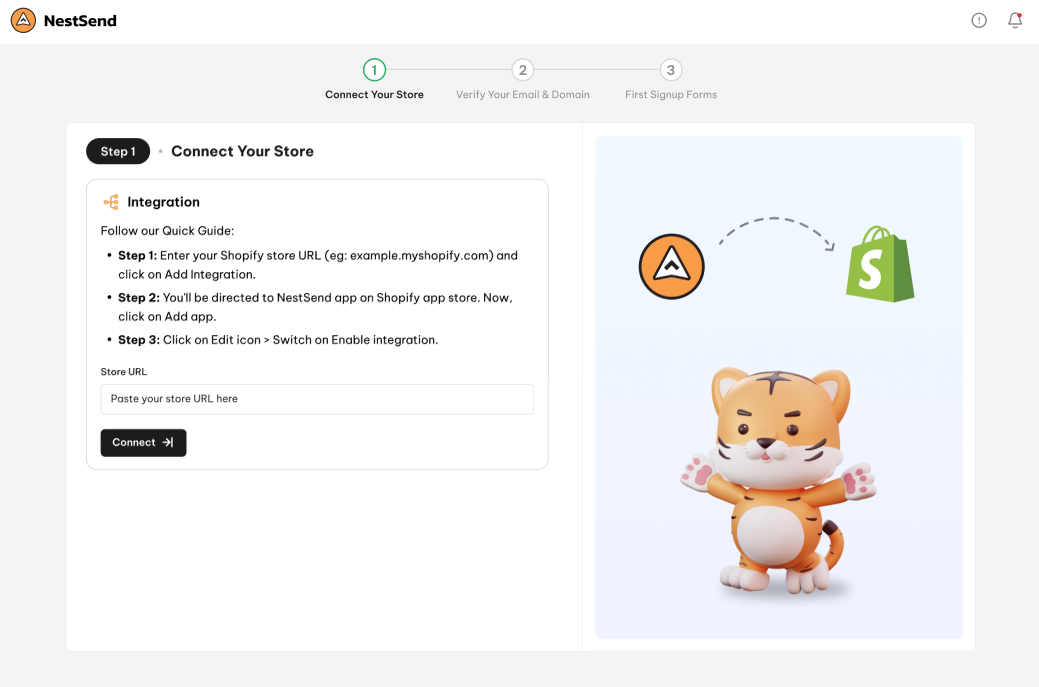
- Connect Shopify store with NestSend
Enter your original store link that ends with .myshopify.com to connect with NestSend
For instance: example.myshopify.com
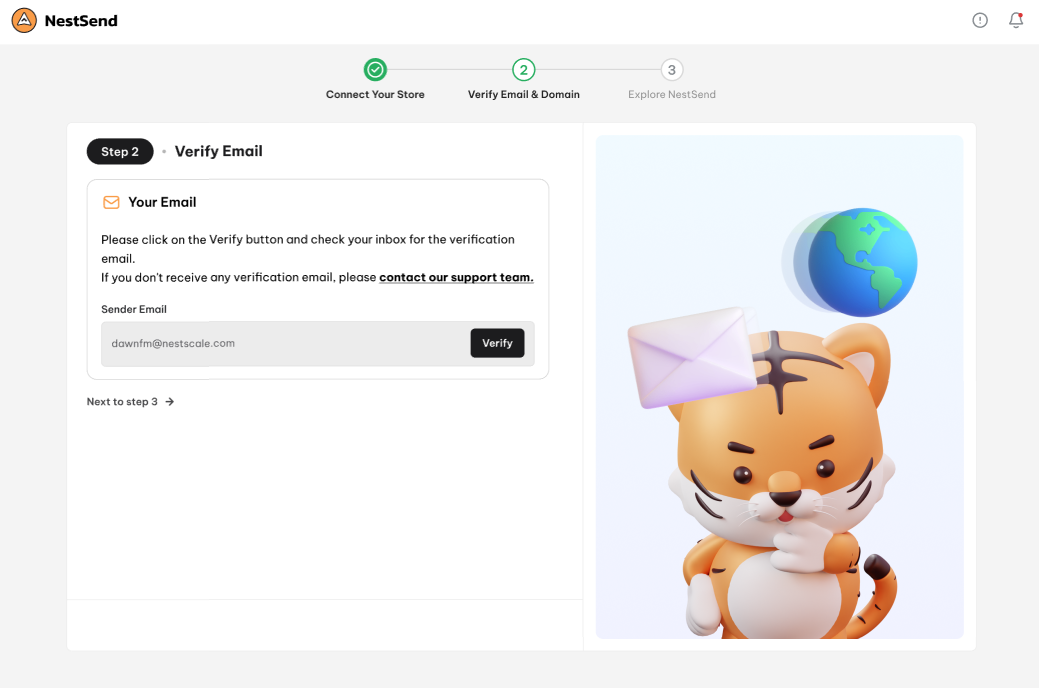
- Verify sender email & domain
Please provide the official email address you use to send emails to customers.
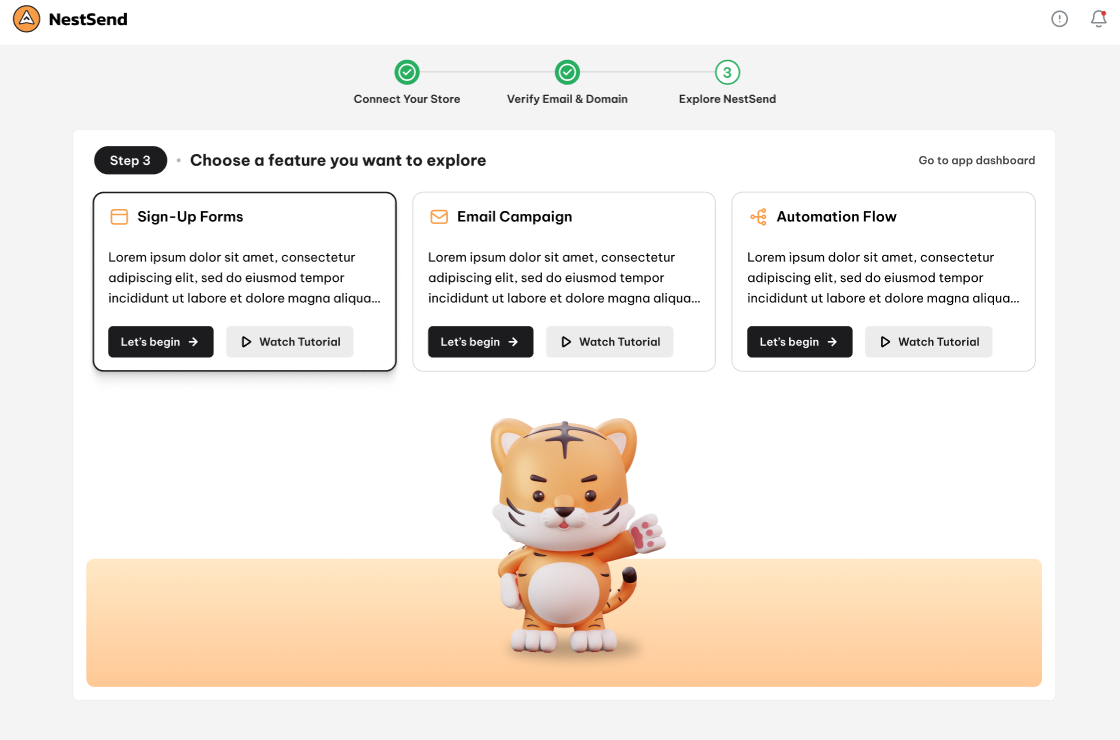
- Create & launch first sign-up form
Sign-up form is shown as an embedded form or pop-up form on the website to collect leads’ information.
>>> Learn more: How to create sign-up form
- Create & launch first email campaign
Email campaign is a single email that is sent for a specific marketing purpose.
>>> Learn more: How to create email campaign
- Create & launch first automation flow
Automation flow is a set of emails that are automatically sent based on specific conditions.
>>> Learn more: How to create automation flow
Want to explore the full features of NestSend? Please check out our Help Center here.
Need any help?
If you need any assistance to get started with NestSend, feel free to contact us via live chat or send an email to [email protected]. Our support team is happy to help you!