 NestAffiliate
  NestDesk
  NestScale Product Variants
 In this post, you will learn on what automation flow, how to create & send it. Let’s get started now!
Overview
An automation flow is a set of emails that are automatically sent based on specific conditions. An automated flow would typically target a specific segment of visitors, such as those who abandoned their carts or those who have visited your store.
A flow is an automated sequence that is set in motion by a specific trigger and then includes one or more steps. Flows can help you easily grow your business and build strong customer loyalty.
All flows have a trigger that sets the flow in motion. The trigger can be when someone:
- qualifies for a segment/list of contacts (segment-triggered)
- performs an action (action-triggered)
>>> Read more: What’s the differences between email campaign and automation flow
How to create & send automation flow
- Navigate to Automation Flow section
- Click on New automation flow button

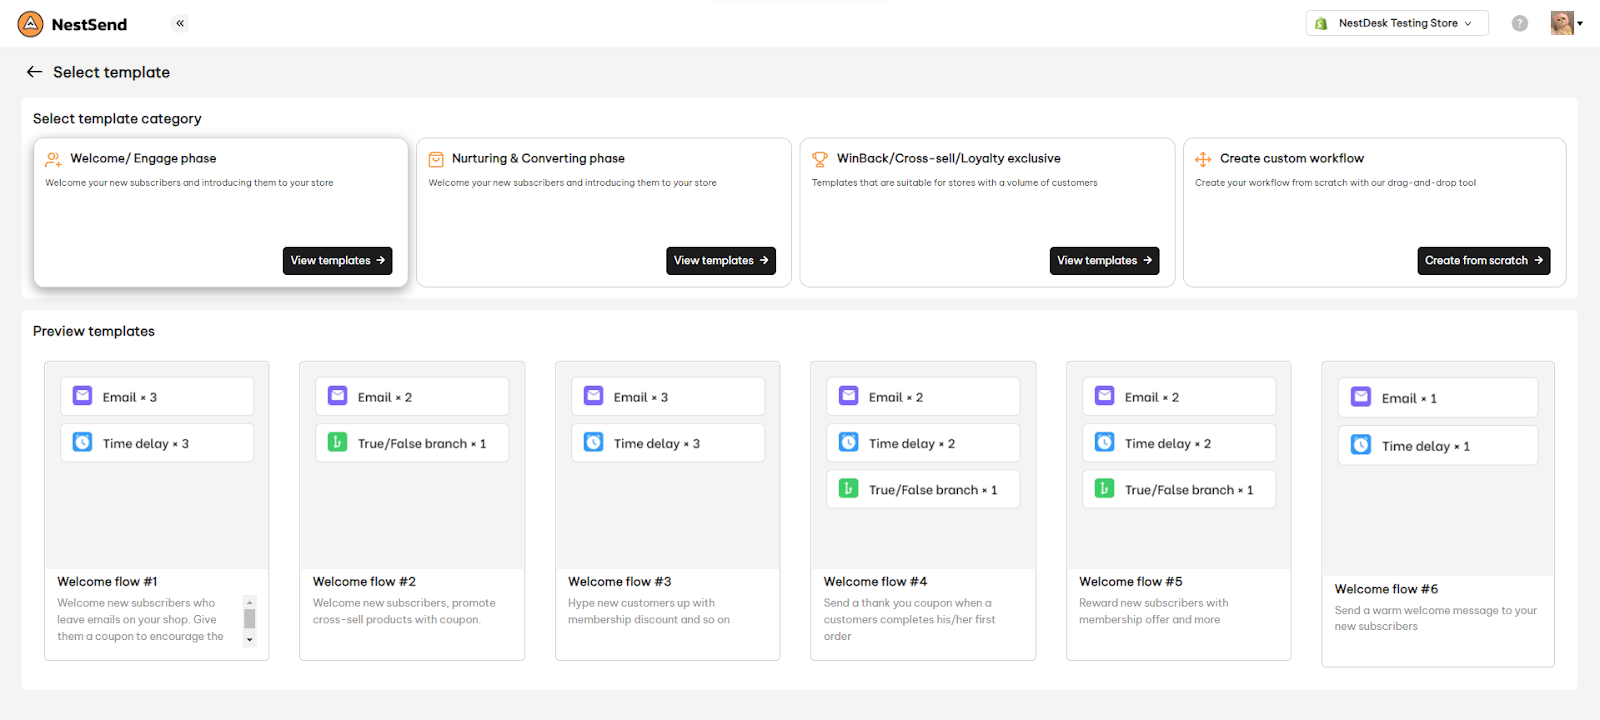
Select Flow Type
Now you will see a library of various flow templates.
You can choose Create custom workflow or choose automation flow template.
Set up workflow & Edit email content
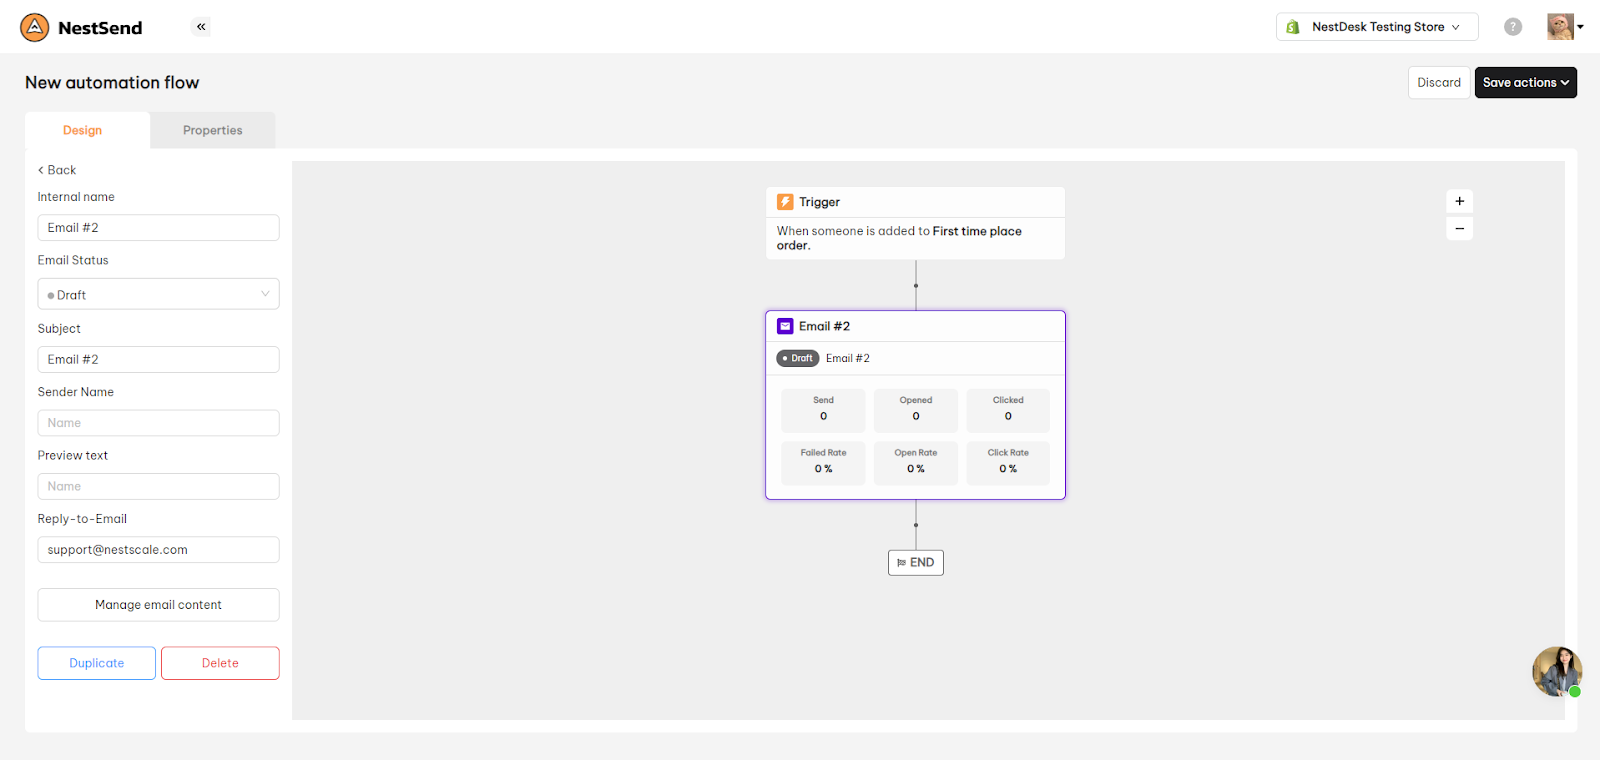
Now you will enter the editor screen with 2 tabs: Design and Properties.
In Design tab, you need to decide Flow trigger & Flow elements in the workflow.
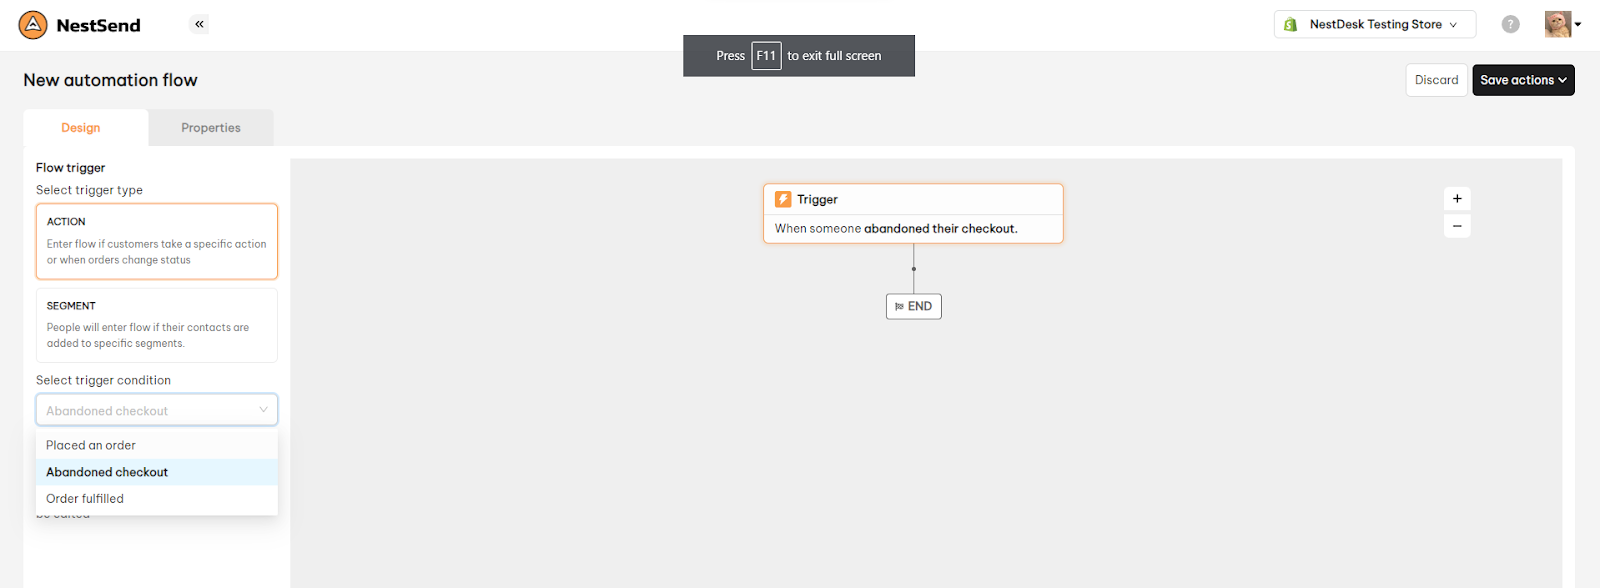
Flow Trigger
Flow trigger is the condition to activate an automation flow. You will be able to choose one of 2 options outlined below: Action or Segment
- Action-triggered: People will enter a action-triggered flow when they take a specific action(s). For example: abandon checkout, place order, order fulfilled
- Segment-triggered: People will enter a segment-triggered flow when they meet conditions to join a segment/group of contacts.
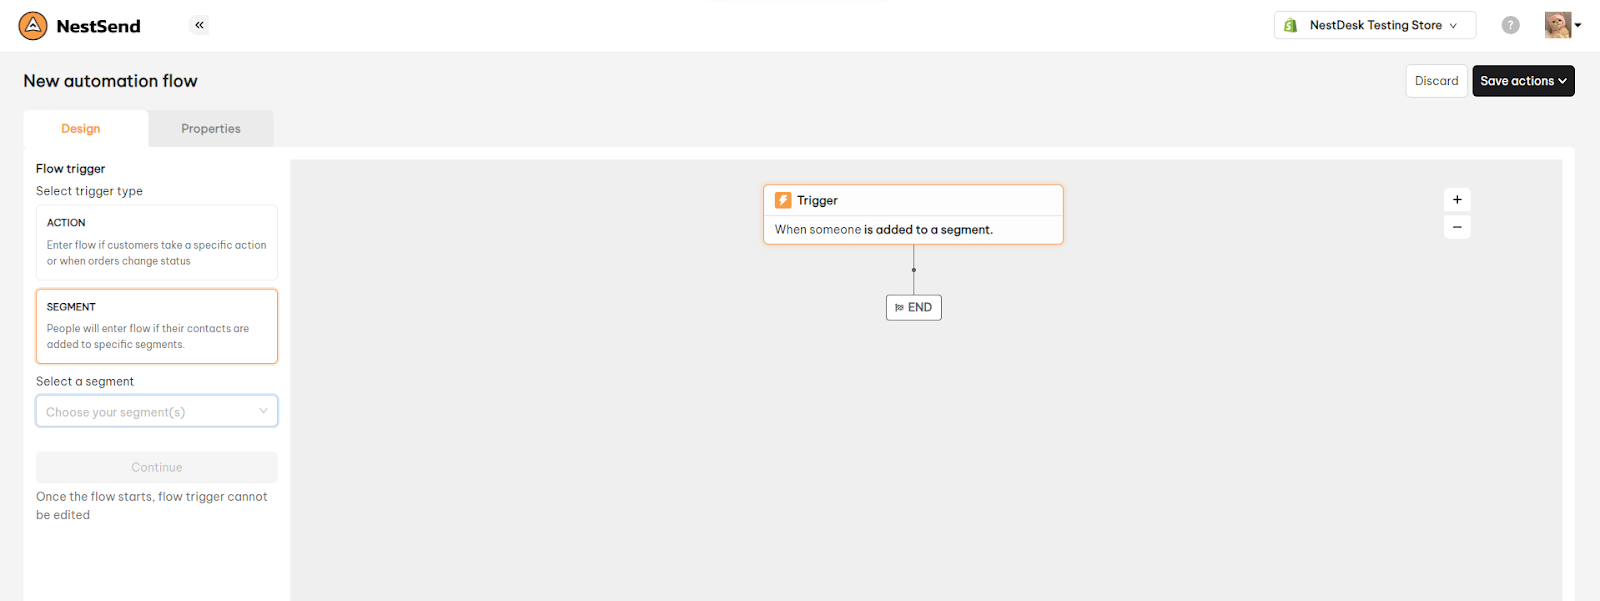
>>> Learn more: How to create a segment
Flow Elements
After you select a trigger, you’re ready to add additional elements into your flow. A workflow can include multiple flow elements.
Flow elements come in 4 types:
- A/B testing: An experiment where two or more versions of the same email are shown to subscribers at random, such as versions A and B (or variations 1 and 2).
- Time delay: A time delay can be added before an action in order to schedule the action relative to the trigger or another action. A time delay must have a live or manual status action immediately after it in order to function.
- True/ False branch: This is used to branch your flow into multiple paths based on specific criteria. A conditional split can branch based on information related to the person currently in the flow whereas a trigger split can branch based on information related to the event that triggered the flow.
- Email: You can select plain text email, pre-made template or blank template to start with.
To add a step into your flow, such as a email, click on the element in the sidebar and drag it onto the visual canvas. Every “droppable” location will appear a “Drag a flow element here” message as you get close to a drop point.
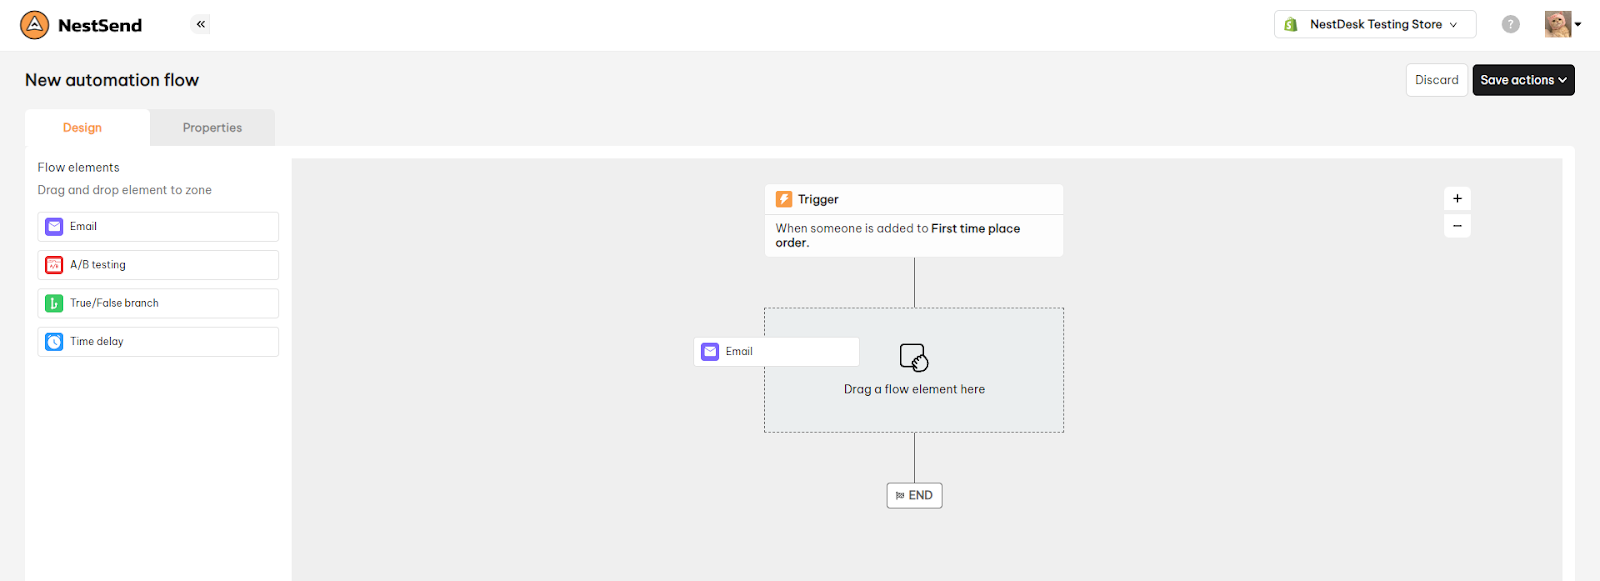
Once a message is dropped onto the canvas, you can configure it in the left-hand sidebar.
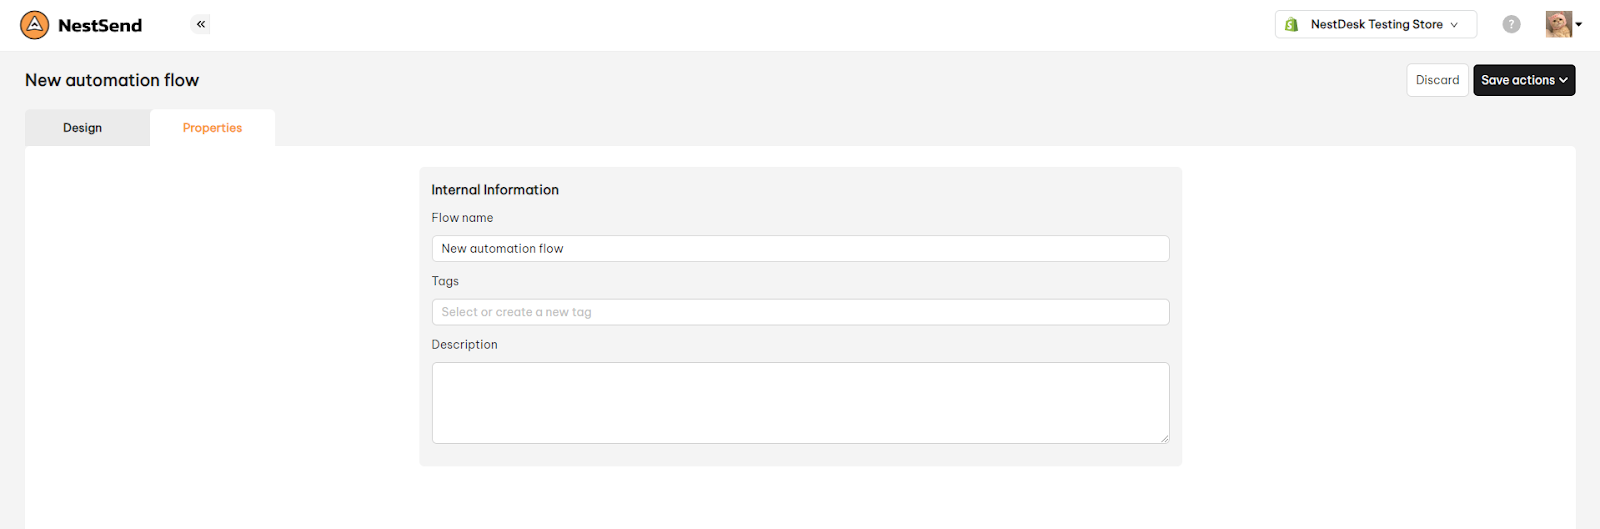
In Properties tab, you fill in following information.
- Flow name: This name is internal so only you can view it
- Tags: Add one or multiple tags to categorize your automation flow easily
- Description: Write short description or note about the automation flow
Send automation flow
After you have all above settings done, you can now go live the automation flow.
- Hit on Save options button in the bottom right corner.
- Then select Save as draft or Go live
That’s done! Your automation flow has been well set and ready to go!
>>> Read more: How to edit Active Automation Flow?
Need any help?
Feel free to contact us via live chat or email at [email protected]. Our support is happy to assist you!