Klaviyo is an email marketing platform tailored for e-commerce businesses, it provides advanced segmentation, automation, and in-depth analytics to help businesses understand their customer and enhance their marketing strategies.
NestAds – Klaviyo tracking parameters provide a comprehensive view of the Klaviyo email campaigns and flows’ performance which drive sales other than the advertising efforts. This allows you to track customer journeys, measure the impact of email campaigns on sales, and analyze the performance of your marketing efforts.
With NestAds UTM Tracking for Klaviyo, you can gain insights into which emails drive the most engagement, leverage detailed insights into revenue flows and campaign effectiveness, and achieve the best results.
In this post, we will show you how to add UTM tracking parameters in Klaviyo for smooth data tracking. Let’s get started!
How to add NestAds tracking parameter in Klaviyo
First off, make sure you have integrated the Klaviyo account into your NestAds account. Don’t know how to add a Klaviyo account to NestAds?
>> Read more: Klaviyo Integration
UTM Setup
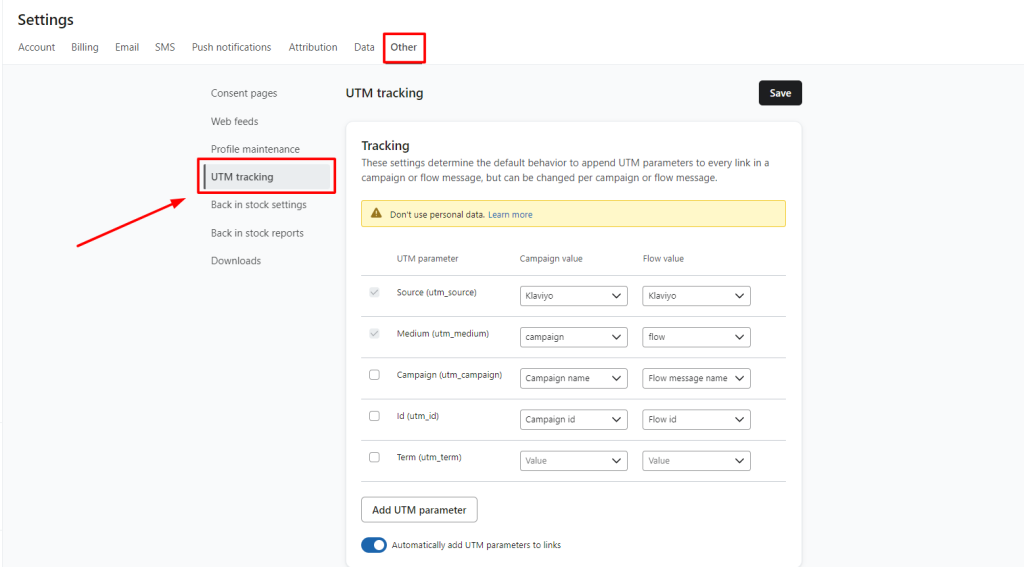
- Navigate to Settings > Other > select UTM tracking section.
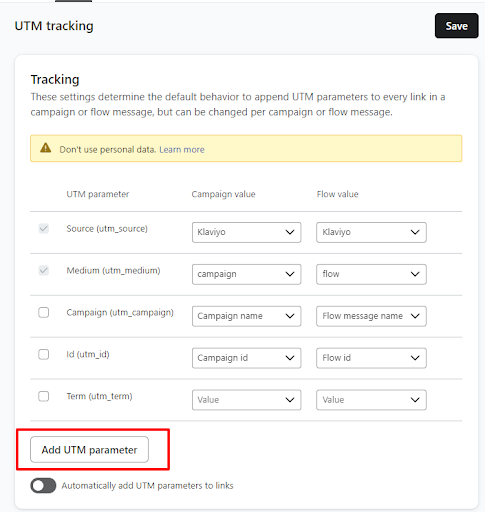
- Click on Add UTM parameter button
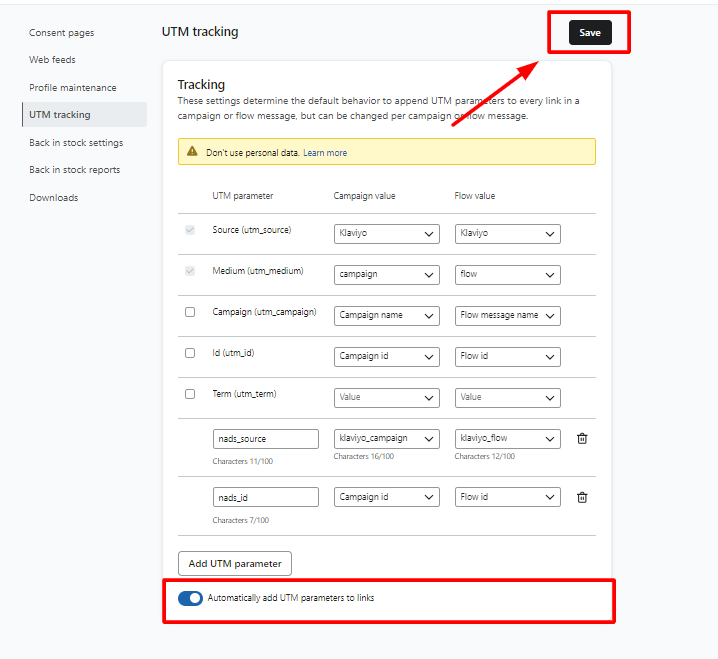
Add NestAds UTM tracking as the following table:
| UTM parameter | Campaign value | Flow value |
| nads_source | klaviyo_campaign | klaviyo_flow |
| nads_id | Campaign id | Flow id |
- Ensure the toggle Automatically add UTM parameters to links is set to active > Click on Save to complete.
Tracking for Existing Campaigns & Flows
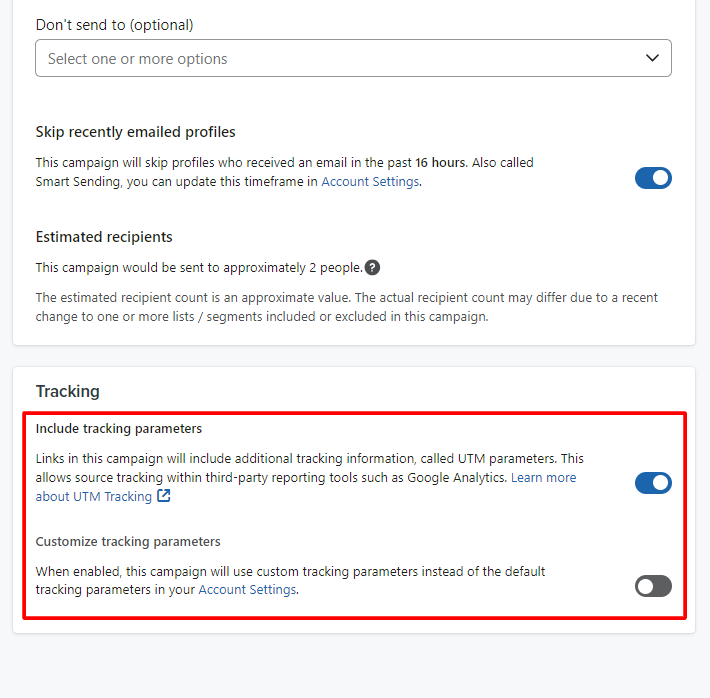
- Campaign Settings
You can set NestAds UTM tracking in your Draft campaigns, for Scheduled campaigns, you need to pause > edit in Draft status and click on Reschedule from the three-dots icon beside this campaign.
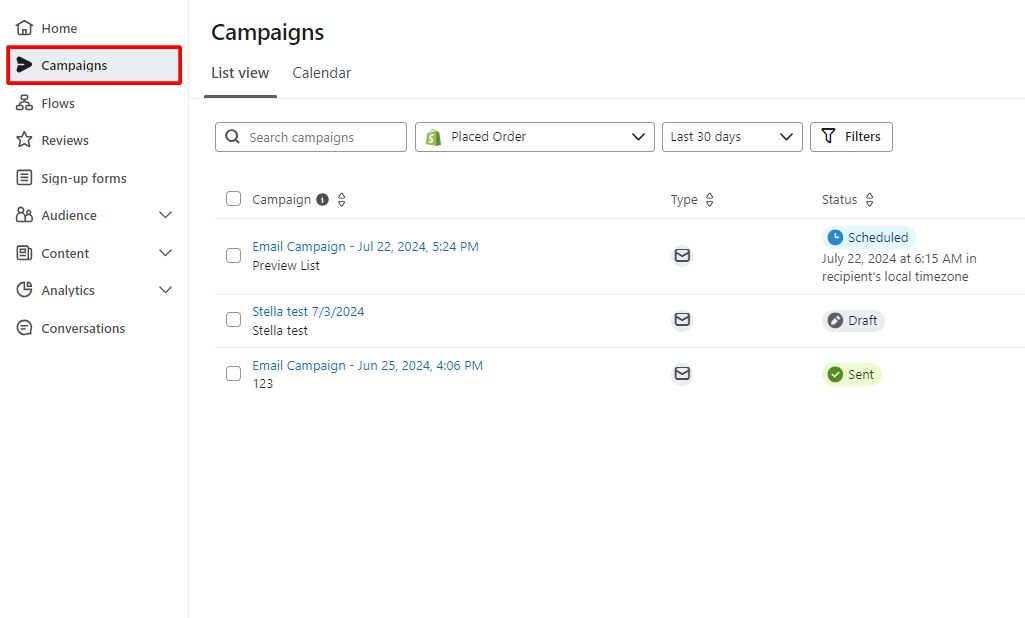
- Navigate to Campaigns section > choose the Campaign you want to add NestAds tracking UTM
- In this Campaign Edit dashboard, scroll down to the Tracking section > ensure the Include tracking parameters button is set to active.
Note: Keep the toggle of Customize tracking parameters in Inactive status
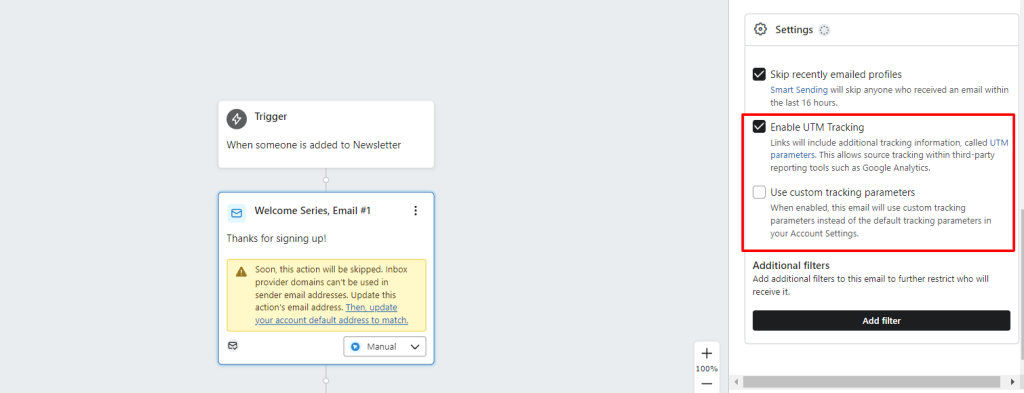
- Flow Settings
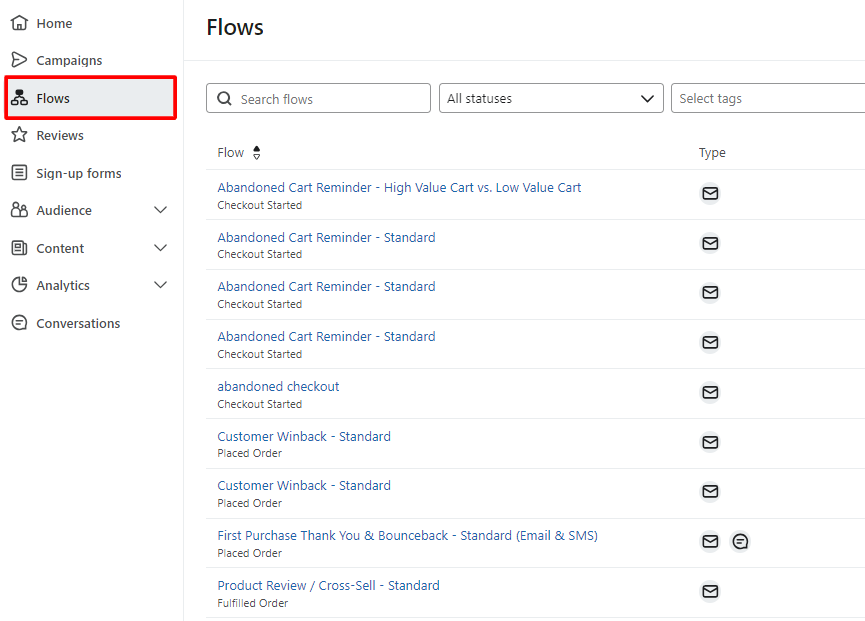
- Navigate to Flow section > choose the Flow you want to add NestAds tracking UTM
- In this Flow Edit dashboard, click on each Email or SMS action > on the right sidebar, scroll down to Settings section > ensure the Enable UTM Tracking checkbox is marked > click on Save.
Note:
- Only one Klaviyo account can be integrated with NestAds at a time.
- Why do I see the discrepancies in data from NestAds performance report and Klaviyo’s?
- Klaviyo’s default attribution window is 5 days, while NestAds’ is 7 days. Klaviyo uses a Last Click attribution model, whereas NestAds offers multiple models. Therefore, the metrics reported by Klaviyo will often differ from those reported by NestAds.
- In NestAds, a conversion happens when a recipient opens your message and then takes another action (like placing an order) within the attribution window. On the other hand, Klaviyo defines conversions as events involving orders (e.g., Placed Order, Fulfilled Order, Ordered Product). However, it does not count if a subscriber only opened your email or started a checkout.’
- By default, Klaviyo’s analytics attribute revenue based on the send date/time of your campaign or flow.
Ex: If someone orders from Campaign A on January 1, but Campaign A was sent on December 25, that order revenue is attributed back to December 25. This differs from how NestAds attributes revenue, which is based on the order date.
Therefore, NestAds’s reported metrics on Klaviyo’s performance will most closely resemble the reports generated in Klaviyo’s Metric Analytics.
Need any help?
If you need help, please contact us via live chat or email at [email protected]. Our support team is happy to assist!
 NestAffiliate
  NestDesk
  NestScale Bundles & Discounts
  NestScale Product Variants
  NestSend
  NestWidget