 NestAffiliate
  NestDesk
  NestScale Product Variants
 Why use Custom Traffic Rules?
The Traffic Rules feature in NestAds lets you create custom rules to control how traffic is attributed, overriding the default settings based on your specific conditions.
Other than set the custom rules of attributed traffic for the default settings by the advanced conditions, you can also launch advertising campaigns on various platforms, including those not directly integrated with NestAds, such as:
- Affiliate links
- Automated email marketing platforms
- Other search engines not currently listed in NestAds
- …
To accurately track and optimize their campaigns and attribute conversions from these sources, users can use the Custom Traffic Rule feature. This feature allows users to customize and allocate conversion credits to advertising efforts on non-integrated platforms, ensuring accurate tracking and optimization of their campaigns.
In this article, you can learn how to use this feature to ensure accurate traffic attribution. Let’s get started!
How does Custom Traffic Rules work?
A Traffic Rule works as an if/then equation: If one of the the assigned Condition/s are met, then the traffic is attributed to the desired channel
Note: URL/Referrer only needs to match at least one condition. (OR conditions are acceptable).
There are two outcome options for any assigned Condition:
- Contains/ Exactly includes this traffic event from your attribution data
- Assign this traffic to Channel X (selected by you)
How to create Custom Traffic Rules?
- Navigate to Tracking setup > click on Custom traffic rule
On the custom traffic rule page interface, you can see a list of setup rules. Rules will be identified according to the following criteria:
- Priority: Priority order of rules when attributed to a destination
- Active state: Enable/disable rules
- Rule name: Choose a rule’s name
- Condition: Select one or multiple conditions that a URL needs to meet to be counted as attributes for a destination
- Destination: An attribution source
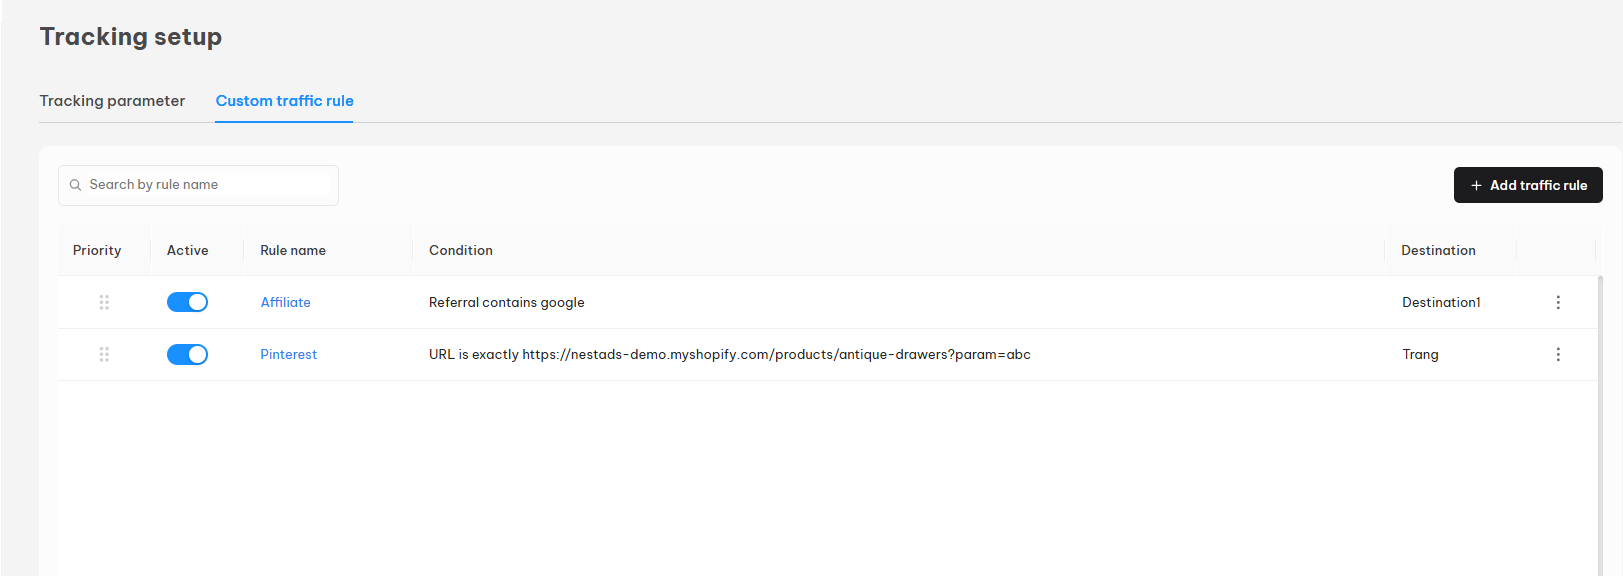
- To create a traffic rule, click on Add traffic rule button
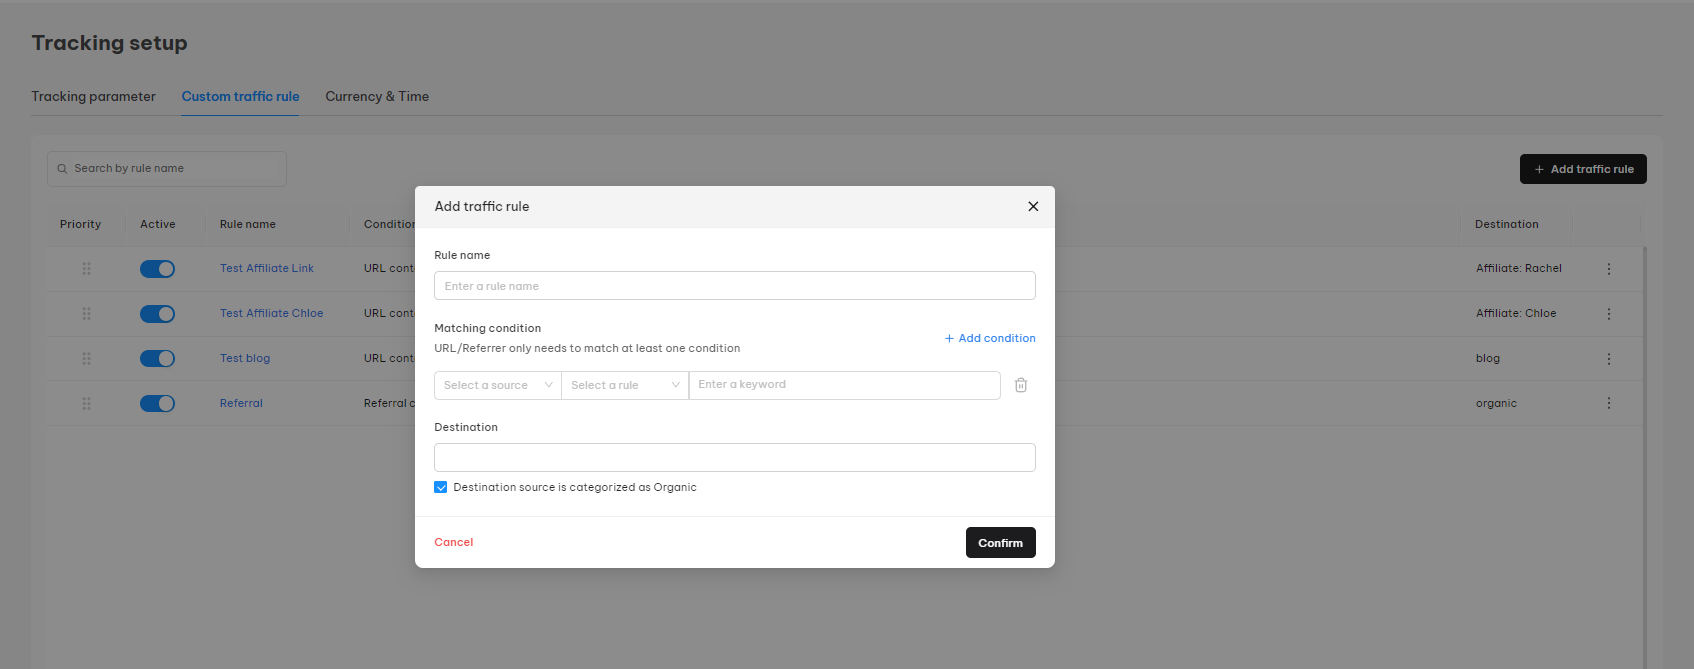
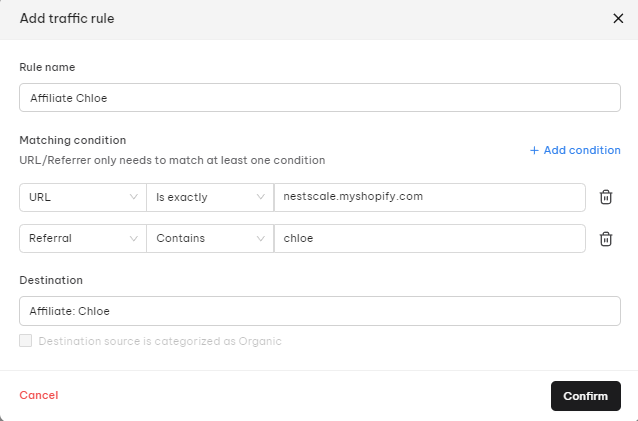
3. On the pop-up window, add
- Rule name

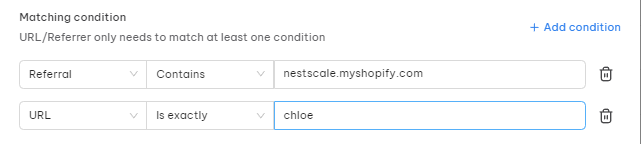
- Matching condition
Each URL needs to satisfy at least 1 condition. To create more conditions, please click + Add condition
- Destination
Select attribution source or create a new source by clicking + Create new source
Note: Tick the box under the Destination field to select sources classified as Organic if desired, or choose from the existing destination list. Once create existing destination, you can not be able to tick/ untick it again

- Click on Confirm button to complete adding the traffic rule
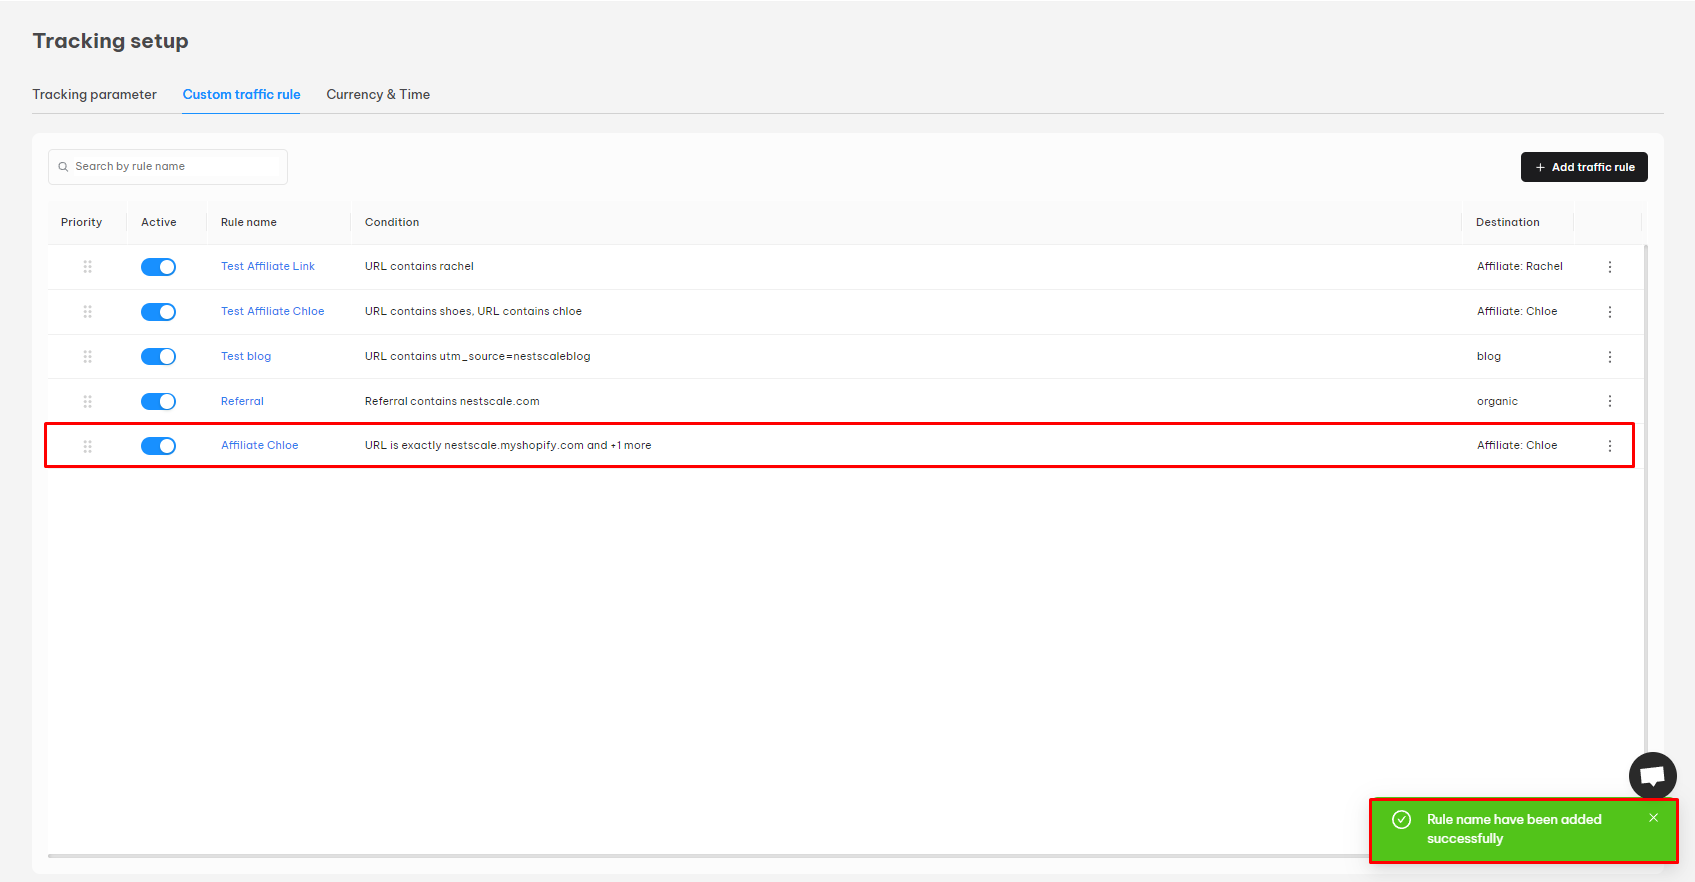
A Pop-up notification will appear in the bottom right corner. Your new traffic rule will automatically be placed on the last priority.
Note: The rules are applied sequentially from the topmost to the bottom. If you wish to adjust the priority of these rules, click and hold the left mouse button on the six-dot icon next to the rule you want to move. Then, drag it to your desired position and release the button to drop it there.
How to change the priority of Custom Traffic Rules?
Priority feature allows you to set the order in which rules are applied when attributing traffic to a destination. Assigning a priority to each rule ensures that the most important criteria are met first.
- Hold the left mouse button on the six-dot icon > drag and drop to change the position of the rules > click Save
Note: Higher positions represent higher priority order
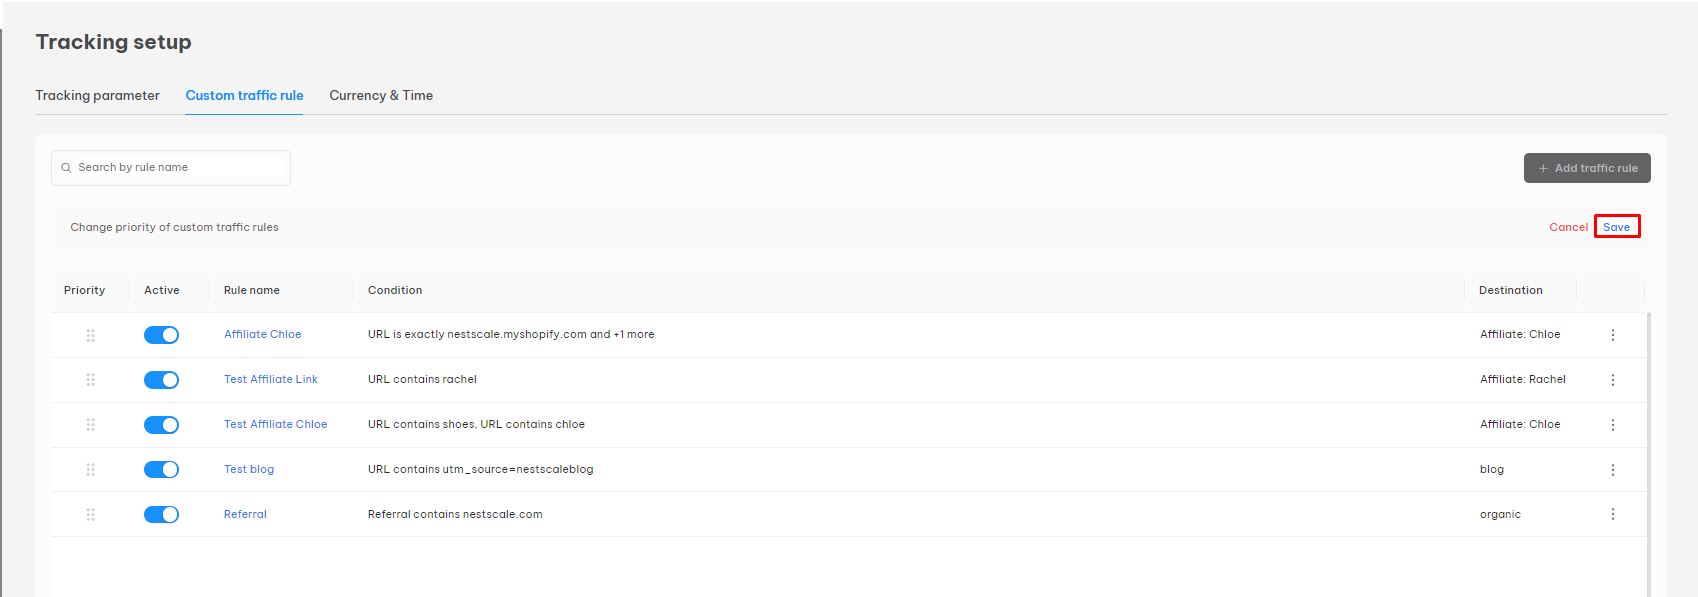
A pop-up notification will appear in the bottom right corner.
How to edit a Custom Traffic Rules?
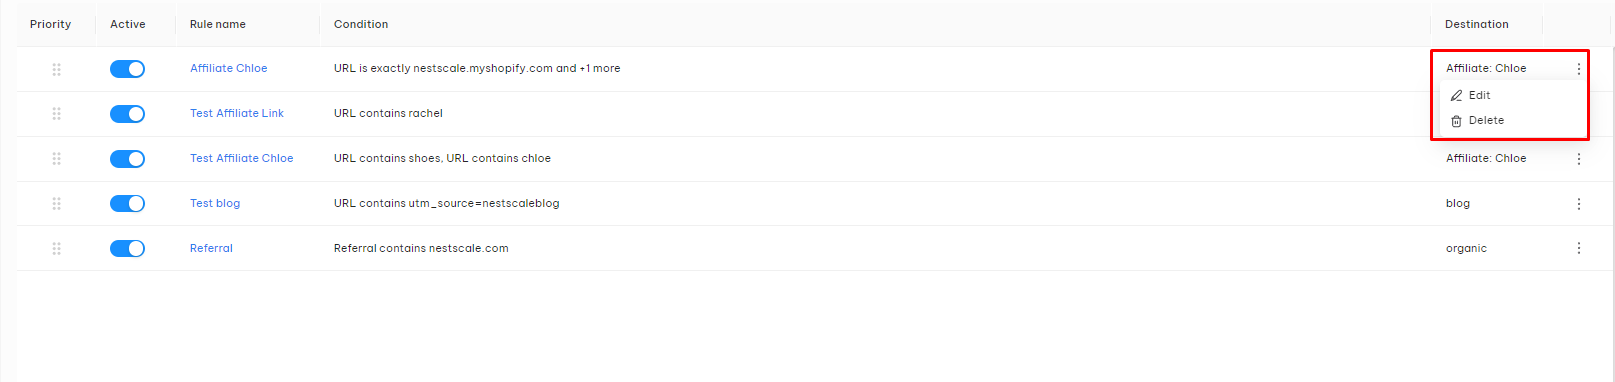
- In case you want to edit a rule, please click on the 3 dots of a rule line > choose Edit
- Change the rule’s content > choose Confirm
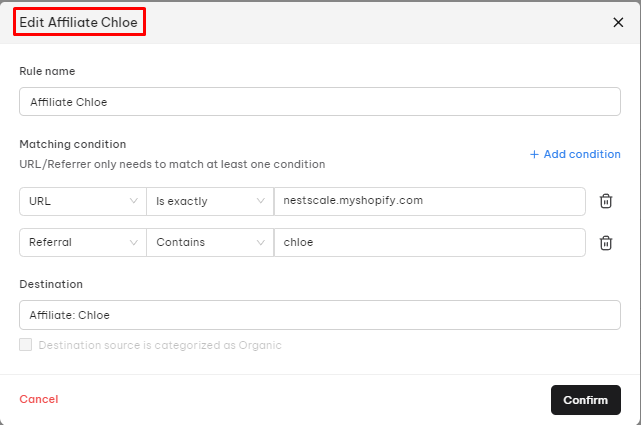
A Pop-up notification will appear in the bottom right corner
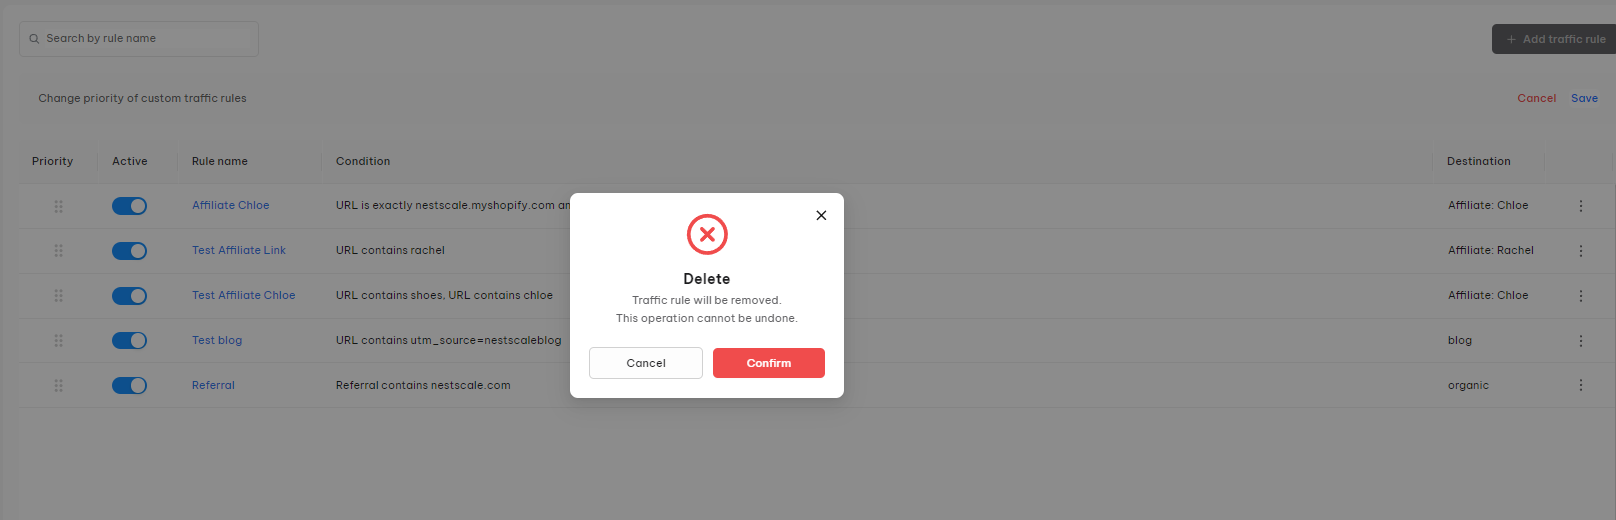
How to delete a Custom Traffic Rules?
- To delete the traffic rule, please click on the 3 dots of a rule line > choose Delete
- Choose Confirm button on the confirmation pop-up window
A pop-up notification will appear in the bottom right corner
Need any help?
Feel free to contact us via live chat in-app or email at [email protected]. Our support team is happy to help.