 NestAffiliate
  NestDesk
  NestScale Product Variants
 The Billing Store feature simplifies the management of billing for agencies and store owners who handle multiple Shopify stores. It offers the flexibility to select which stores are on paid plans and which are on free plans.
Additionally, it allows you to choose whether to consolidate payments for all stores into one transaction or handle them individually. This functionality makes it easier to manage multiple accounts and gives you proactive control over the payment methods used for billing.
There are 2 methods for store owners to choose billing stores:
- Select one billing store for all subscriptions
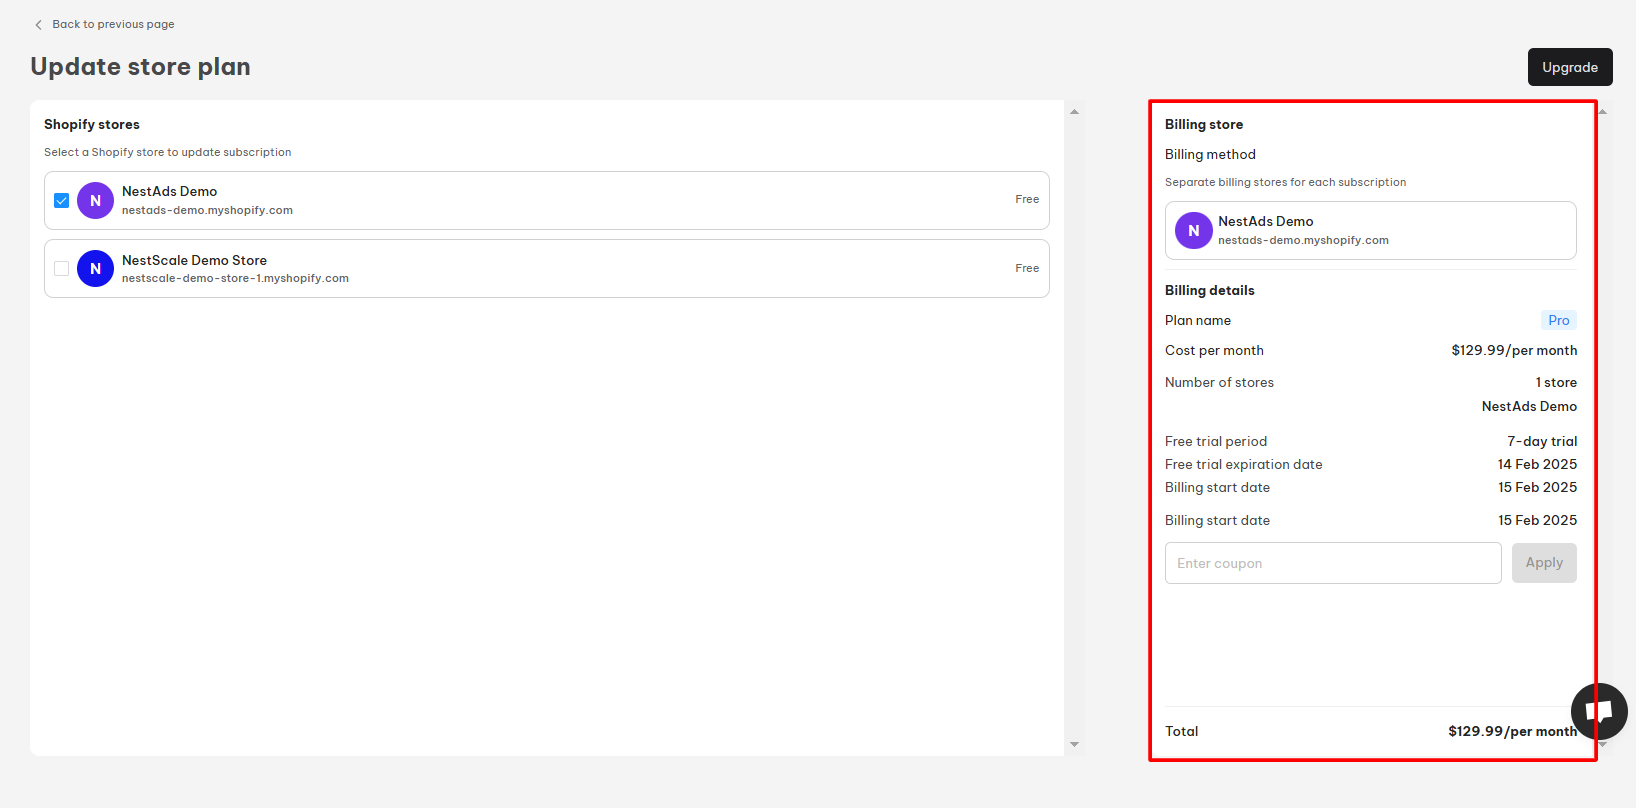
- Select separate billing store for each subscription
NestAds suggests Method 1 for Shopify store owners who have multiple stores. While Method 2 is recommended for agencies looking for several customer stores at once.
In this article, you will learn how to choose the billing store in NestAds. Let’s get started!
How to choose the billing store for your multiple stores?
- From NestAds dashboard, navigate to Plan & Billing section
You can see all your stores and their plans here:
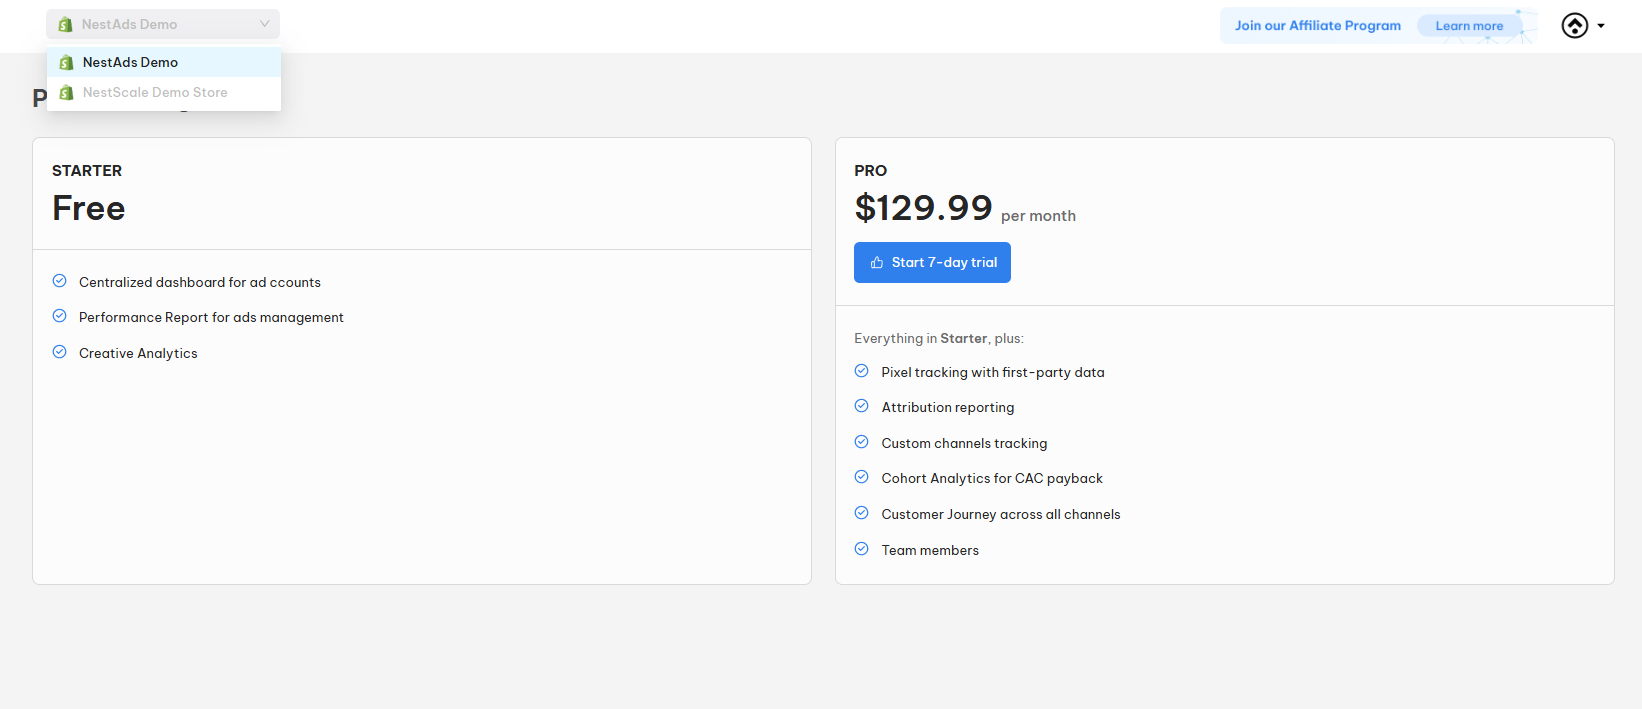
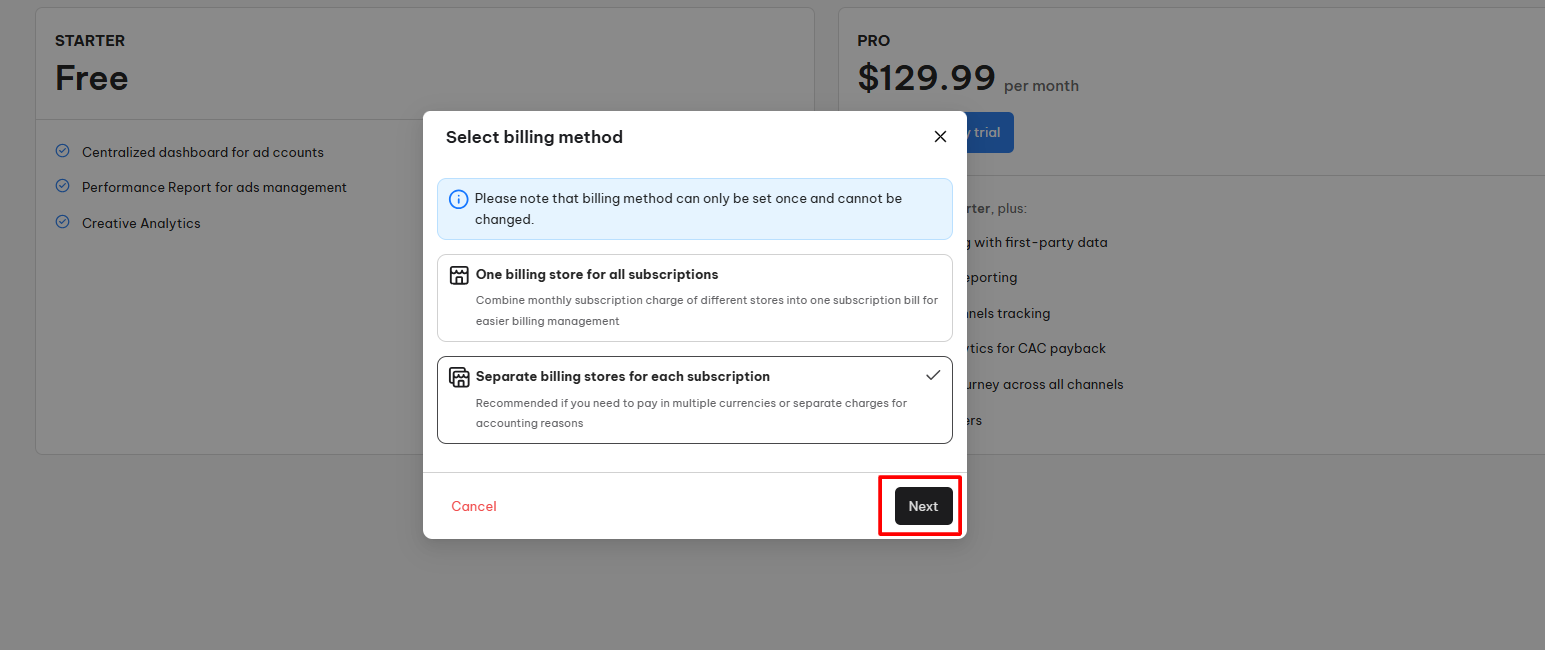
After clicking on Start 7-day trial button to upgrade your current store to the Pro plan, a pop-up will be displayed as follows:
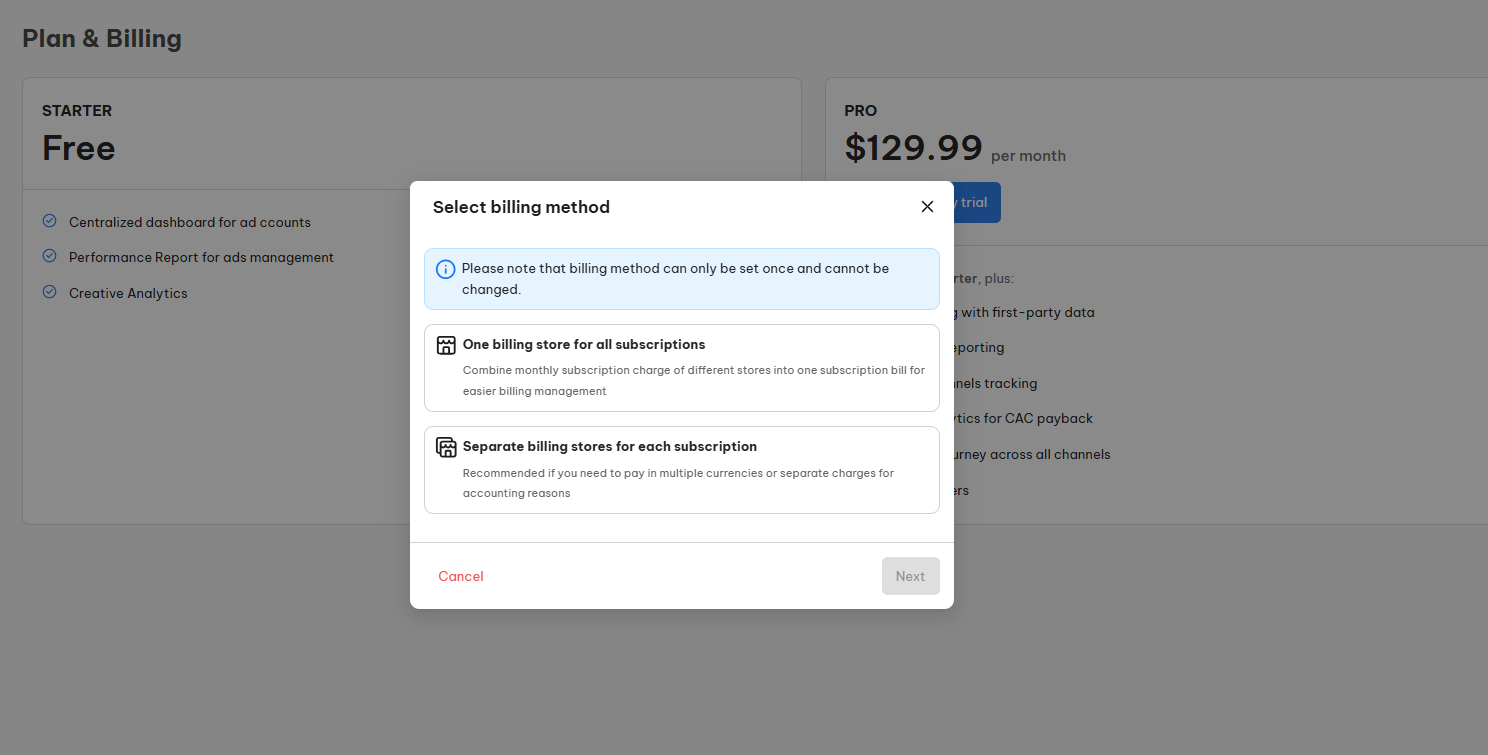
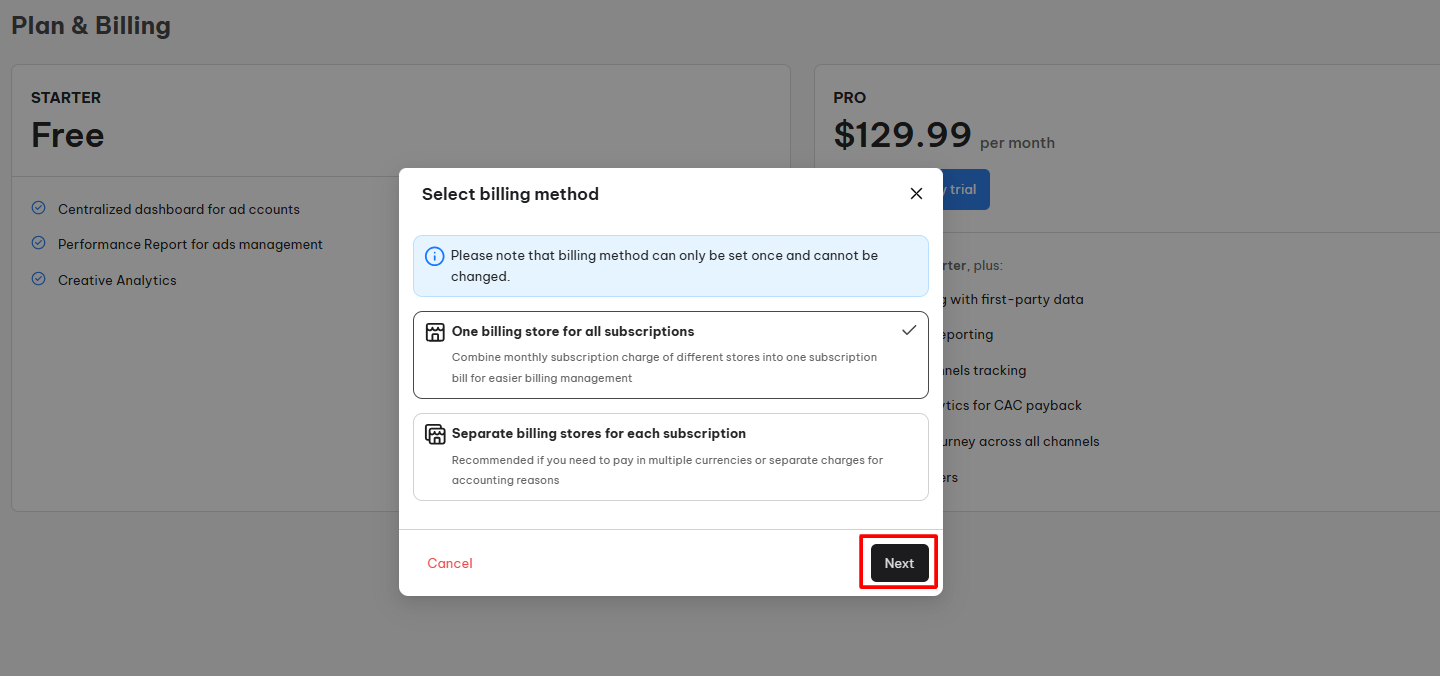
Select one billing store for all subscriptions
In case you want to use one billing store to charge for all the stores with the paid plan, you can choose this option. Here is how to do it:
- Choosing one or multiple stores to upgrade to Paid plan by ticking on the box of these stores.
Select all of the stores needed to update the plan from the list displayed below:
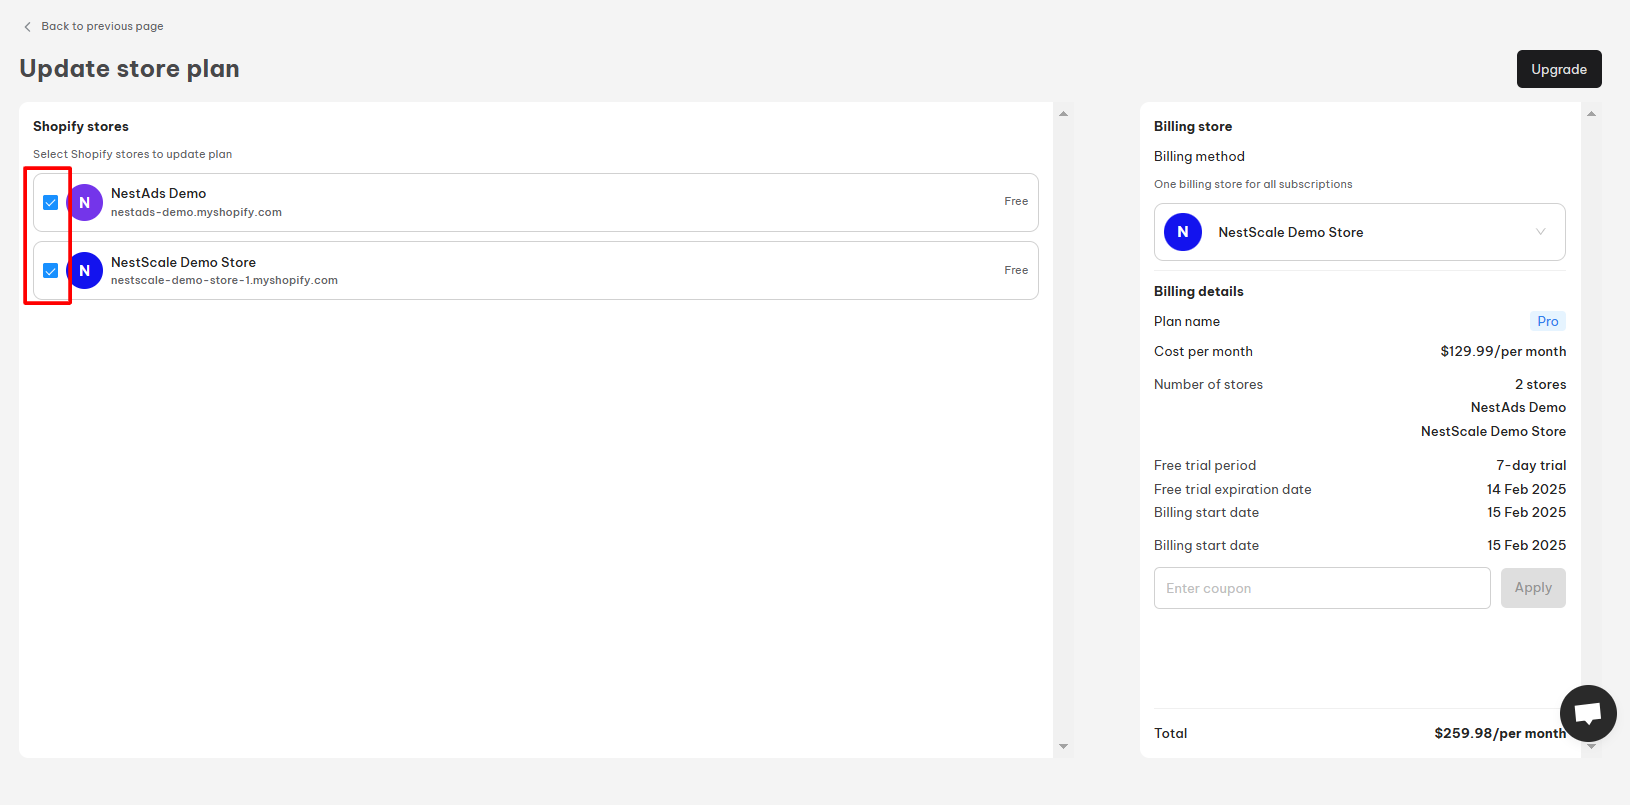
- Billing details and the total cost are displayed on the right side of the screen: Select the billing store from your updated chosen stores > click on Upgrade button
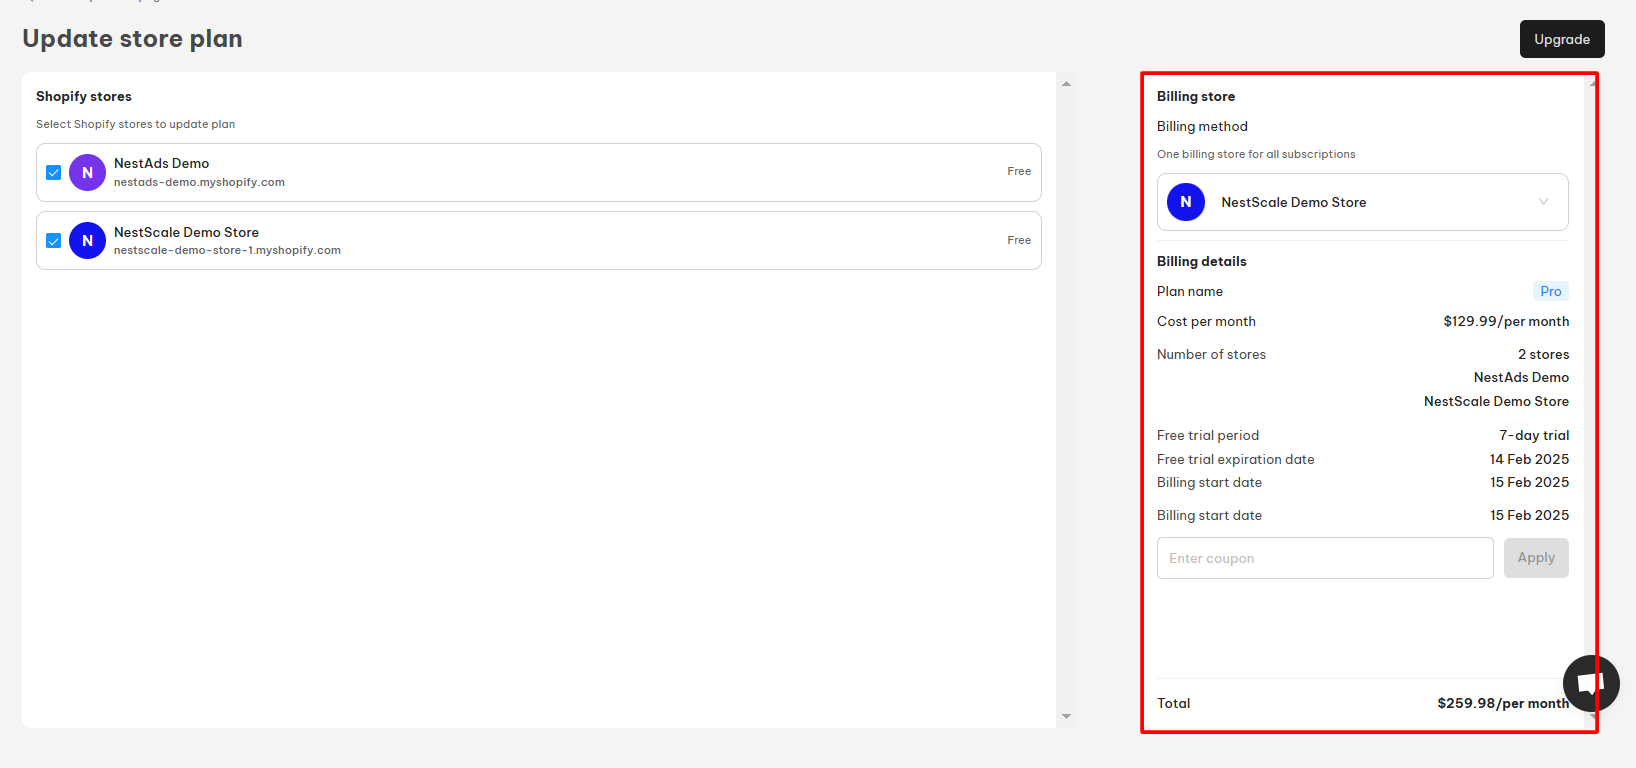
Note: If you have a discount code, simply type it inside the Billing details to have the discount applied
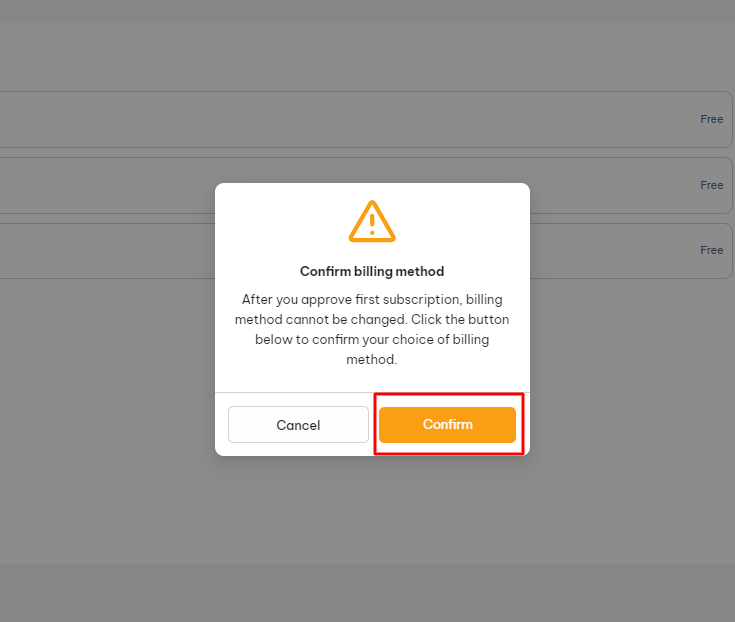
- From the confirmation pop-up window, select Confirm button to complete
After clicking on Confirm, you will be navigated to your Shopify Admin page to check the bill.
Select separate billing stores for each subscription
- For this method, you can click one store each time to upgrade to Pro plan
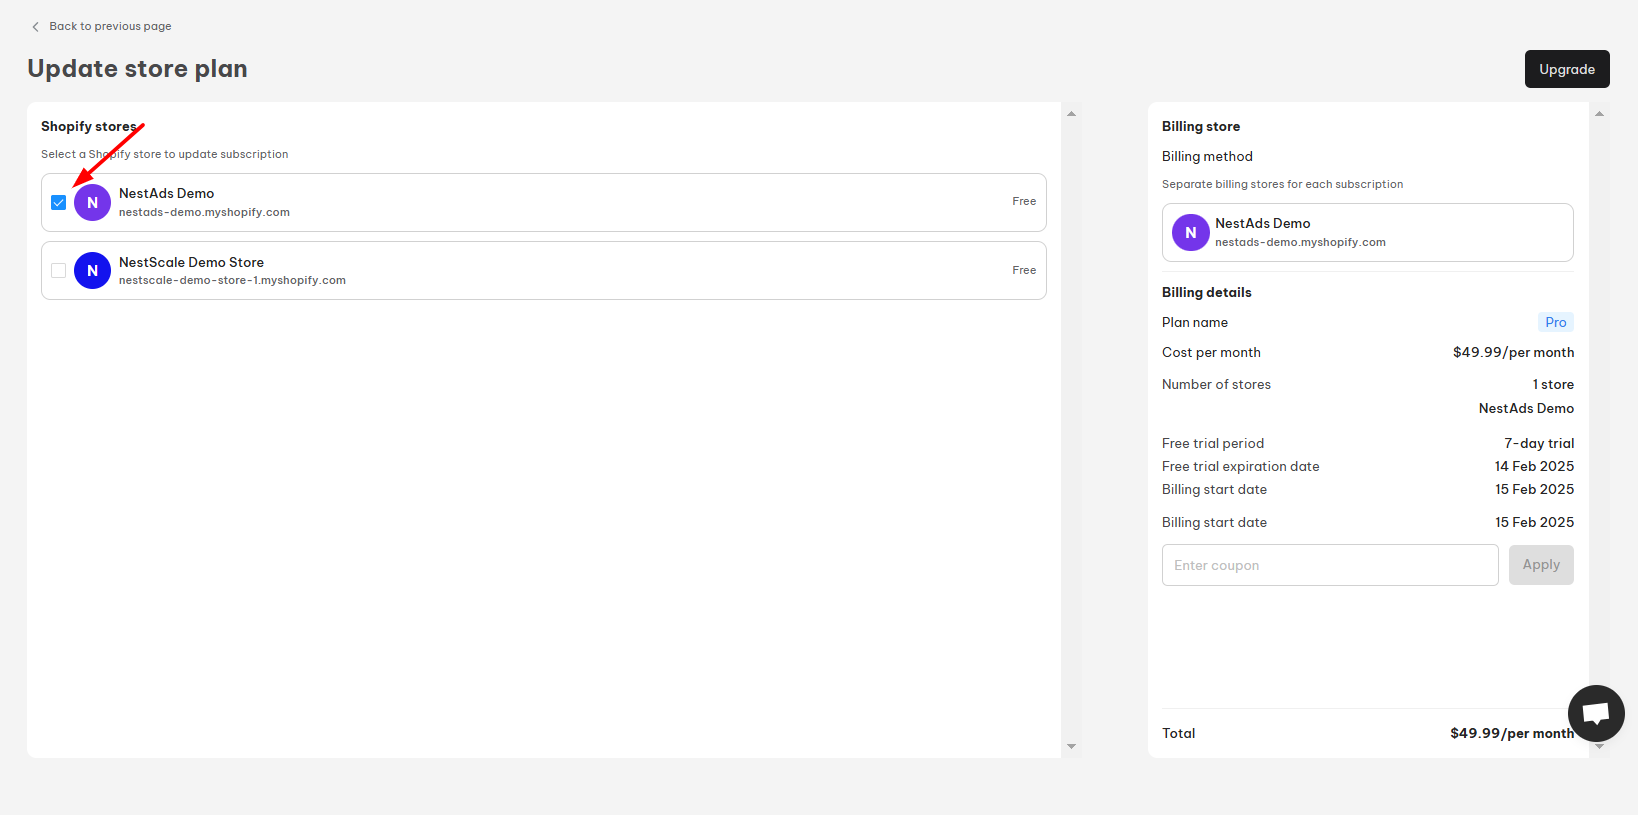
- The billing details will be displayed for the store you choose from. Click on Upgrade button
Note: If you have a discount code, simply type it inside the Billing details to have the discount applied
- Click on Confirm button from the confirmation pop-up to complete the process
After clicking on Confirm, you will be navigated to your Shopify Admin page to check the bill.
Need more support?
Feel free to contact us via live chat or email at [email protected]. Our support team is happy to assist!