 NestAffiliate
  NestDesk
  NestScale Product Variants
 Product Report in NestAds provides detailed insights into how products are performing across your ad campaigns. By tracking key metrics at the product level, you can:
- Identify top-performing items driving the most revenue.
- Spot high-potential products that could benefit from increased ad spend.
- Detect underperforming products that may need adjustments to optimize performance.
In this guide, you’ll learn how to configure and make the most of Product Reports in NestAds. Let’s get started!
How to use Product Report
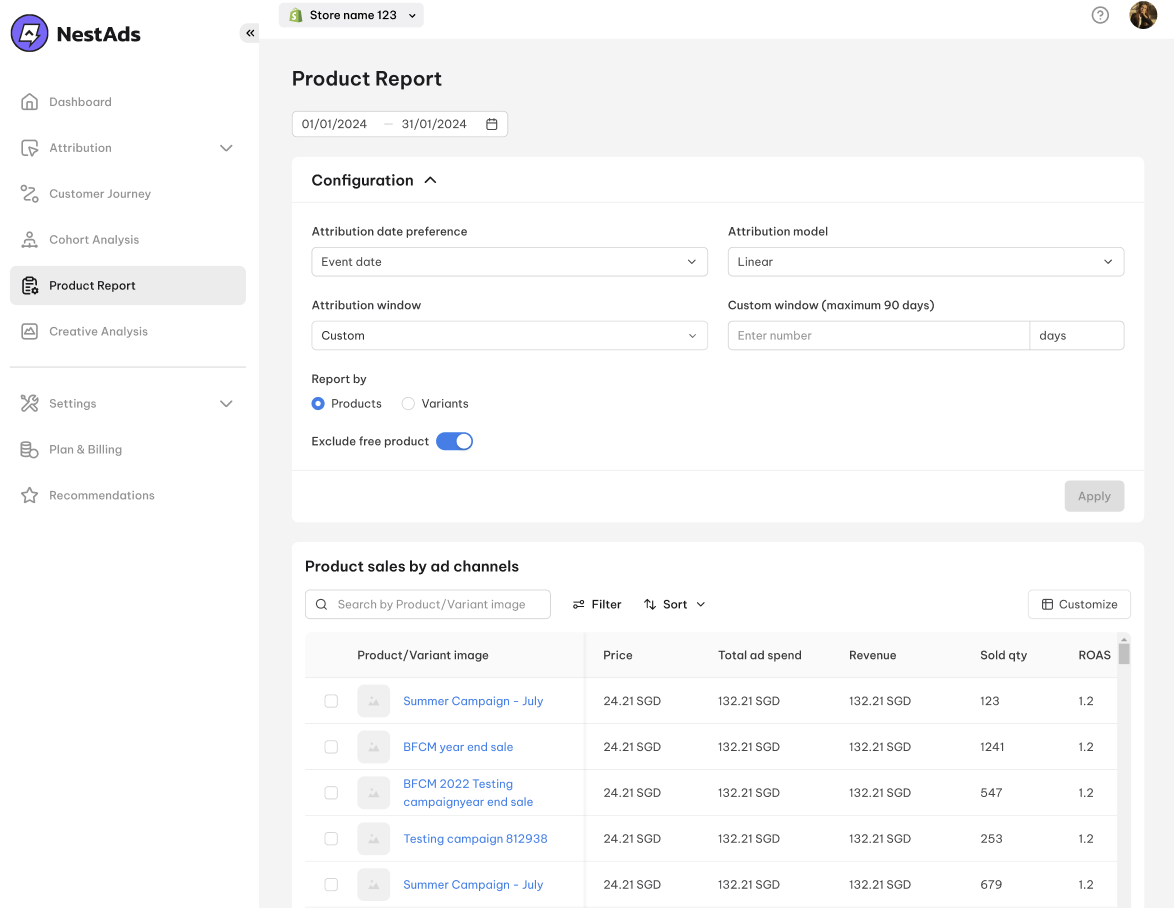
General configuration
The product report gives you an overview of your product sales performance across key ad channels like TikTok, Google, and Facebook.
- Log into your NestAds account.
- Navigate to Product Report from the left-hand menu.
- Configure the following settings to customize your report:
- Time Range Picker: Set a specific time frame to analyze performance.
- Attribution Date Preference:
- Event Date: Tracks the date when the customer makes a purchase.
- Click Date: Tracks the date when the customer clicks on an ad.
- Attribution Model: Choose how order values are attributed across touchpoints. Options include:
- First Click
- Last Click
- Linear
- Attribution Window: Define the period during which events are tracked and attributed to ads. NestAds offers the following options:
- 1 day, 7 days, 14 days, 30 days, 60 days, 90 days, or Custom.
Note: The maximum custom attribution window is 90 days by default.
- Report By: Choose how data is grouped:
- Products
- Variants
- Exclude Free Products: Toggle ON/OFF as needed.
- Click Apply to save your changes, and your customized product report will generate accordingly.
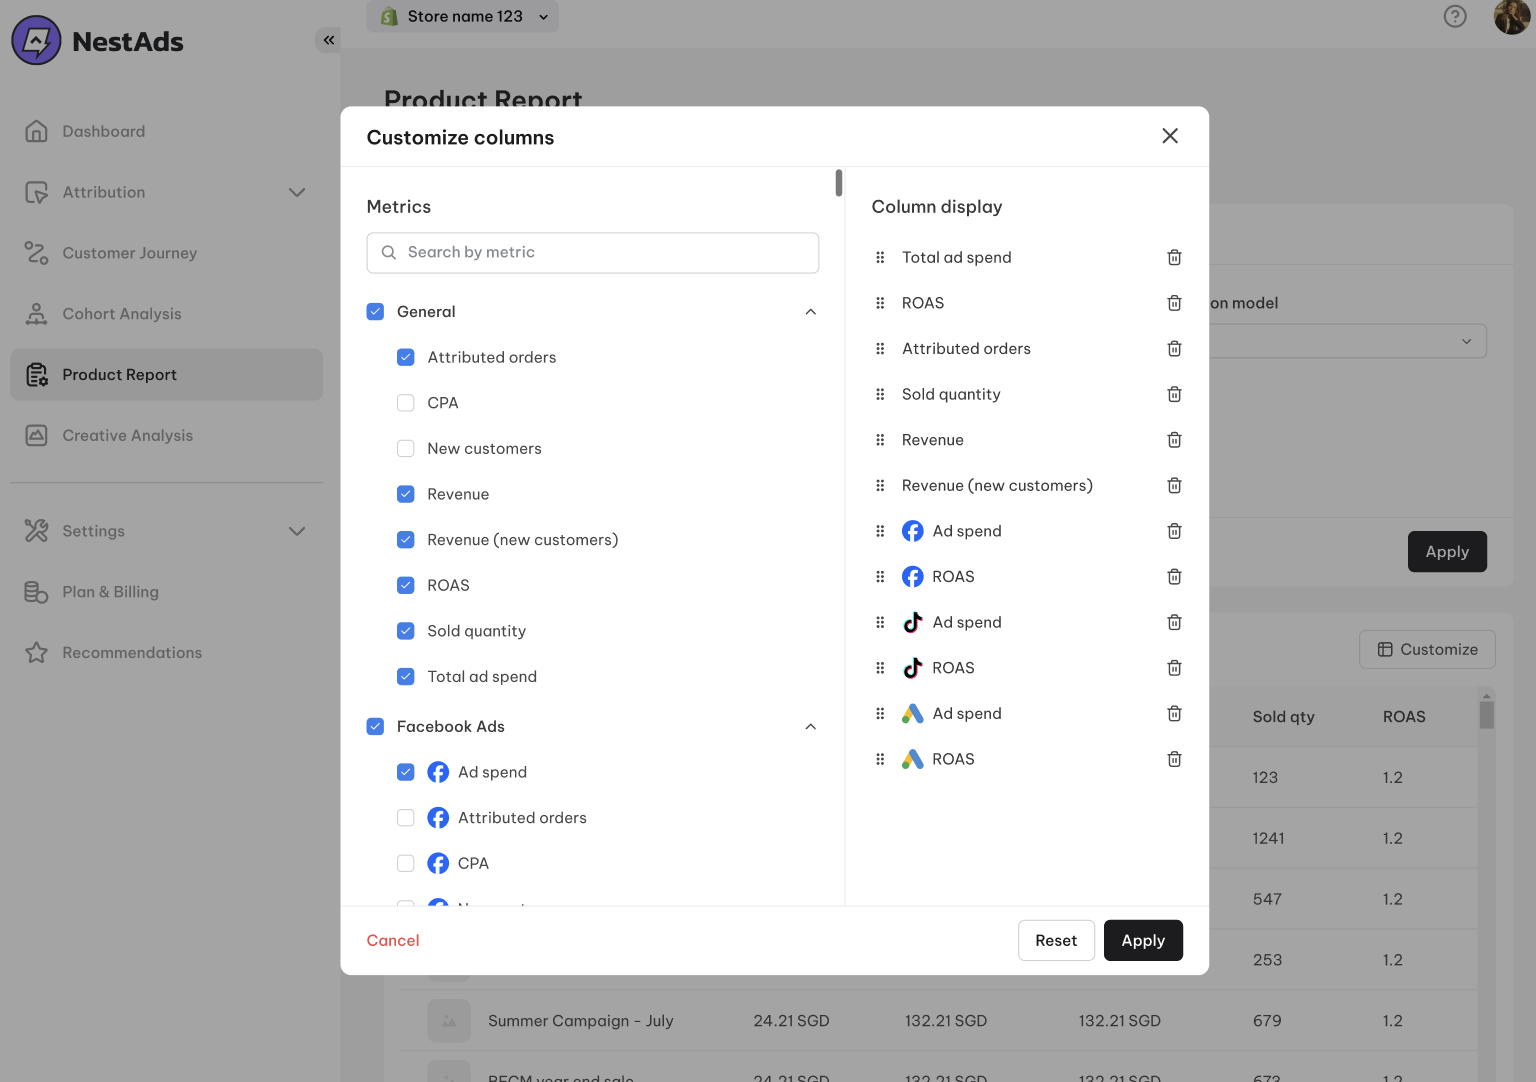
Customize Product Report
The Product Report table gives you a comprehensive, bird’s-eye view of product performance, allowing you to track multiple metrics.
You can personalize the table layout by choosing which metrics to display:
- Click the Customize icon at the top right corner.
- Select which metrics you want to show or hide.
- Rearrange the order of metric columns as needed.
- Click Apply to save your changes.
Search for specific products
Need data on a particular product?
- Use the search bar at the top of the report and enter the product name.
- Quickly track its key performance indicators (KPIs) across ad channels.
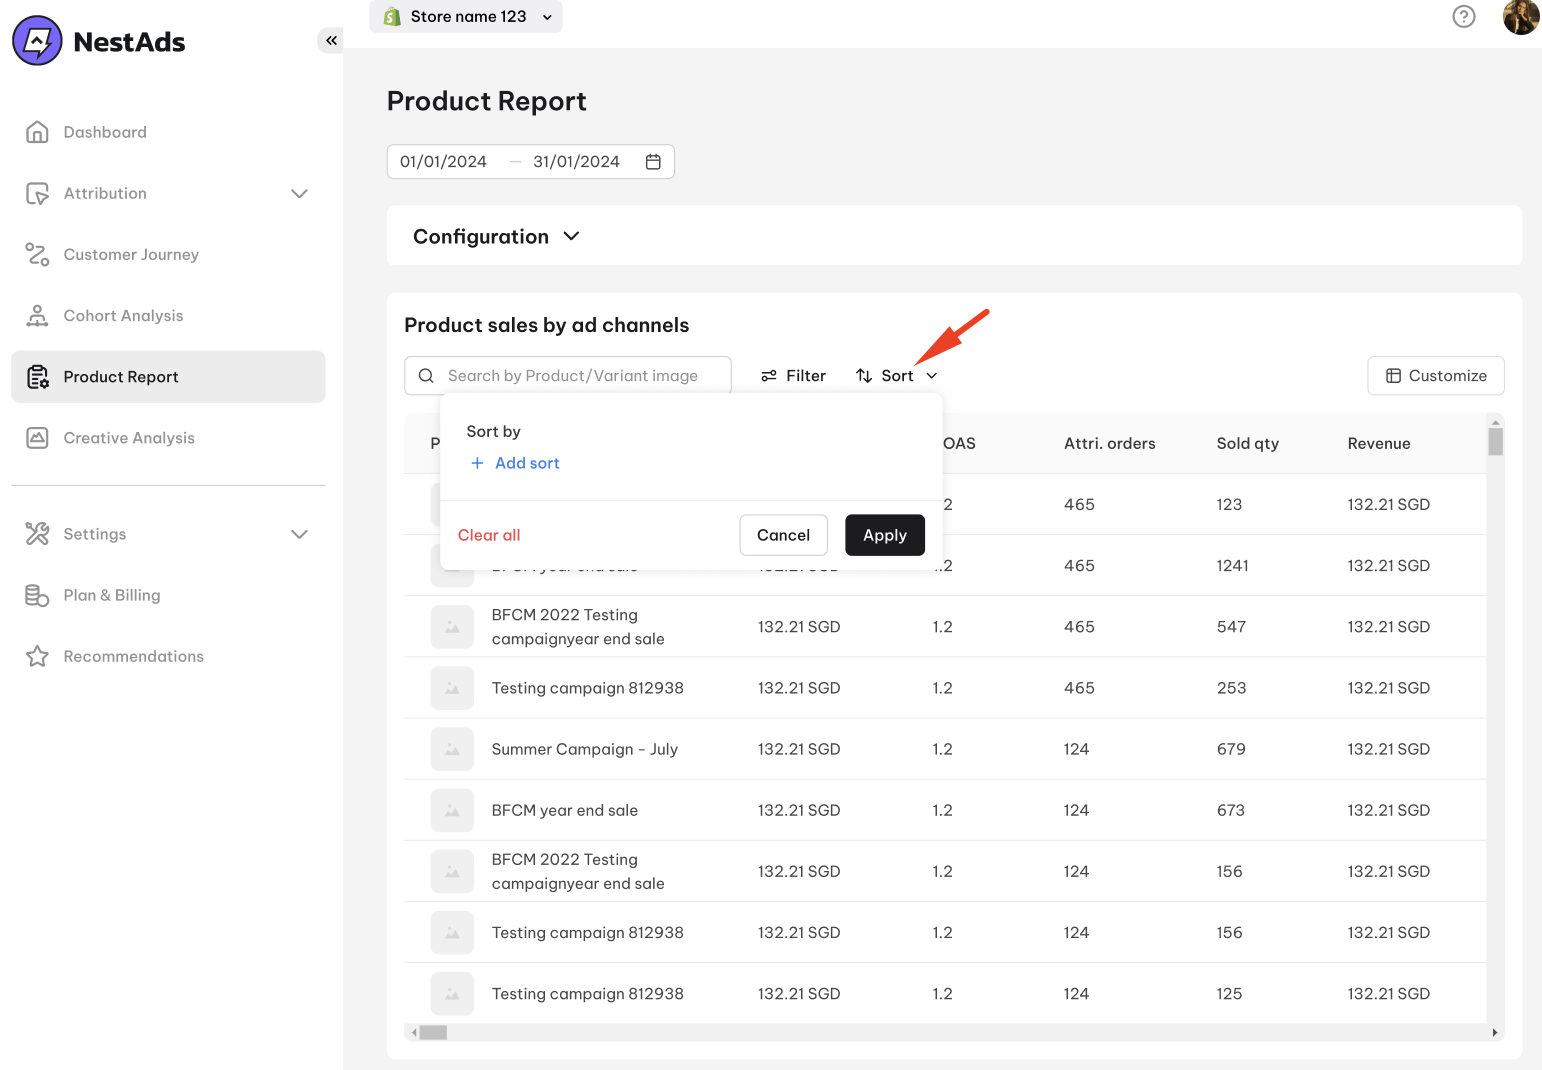
Sort out products
Want to identify your top performers?
- Click Sort, then choose the metric you’d like to rank products by.
- Select Ascending or Descending order.
- Click Apply to see the sorted results.
Note: You can combine 02 metrics to sort products at the same time.
Filter products by metrics
If you need deeper insights with complex applied conditions, use the filter tool:
- Click Filter > Add Metric Filters.
- Set the conditions (e.g., sales > 100, ROAS > 2.0).
- Click Apply Filters to view filtered data.
- Combine multiple filters to analyze performance from different angles.

Need more support?
If you need help or have any questions, feel free to reach out to us:
- In-app live chat for instant support.
- Email: [email protected].
Our support team is always happy to assist!