 NestAffiliate
  NestDesk
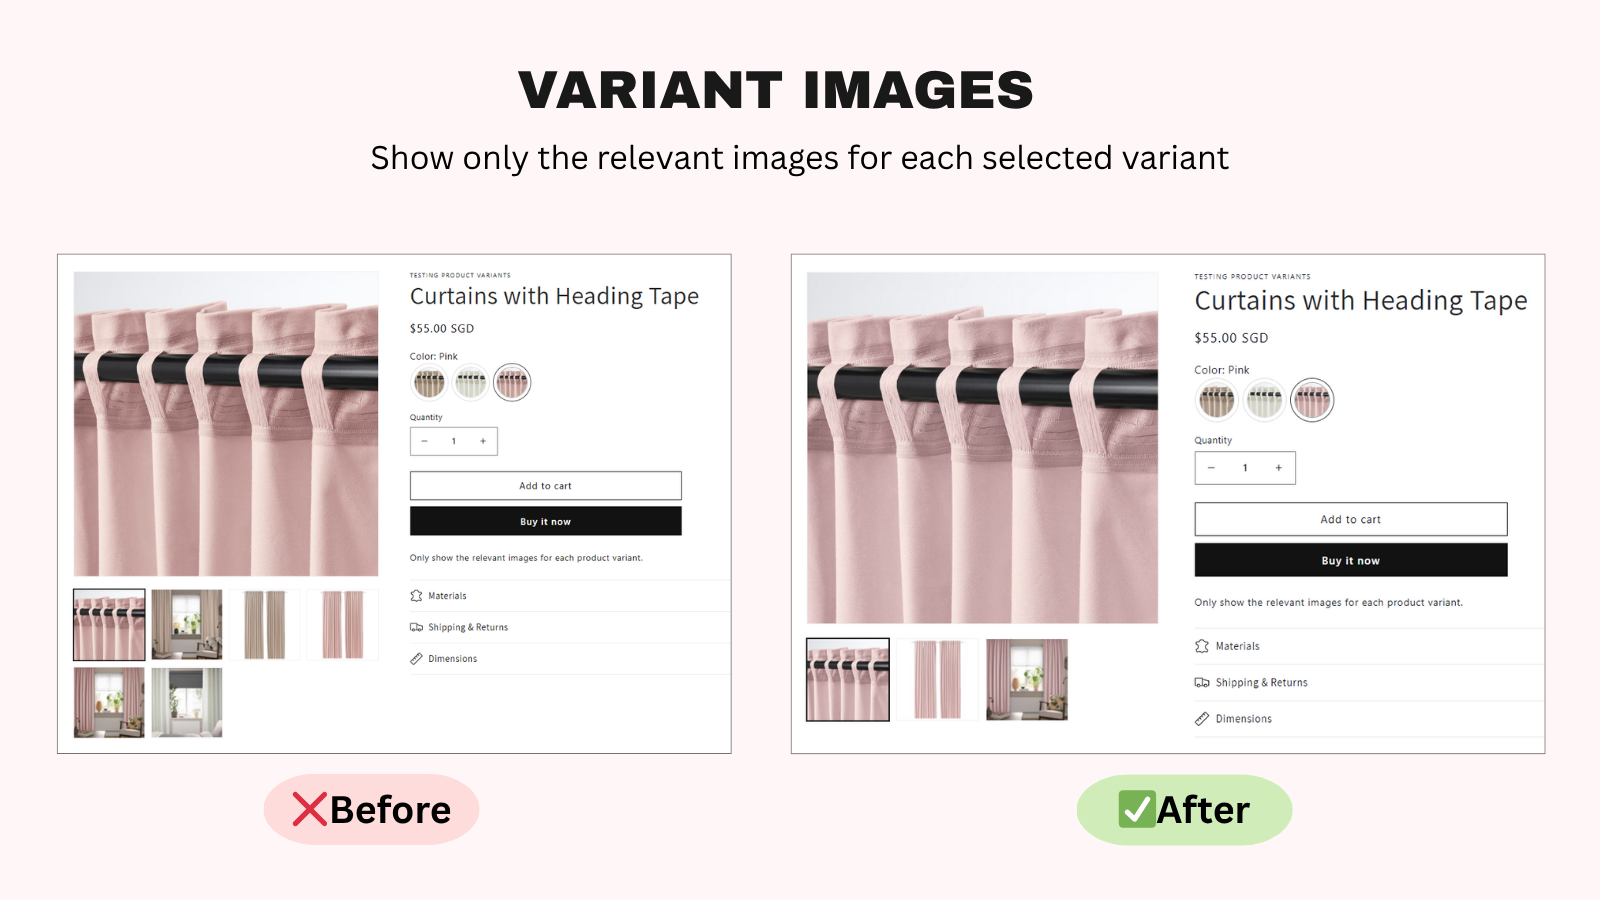
 The Variant Images feature allows you to display only the specific images associated with each variant when customers select it, providing a clearer, more focused shopping experience.
By showcasing relevant images, you make it easier for customers to visualize their choices, which can lead to higher engagement and conversions.
In this guide, you’ll learn how to use and manage the Variant Images feature. Let’s dive in!
How to Use Variant Images Feature
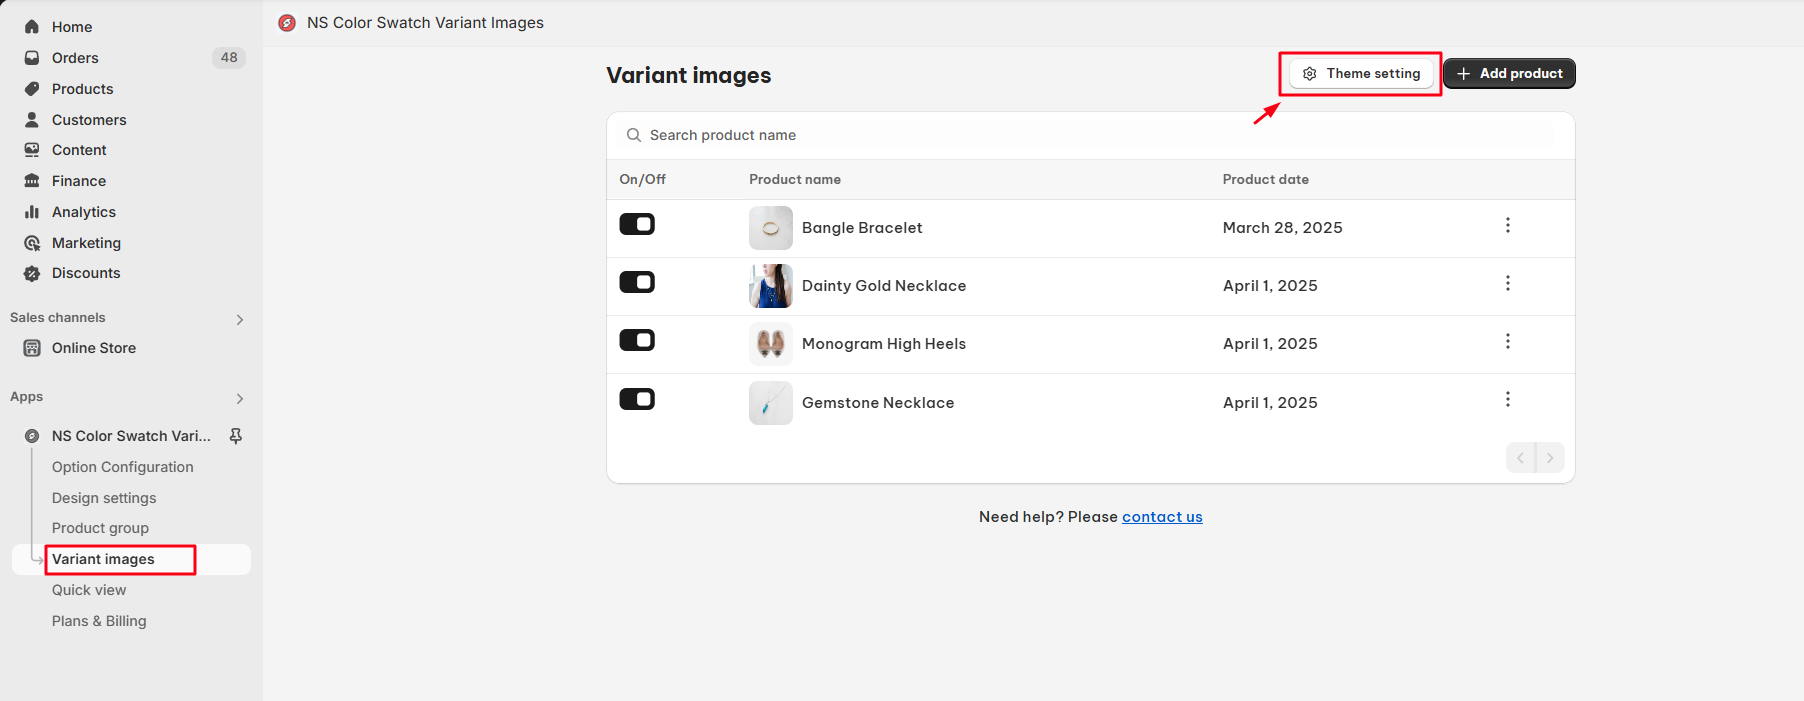
- From the dashboard, navigate to Variant Images section > click on Theme setting to check if your current theme supports this feature:
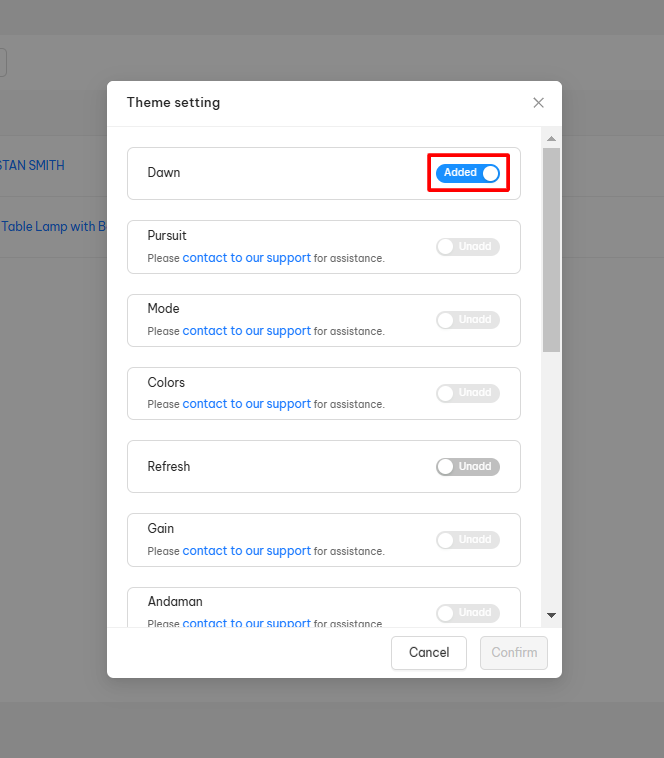
- Switch the button from Unadd > Added to activate Variant Images feature
Note: Unsupported themes display “Please contact our support for assistance”. In this case, please contact the support team to have personalized help.
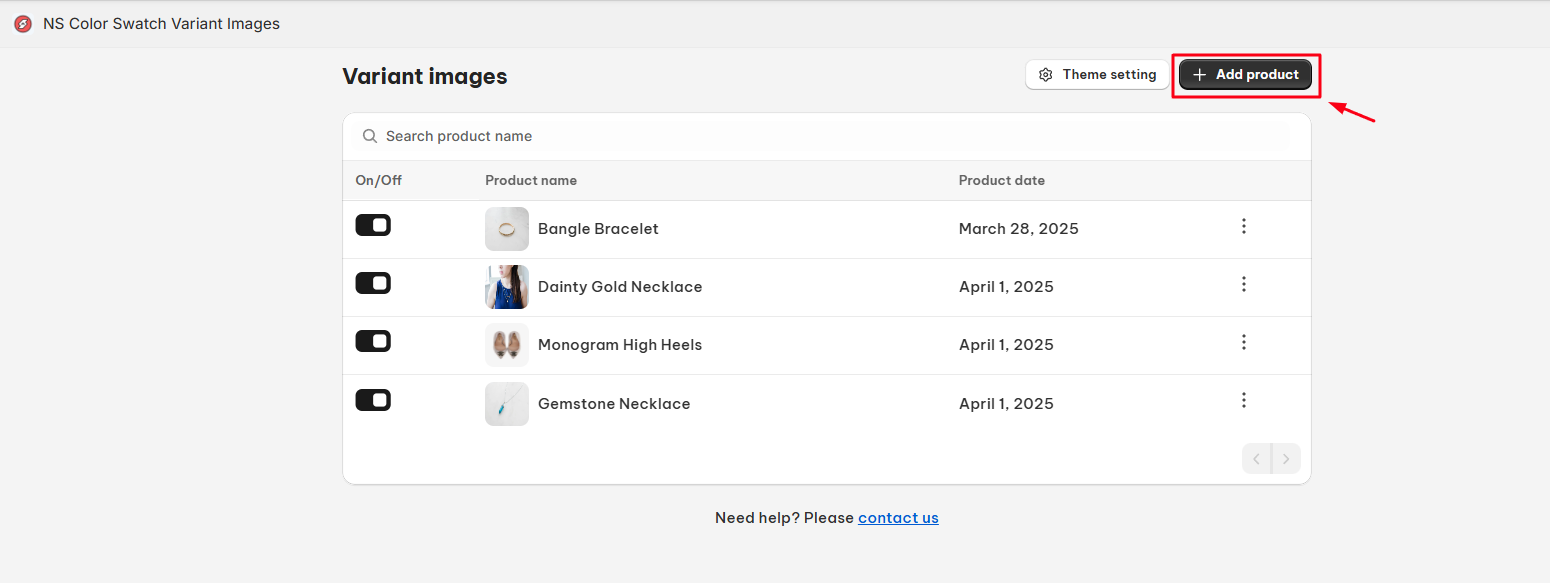
- Click on + Add Product to navigate to the Product List:
- In the Add Product Pop-up window, tick on the product wanted to display selected images (Only 1 product can be selected each time)
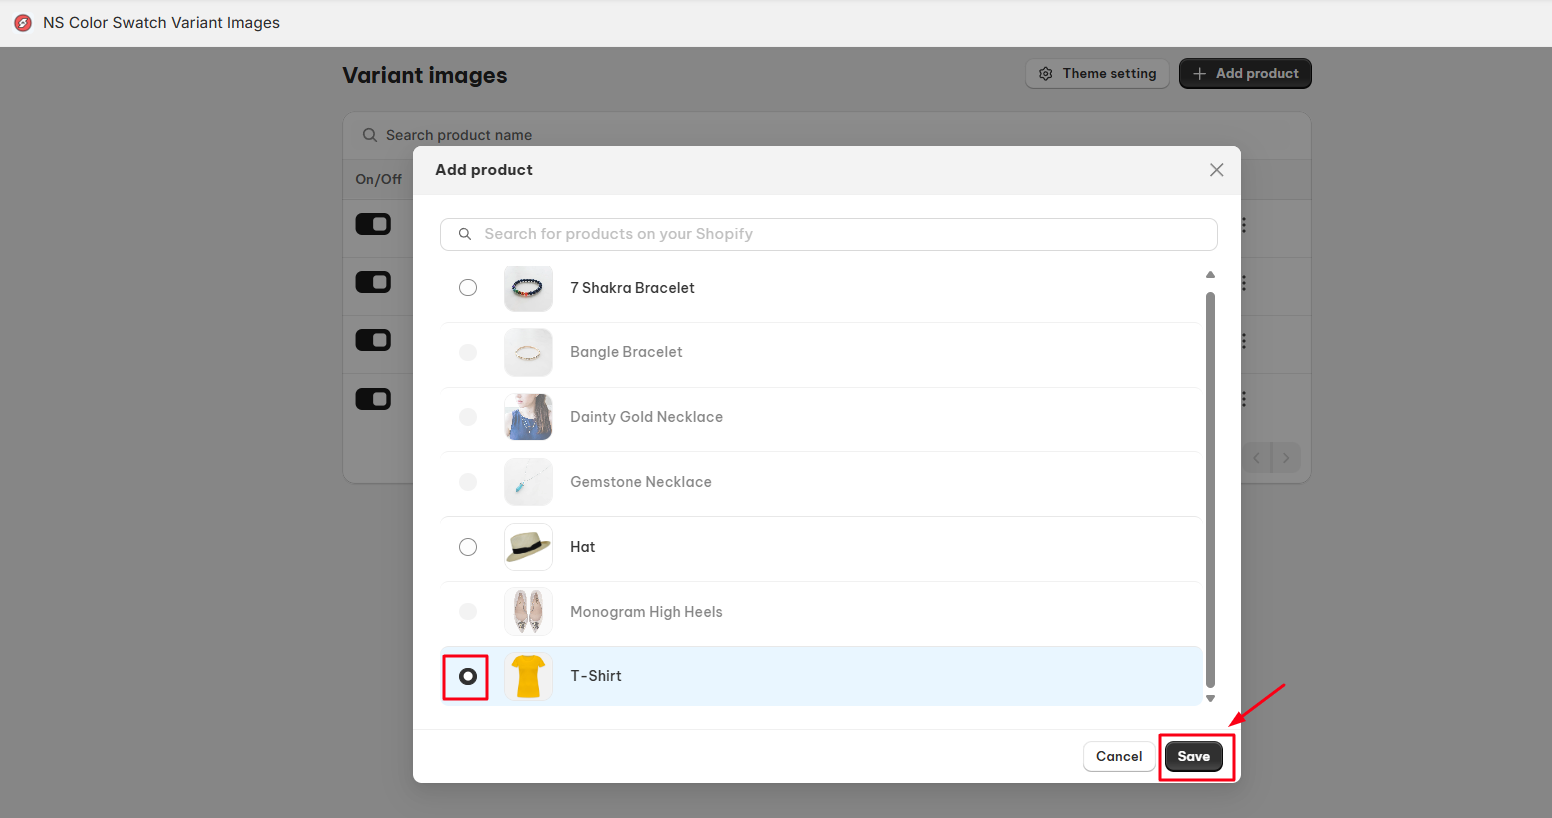
Note: You can search for the product name from the List of Products field to find products from your store
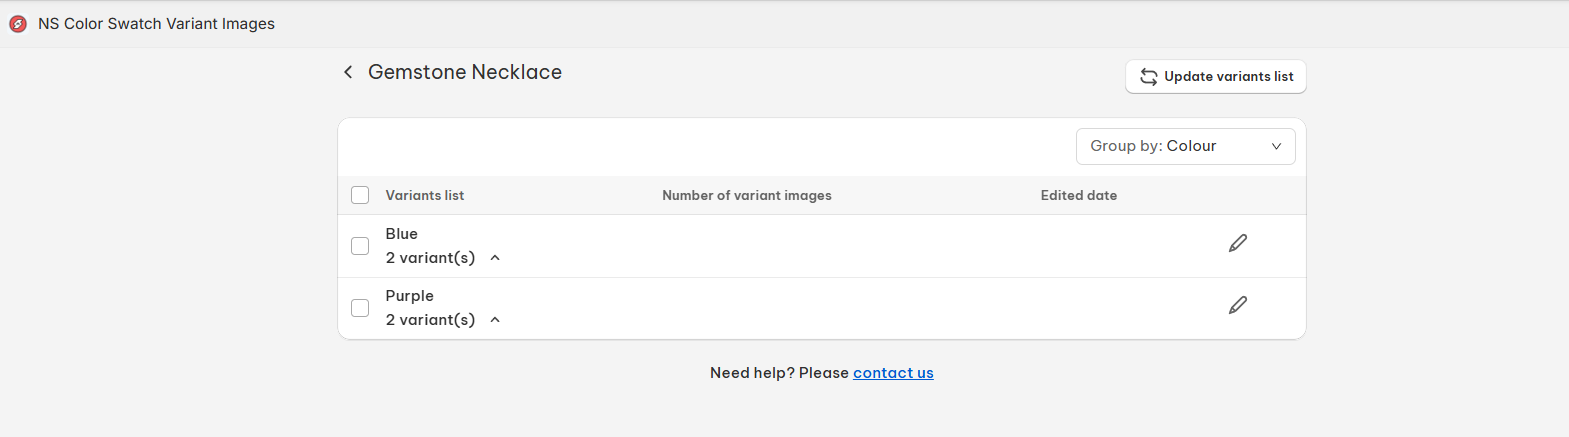
- After hitting on Confirm button, you will be redirected to the respective Product Variant Setting section including the following fields:
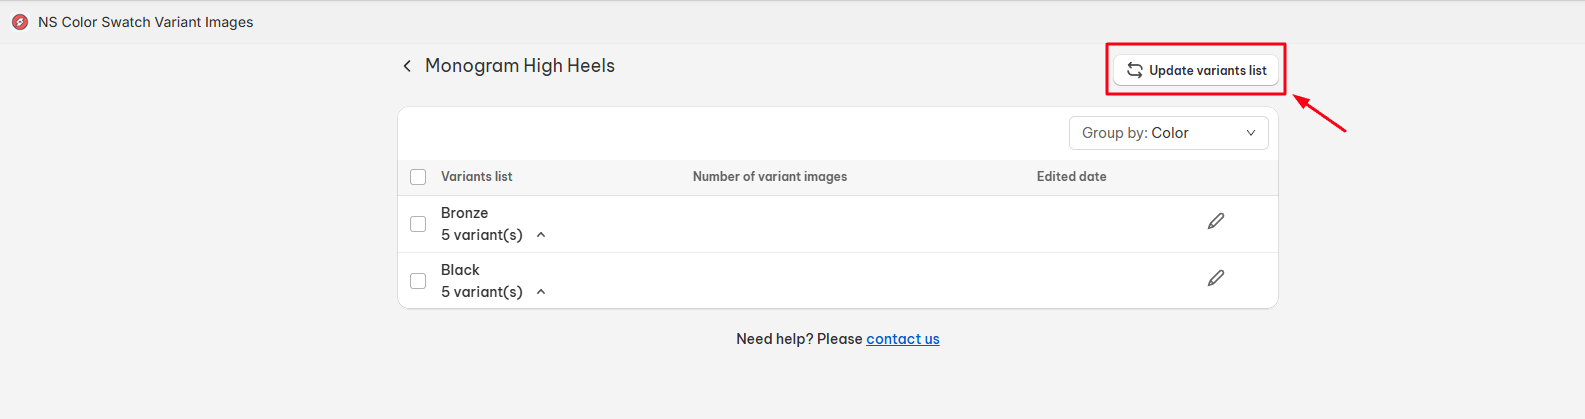
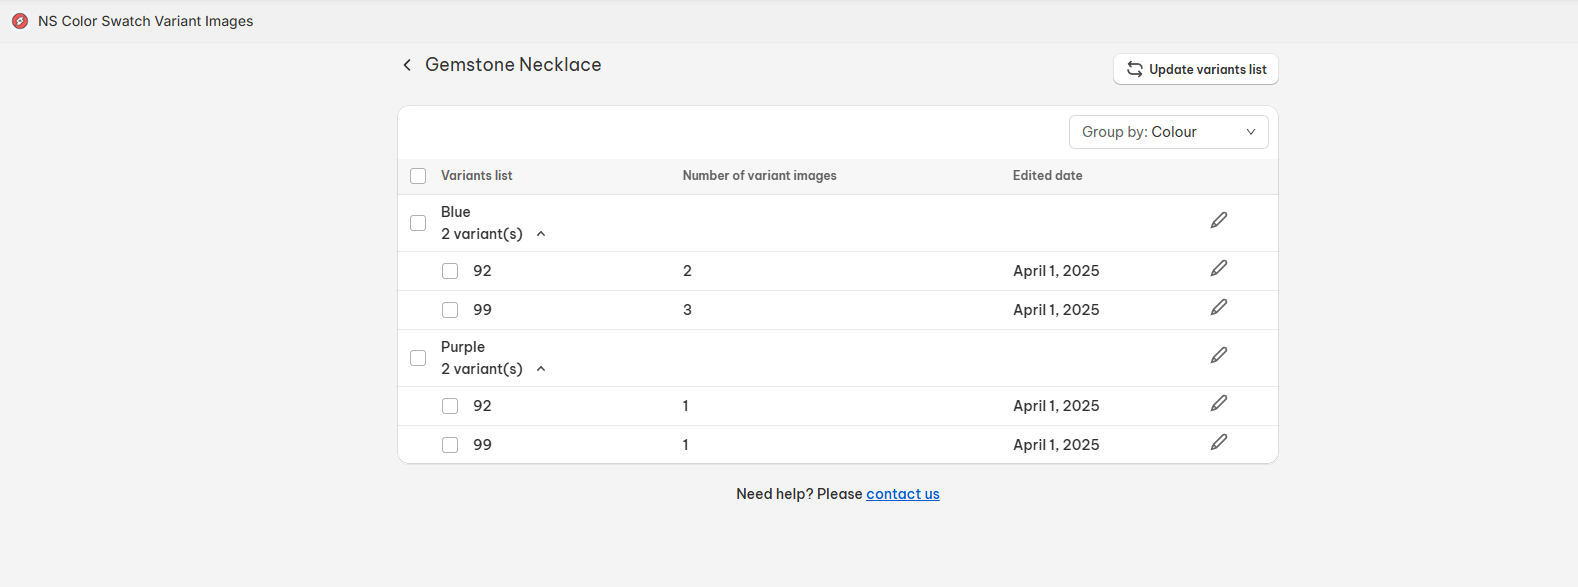
- Variants list: Displays all the variants of the selected option shown as “Group by: ”
- Number of variant images: Total number of images assigned to that variant
- Edited Date: The latest date of editing variant images
- Action: Open variants image list
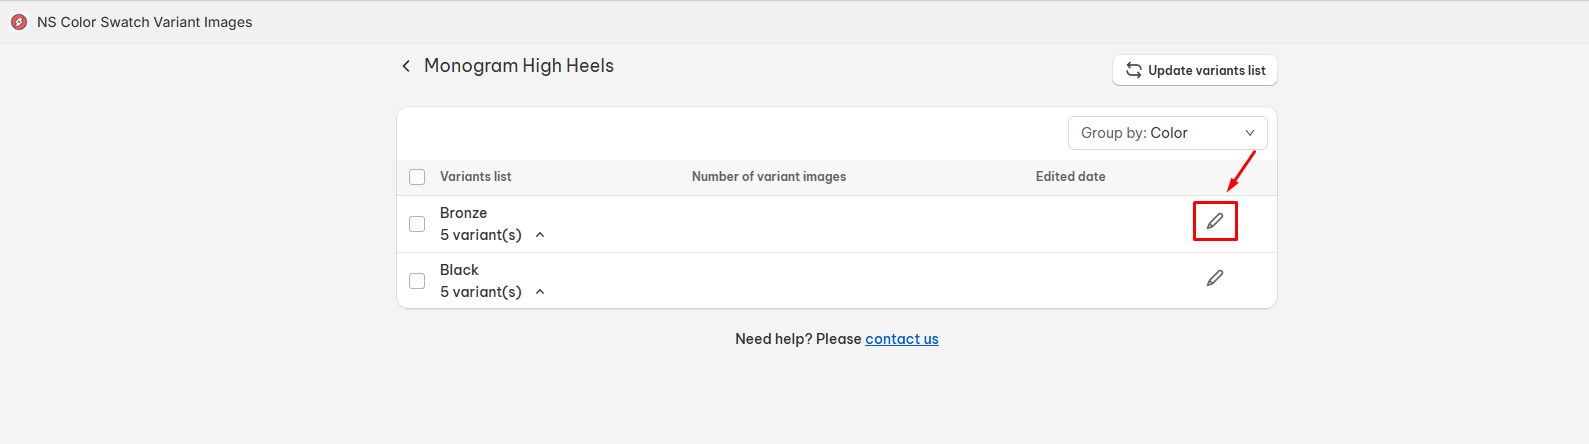
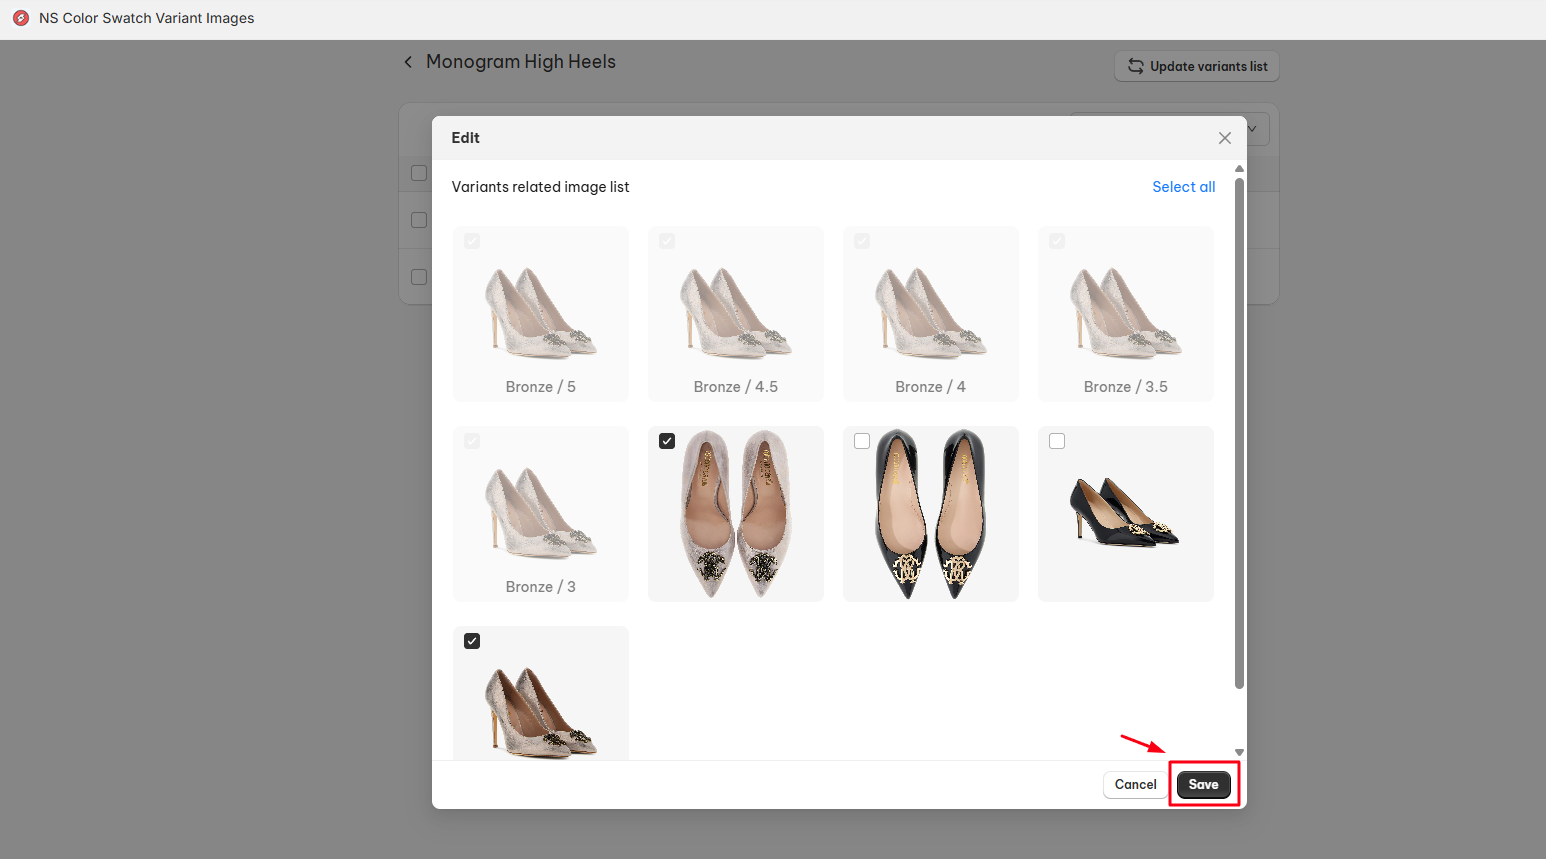
- Beside a variant, choose the Pencil button to edit the variant related images list:
- Bulk Edit: Assign images for both chosen single variants and their combined variants
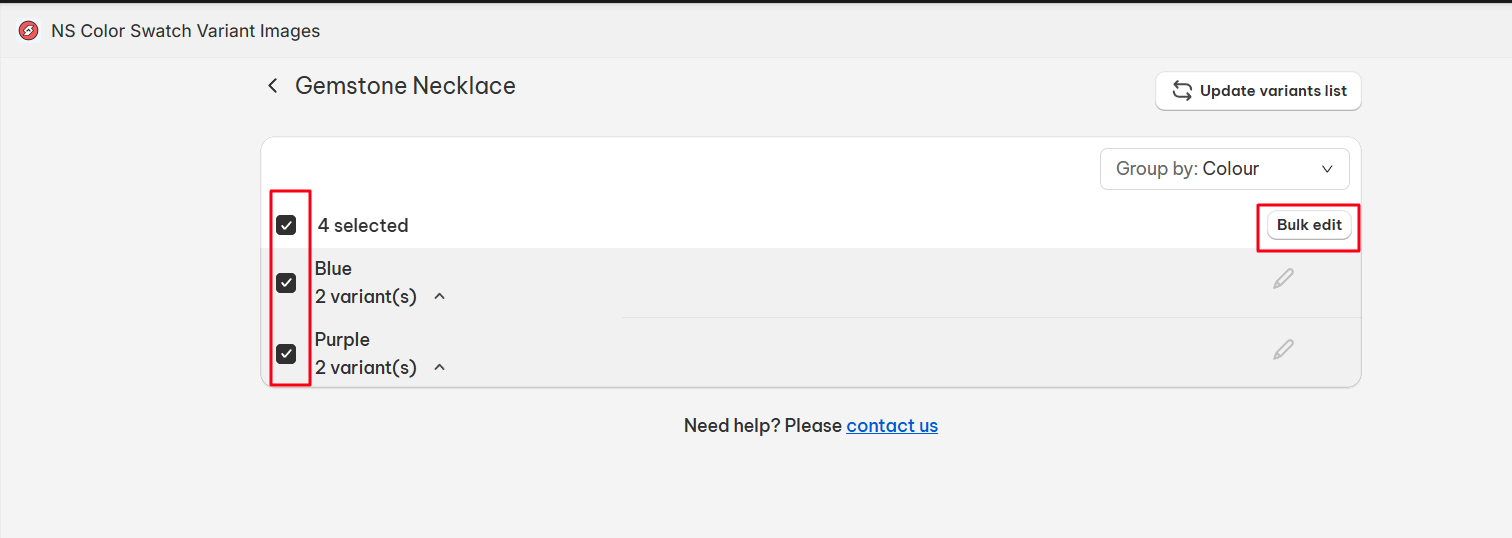
- Single Edit: Select specific images for each combined variant
- Inside the Edit box, tick all images you want to display for that variant > click the Save button
Note: Simply click on Update variants list button for the app to sync all the changes you made for your options/variants inside Shopify Admin during your use.
How To Edit Assigned Variant Images
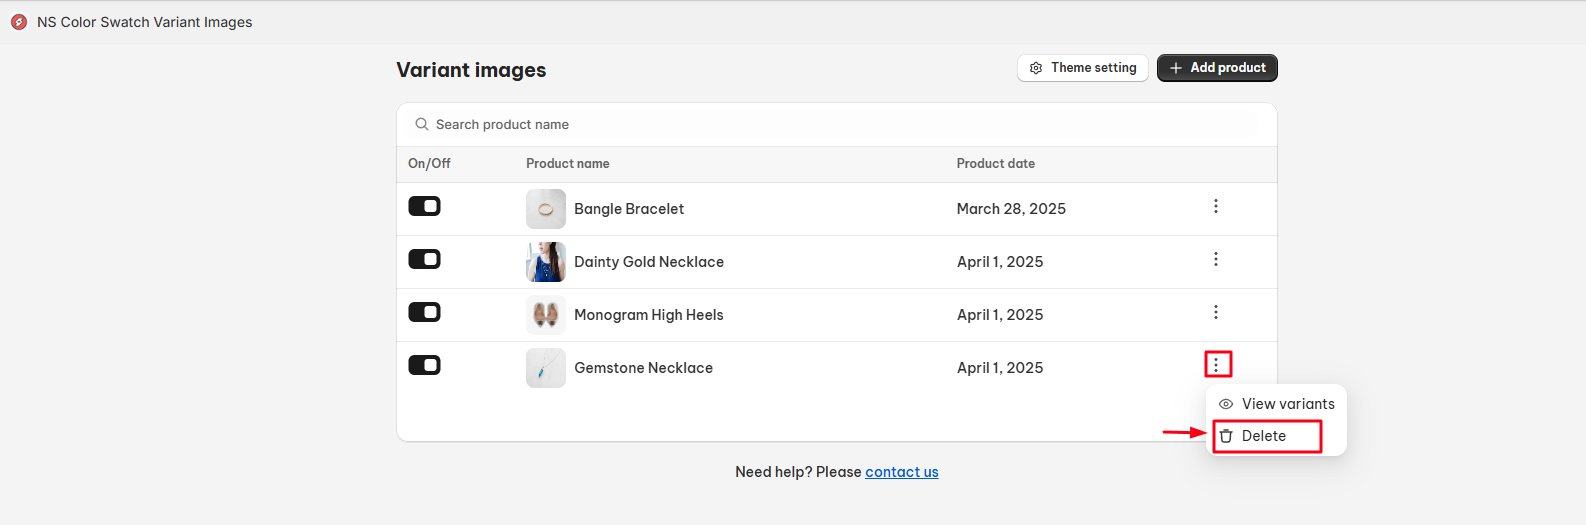
- To view assigned variant images, simply click on the product name or choose the Three dots icon beside this product > select View variants

2. In the Product Variant Settings page, make the changes you want and Save the process.
Note: Click on Update variants list and assign images for your variants in case you add more images for your products.
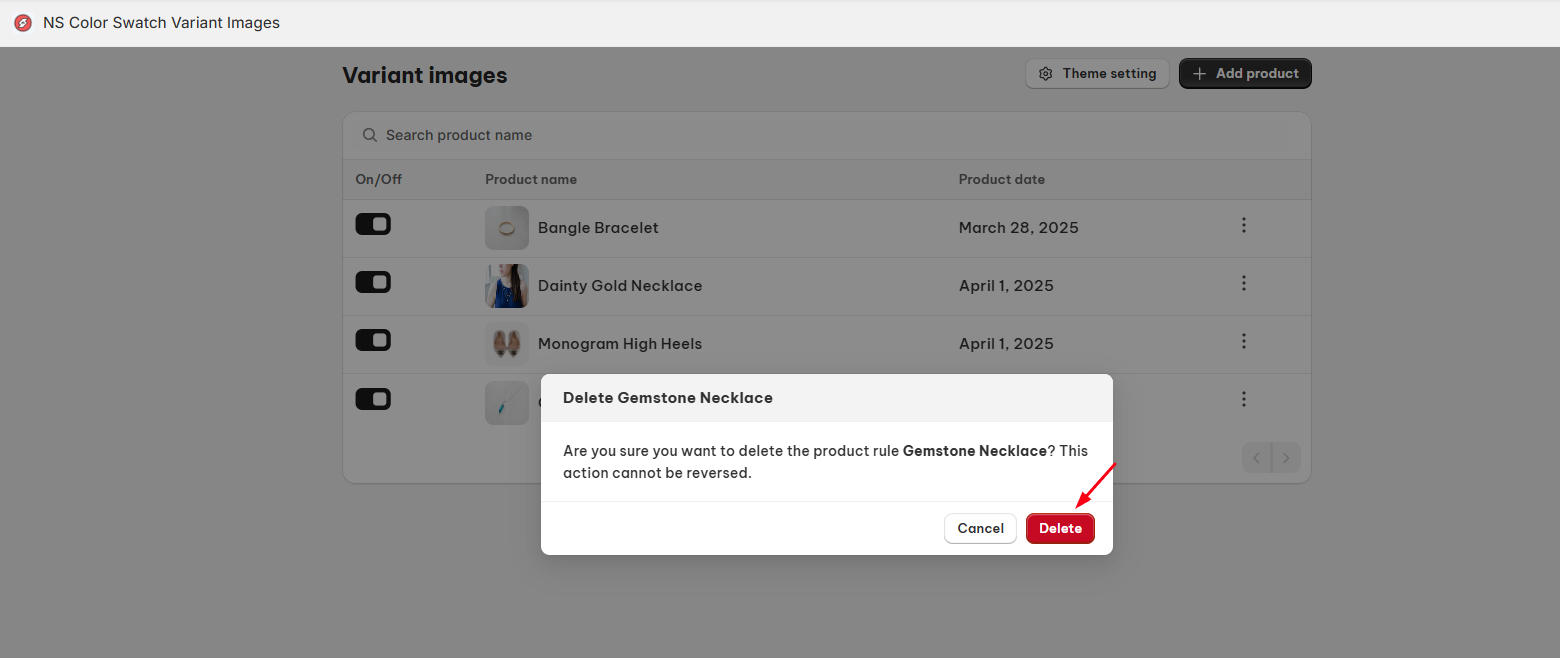
How To Delete Assigned Variant Images
1. To delete assigned variant images, click on the Three dots icon beside this product > select Delete > choose Confirm to complete.
2. In the Product Variant Settings page, make the changes you want and Save the process.
Need any help?
If you need any assistance with NS Product Variants, feel free to contact us via live chat in-app or email [email protected]. Our support team is happy to help