 NestAffiliate
  NestDesk
 NestScale Product Variants app enables you to customize the product variants with multiple styles to enhance the shopping experience.
In this user guide, you will learn how to set up the variant option style. Let’s get started!
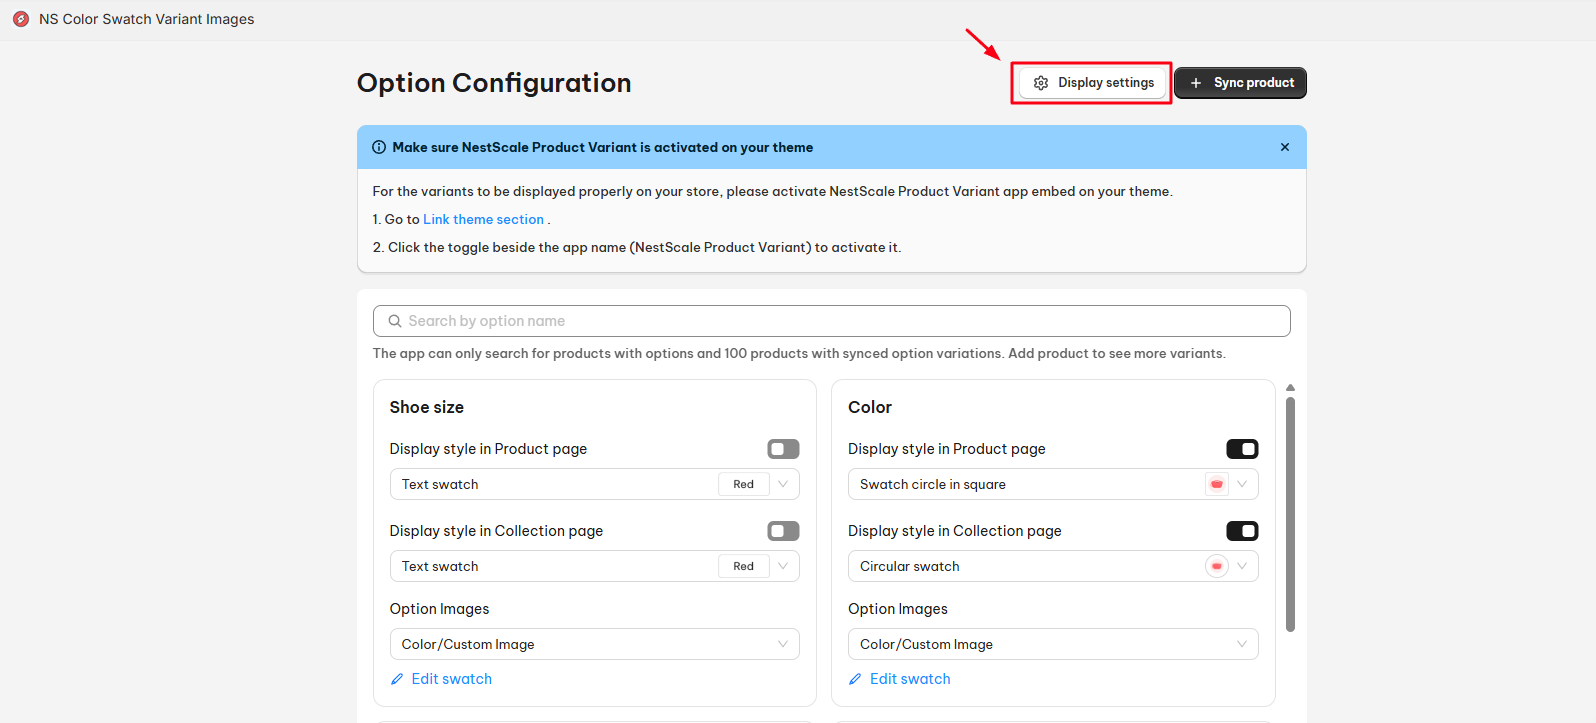
Overview: Option Configuration
The Option Configuration section is where you customize the style of your variant types.
Here, you can:
- Choose the shape and layout for your variant options.
- Display options as color swatches, images, or text.
⚠️ Note:
By default, the first 100 product variants are synced automatically in the app.
To apply the variant style setting for more products, please sync products manually. Follow the steps below:
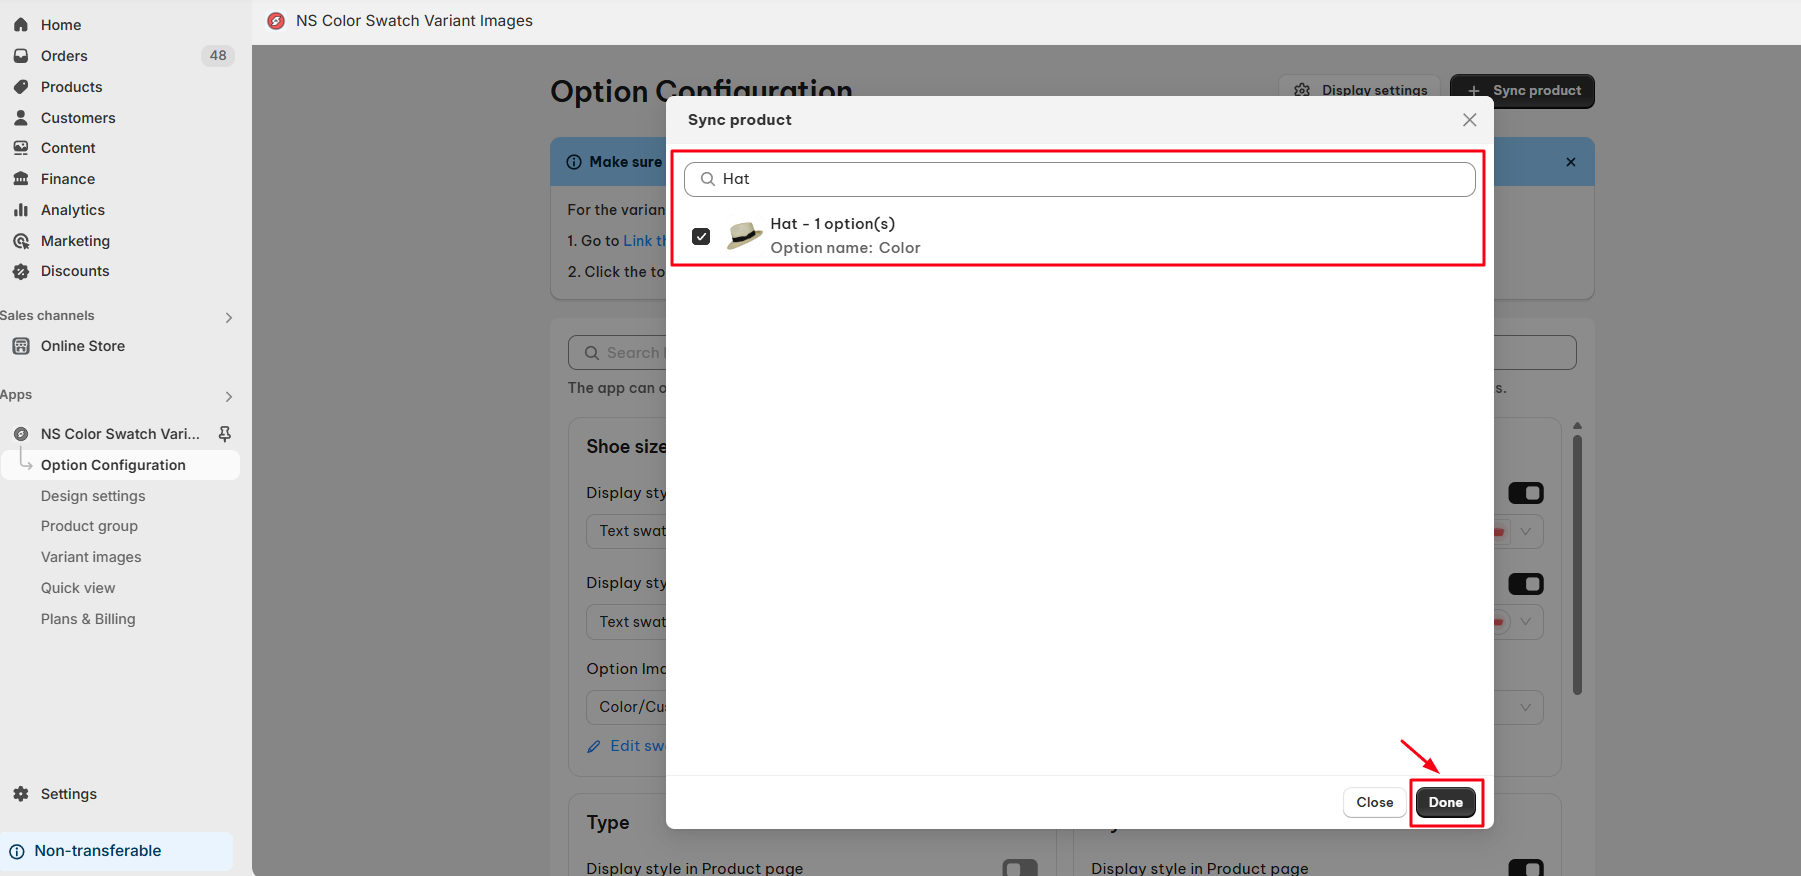
- Go to Option Configuration
- Click Sync Product (top right)
- Search for the product name > Select > Click Done
Your variant style will now be applied to the newly synced items.
How to Configure Variant Style
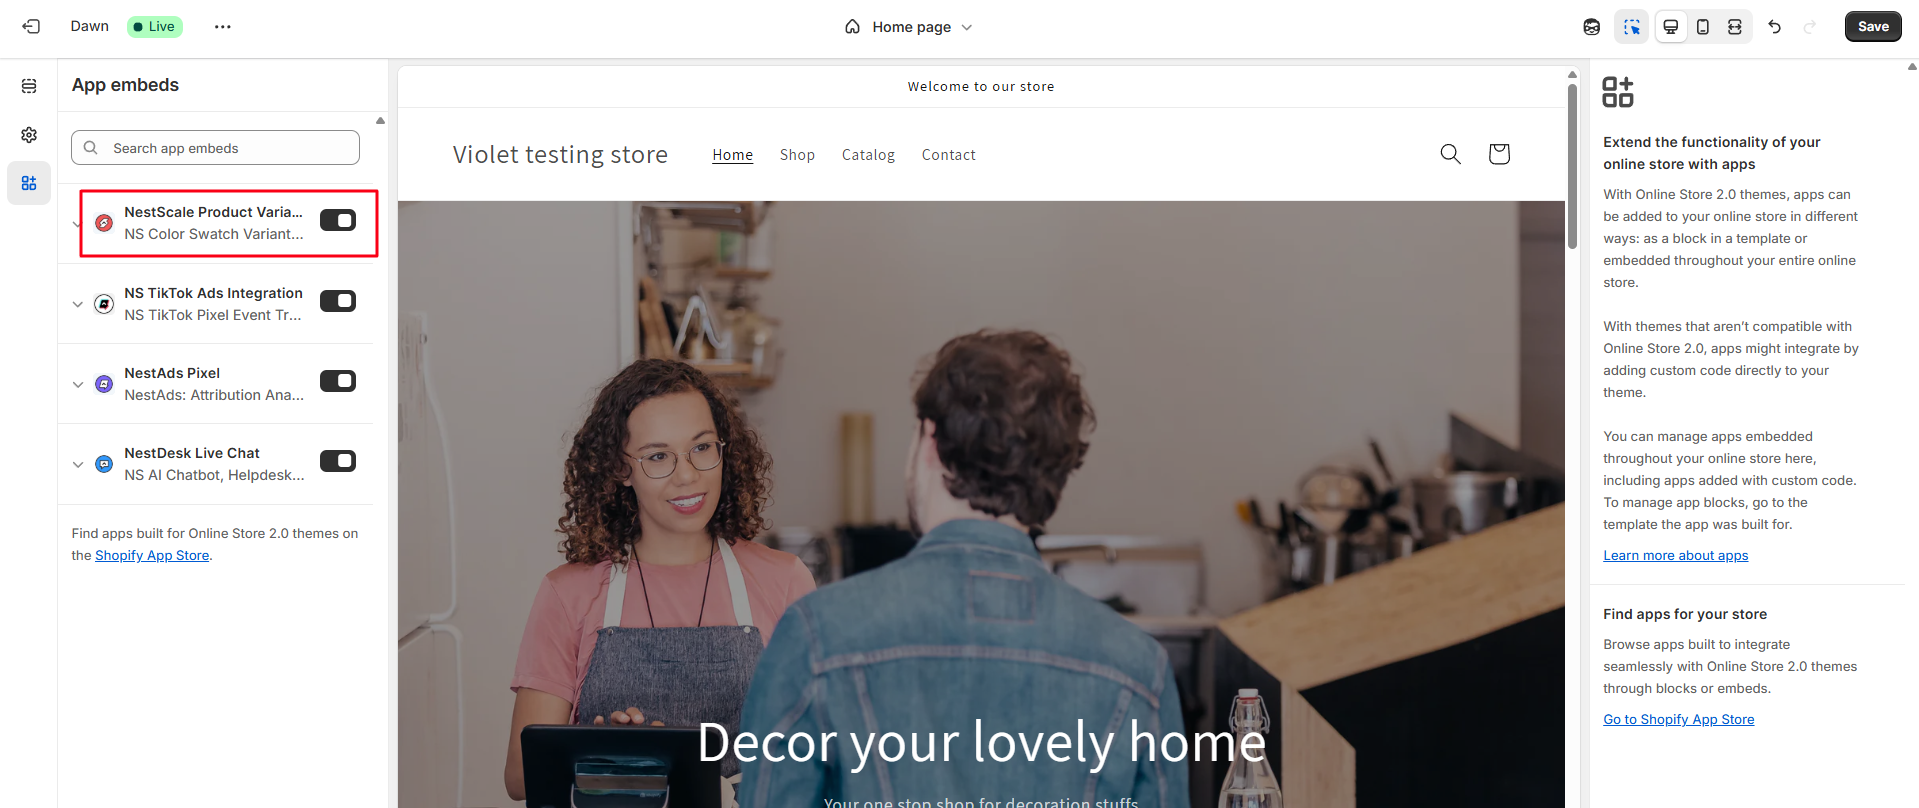
Step 1: Enable NestScale App Embeds on Shopify Theme Editor
- Go to Online Store > Theme > click Customize button
- On the left sidebar, toggle on NestScale Product Variants app embeds
- Click Save button in the top right corner
Step 2: Select Display Style
In the Option Configuration dashboard, choose how to display each variant type (e.g. Size, Origin, Color, Style, Material).
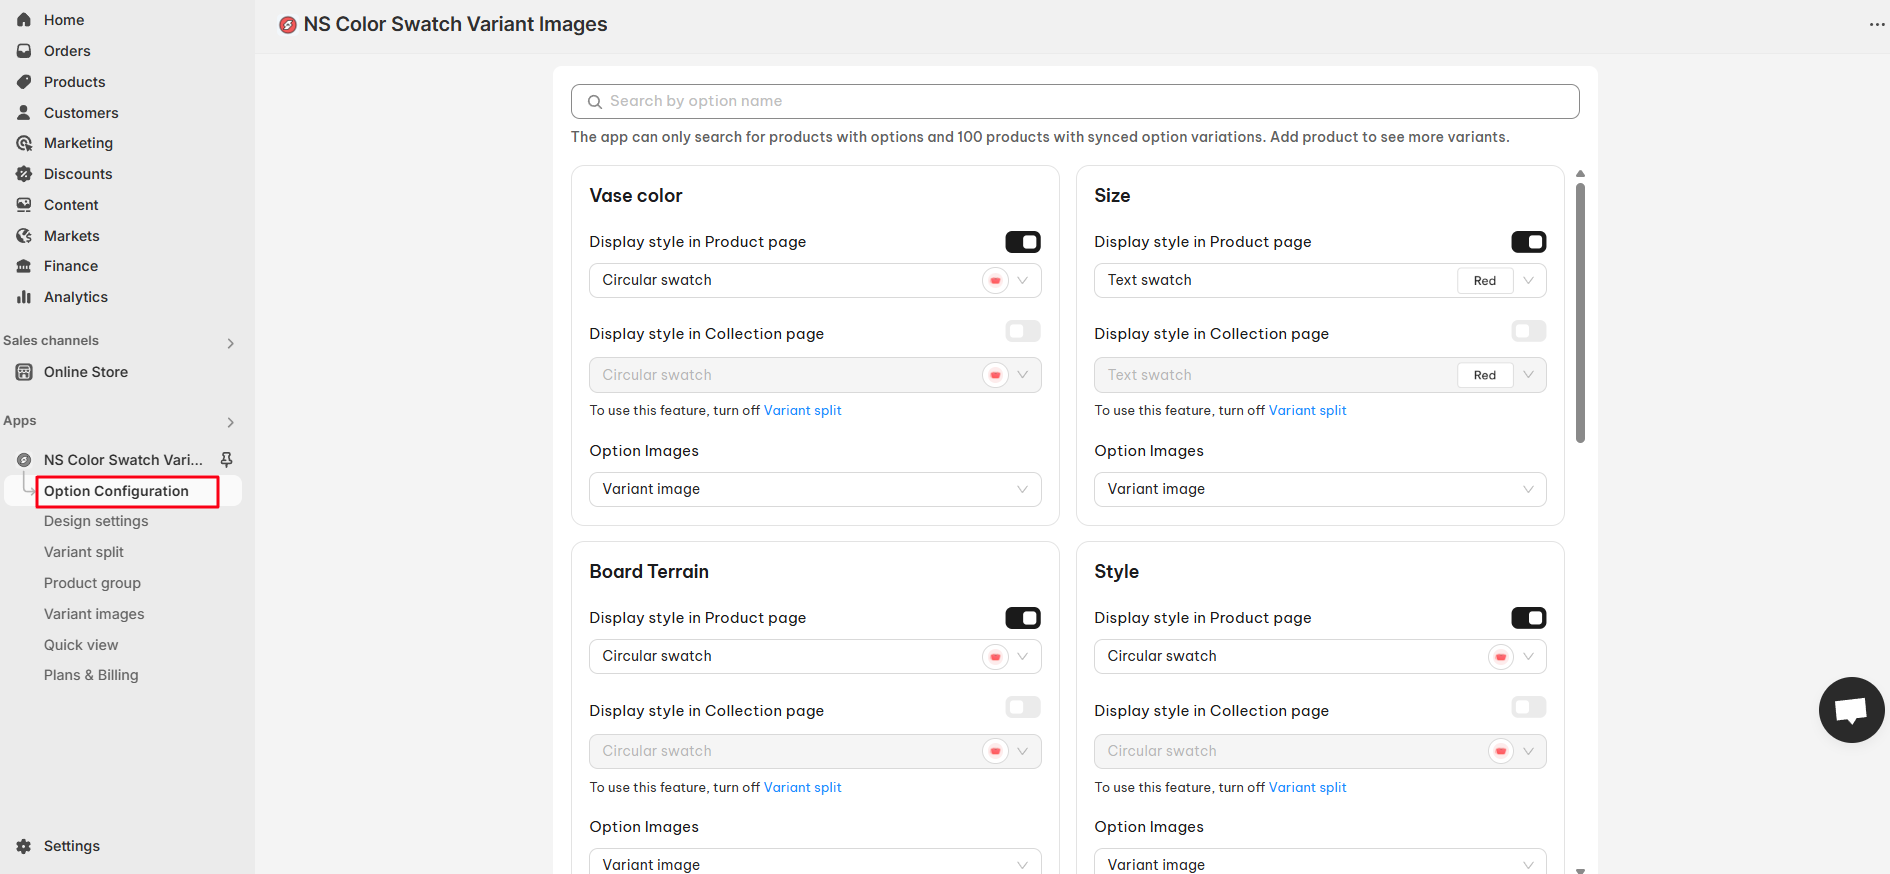
For each variant type, set up the Display Style and Option Images.
Display Style on Product page includes:
- Swatch circle in square
- Swatch in box
- Swatch in dropdown
- Circular swatch
- Square swatch
- Swatch in pill
- Text swatch
Display Style in Collection page includes:
- Swatch circle in square
- Circular swatch
- Square swatch
- Text swatch
✅ Toggle ON to activate your selected style on each page.
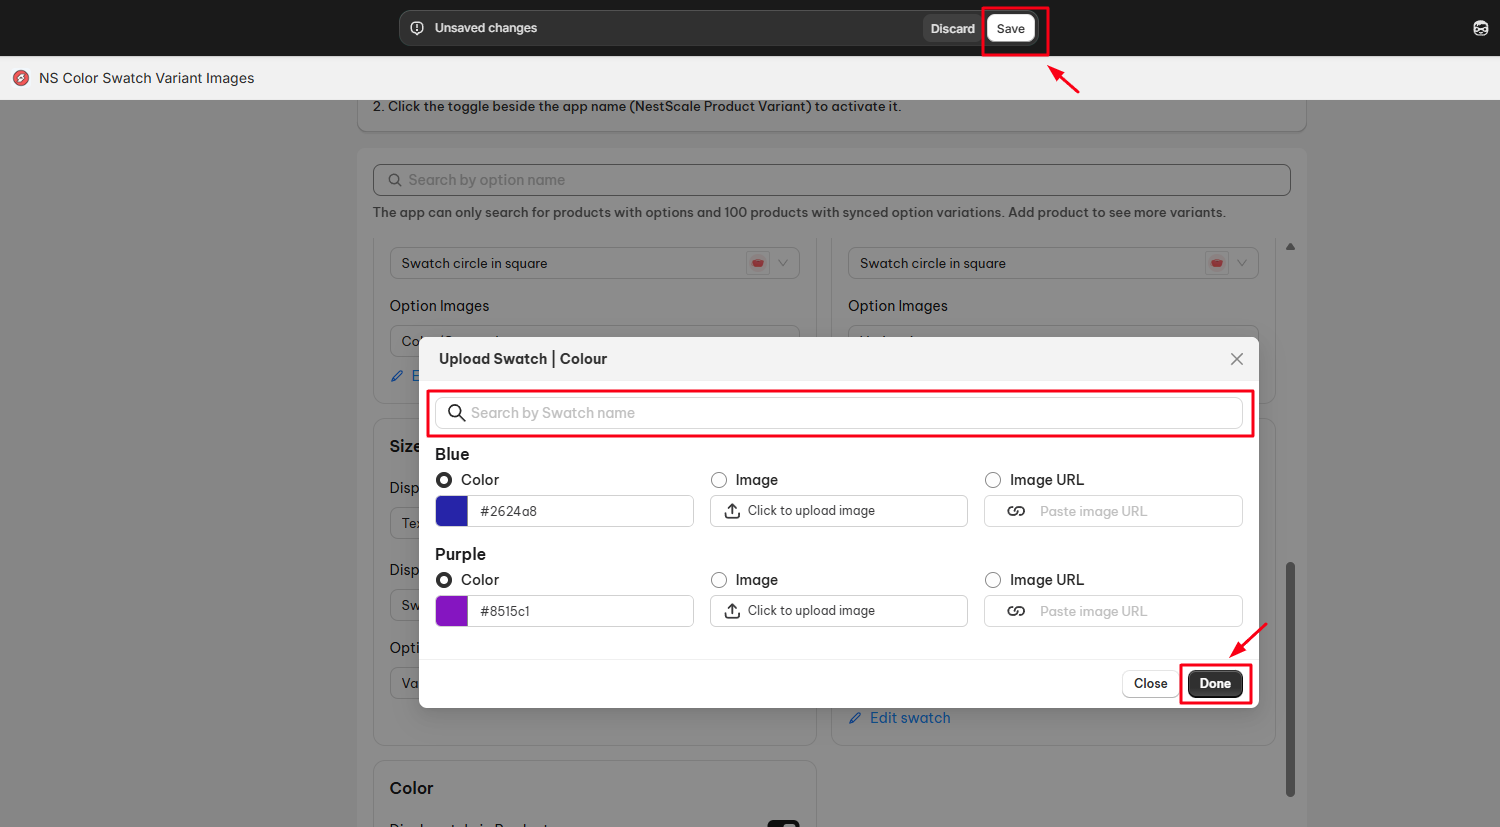
Step 3: Add Option Images
For Option Images, you can choose from the following:
- Variant image: Automatically uses the primary variant image as the swatch.

- Color/custom image: Assign a color code or upload a custom image per variant.

How to apply:
- Search and select the swatches you want to edit
- Set a color code or upload a custom image
- Click Done
- Don’t forget to Save at the top!
That’s all set!
You can now view the product variants on your website to verify that the app is working correctly.
Note: If the variants don’t appear as configured in the app, please reach out to our support team via the in-app live chat or email us at [email protected]. We’re here to help and will assist you as quickly as possible!
How to Reorder Active and Inactive Variants?
You can reorder variant display based on availability:Click on Display Settings (next to the search bar).
- Click on Display Settings (next to the search bar)
2. There are 2 options to choose from
- Active swatch above inactive swatch (default)
- Active swatch below inactive swatch
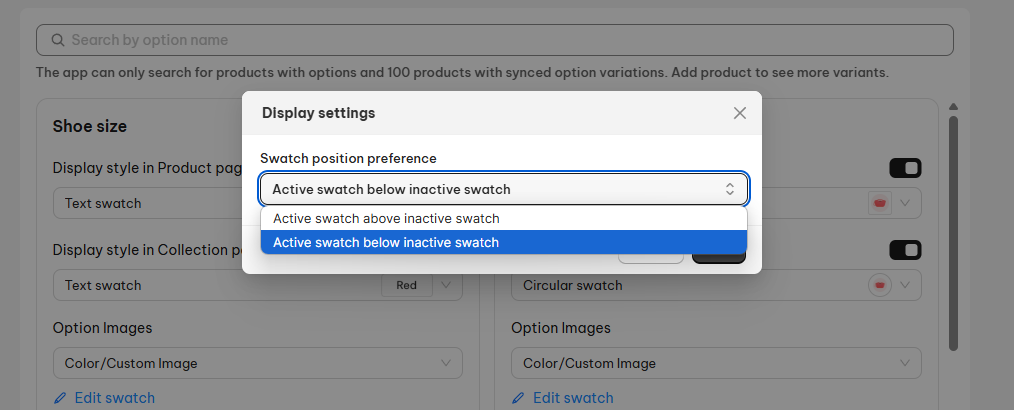
3. Click Apply
That’s done! These simple steps can help you personalize your visual layout with ease.
If you would like to customize your variant option design in more detail, check out the following guidelines.
> How To Custom Swatch Display On Product Page
> How To Custom Swatch Display On Collection Page
Want to have a quick app walkthrough demo?
Need any help?
Please contact our support team via live chat or email at [email protected]. We are happy to help you as soon as possible!