The Product Rule function in NS Estimated Delivery Date allows managing different delivery dates at the Product Level by setting specific delivery timelines based on individual items in your store.
Priority of Rule Levels: Product > EDD Collection > Shopify Collection > Global
In this post, you will learn how to create and manage Product Rule. Let’s get started now!
How to create a Product Rule?
Creating a Product Rule in NS Estimated Delivery Date to display delivery dates for specific products, overriding the other settings applied to the rest of your inventory.
This feature is particularly useful when certain items require different preparation or delivery timelines.
- Log into the app settings > navigate to Product rules section > hit on + Add product rule

- From Create product rule Dashboard, complete 3 steps below:
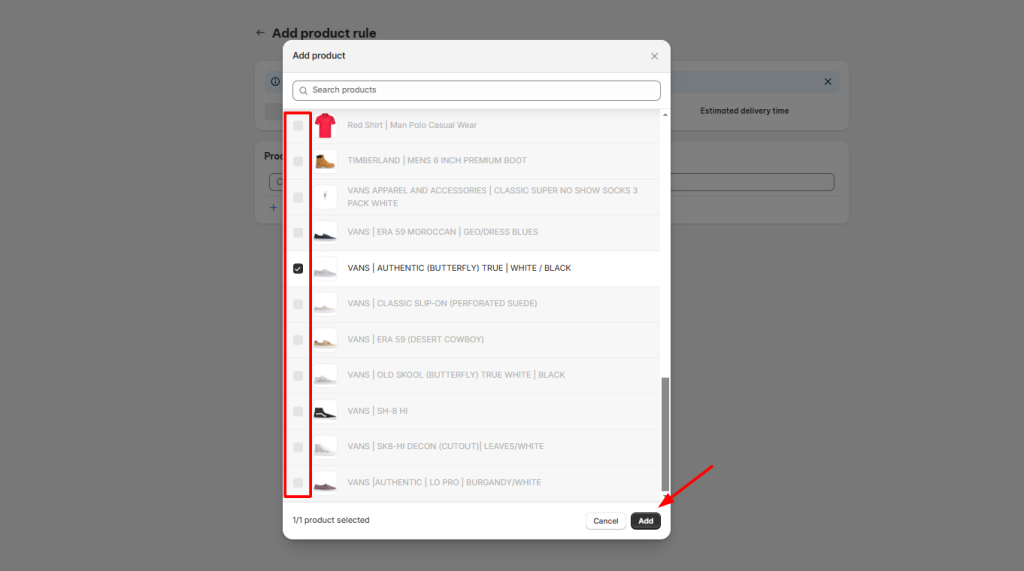
Step 1: Select the product
- Tick on the product you want to set up the estimated date (You can choose one product for each rule)
- Hit on Add button

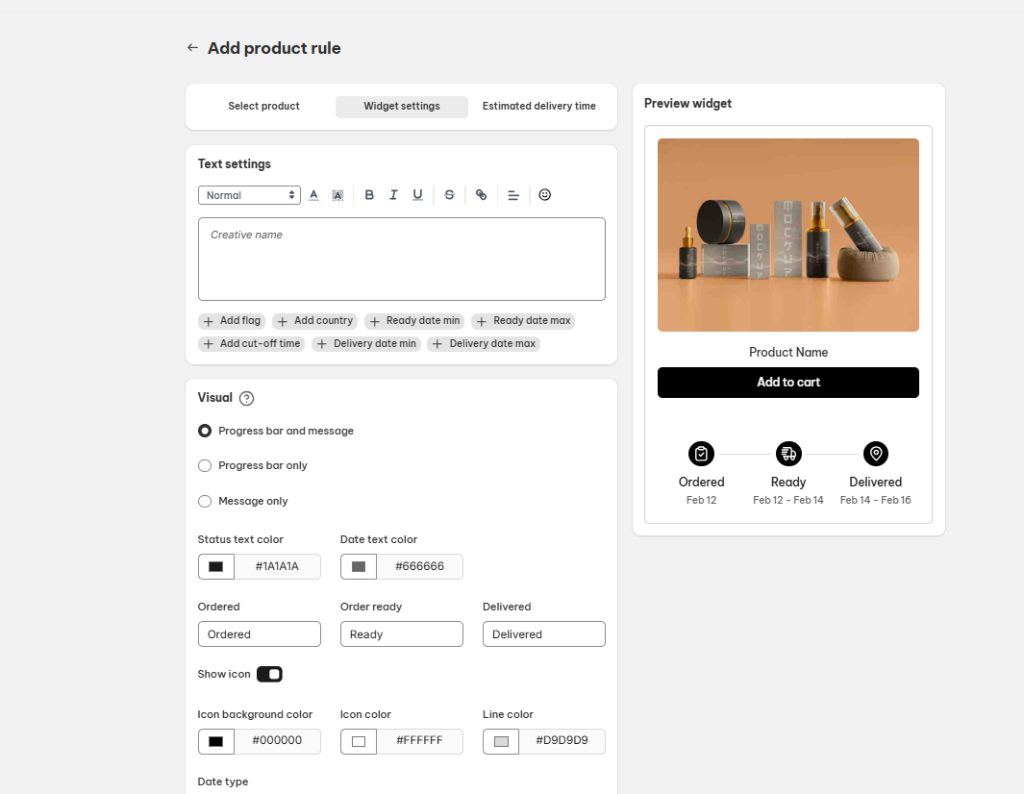
Step 2: In Widget settings
- Configure your Widget Look through 6 sections:
- Text settings
- Visual
- Padding
- Date format
- Timezone Setting
- Out of stock messages
>> Read more: How to customize your EDD Widget
- Click on Estimated delivery time to switch to step 3

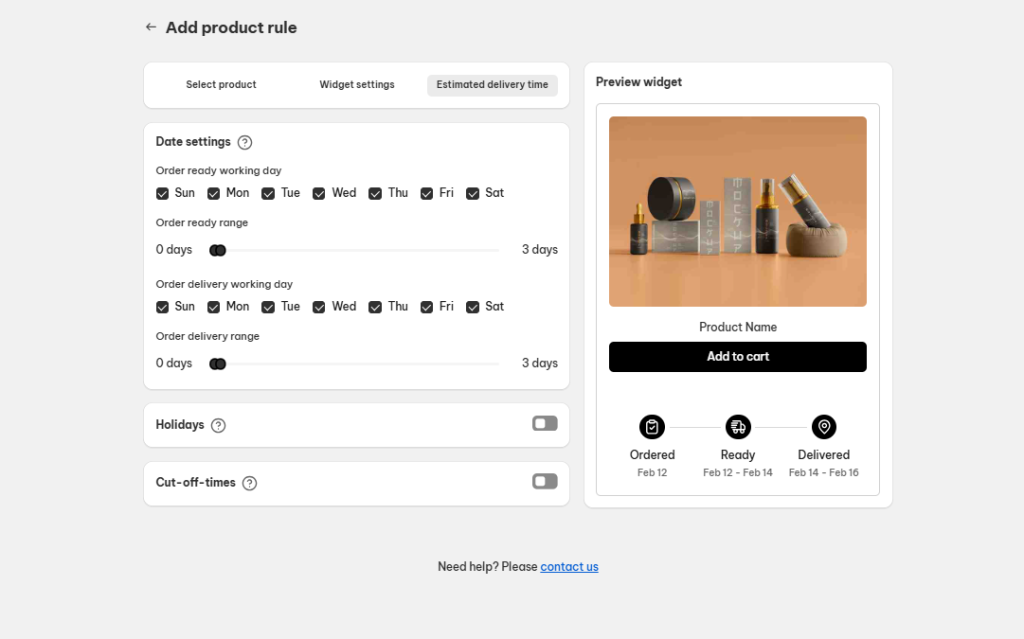
Step 3: Estimated delivery time
- Set up your estimated delivery date through 3 sections:
- Date settings
- Holidays
- Cut-off-times
>> Read more: Setting up product estimated delivery dates
- Choose Confirm

- After completing 3 steps, click on Save button at the top screen:

How to manage your Product Rules?
View On Store
You can navigate directly to the Product Page of the newly created rule for checking the Delivery Date Widget:
- Click on the three dots icon beside a Product Rule > choose View on store

Edit Product Rule
- Click on the three dots icon beside a Product Rule > choose Edit

- Adjust information inside the 2 sections:
- Widget settings
- Estimated delivery time


- Click on Save button on the top right to save the changes.

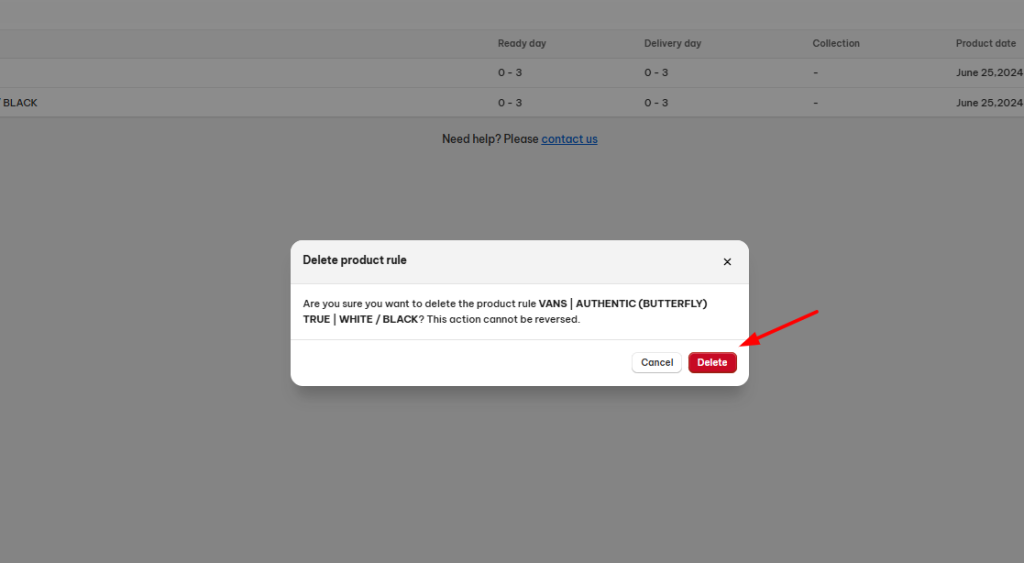
Delete Product Rule
- Click on the three dots icon besides a Product Rule > choose Delete
- Hit the Confirm button from the delete confirmation pop-up


Need any help?
If you need any assistance with NS Product Variants, feel free to contact us via live chat in-app or email [email protected]. Our support team is happy to help!
 NestAds
  NestAffiliate
  NestDesk
  NestScale Bundles & Discounts
  NestScale Product Variants
  NestSend
  NestWidget