 NestAffiliate
  NestDesk
  NestScale Product Variants
 Welcome to NS Estimated Delivery Date. We are glad to have you onboard!
This post includes all the basic steps to help you get up and running fast with NS Estimated Delivery Date. Let’s get started now!
NS Estimated Delivery Date Onboarding Process
Once you’ve installed NS Estimated Delivery Date app successfully, follow these steps to complete the onboarding process.
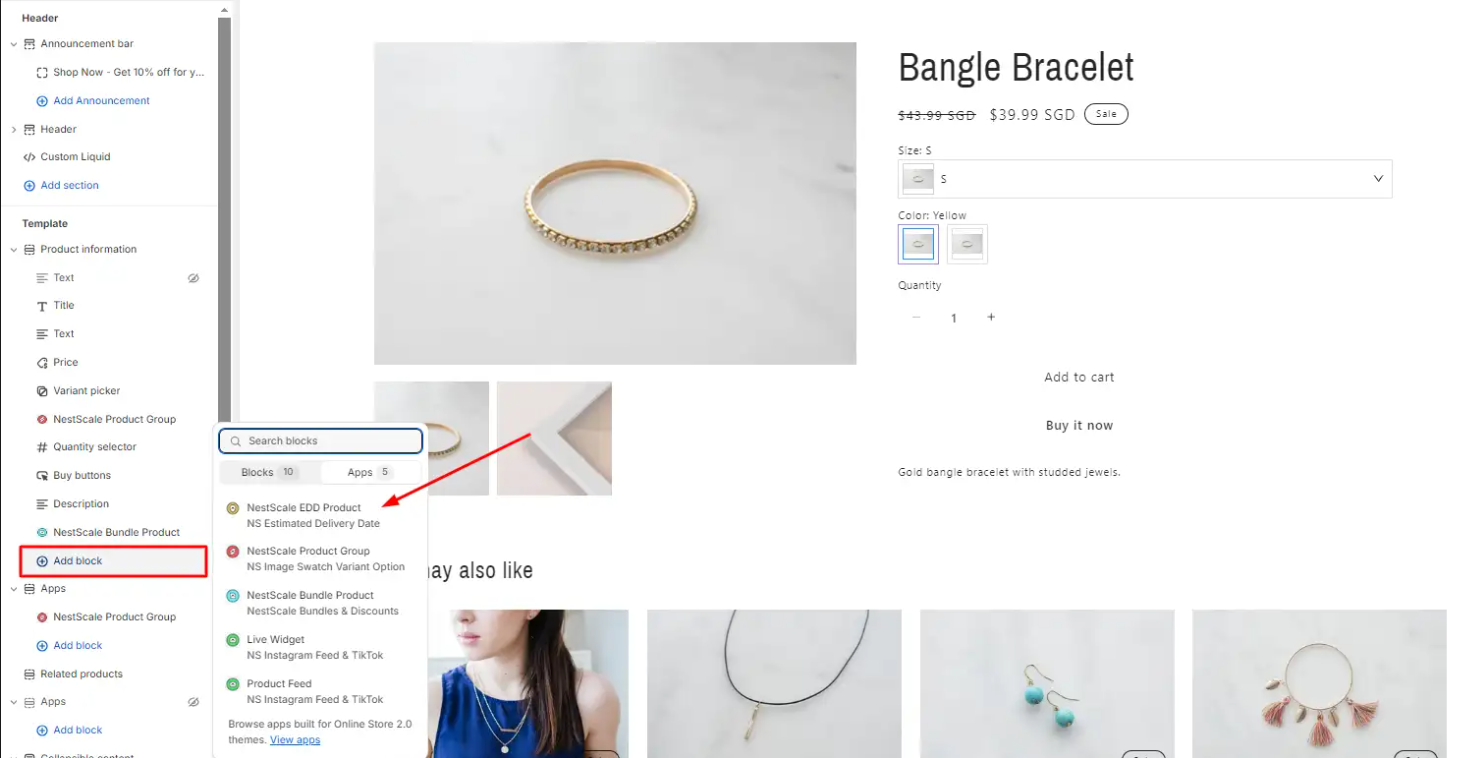
Step 1: Add the app block to your store theme.
- In your Shopify store theme editor, switch to Products > select Default product section
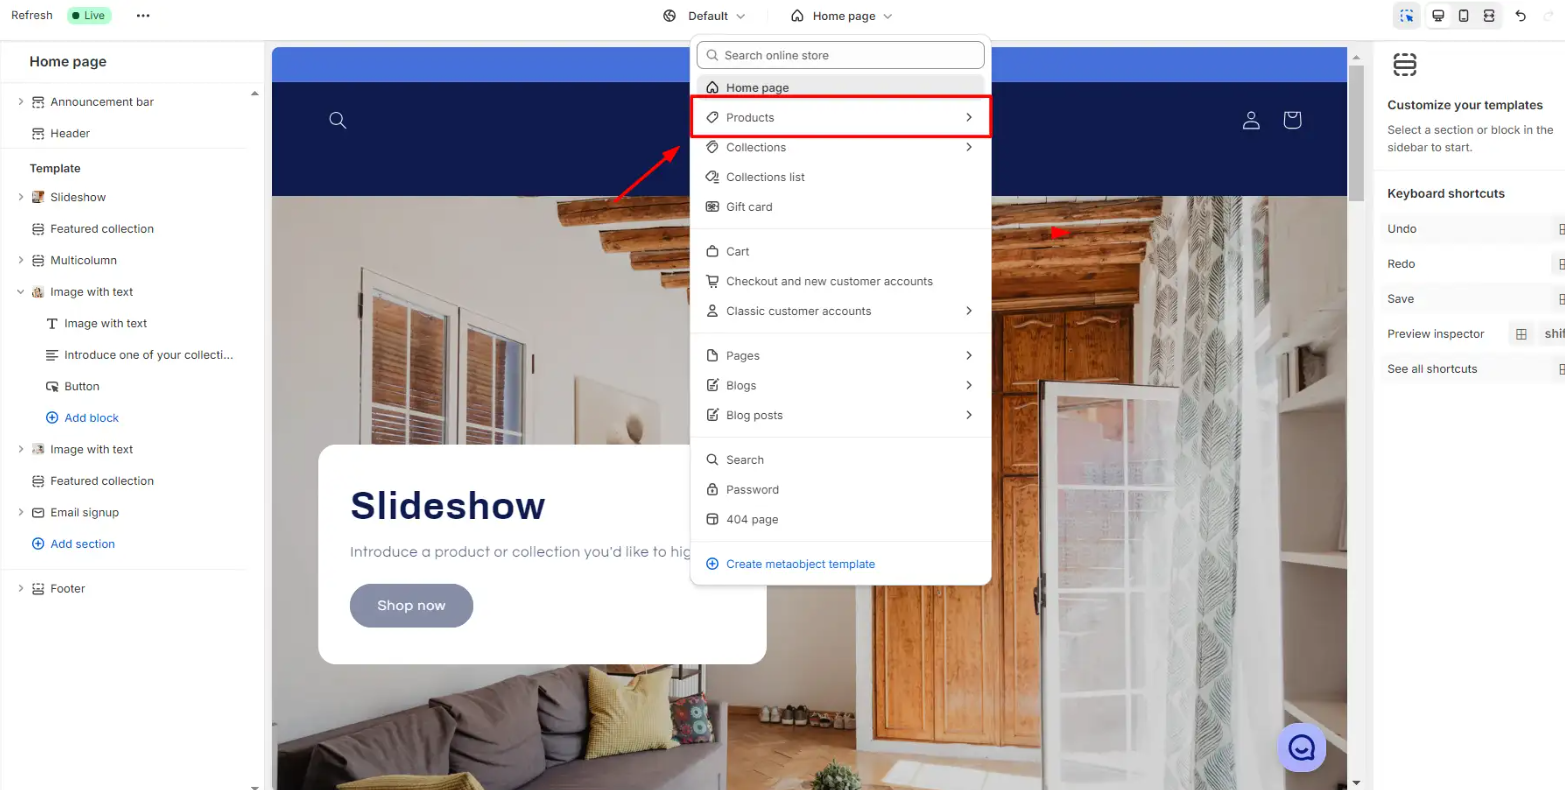

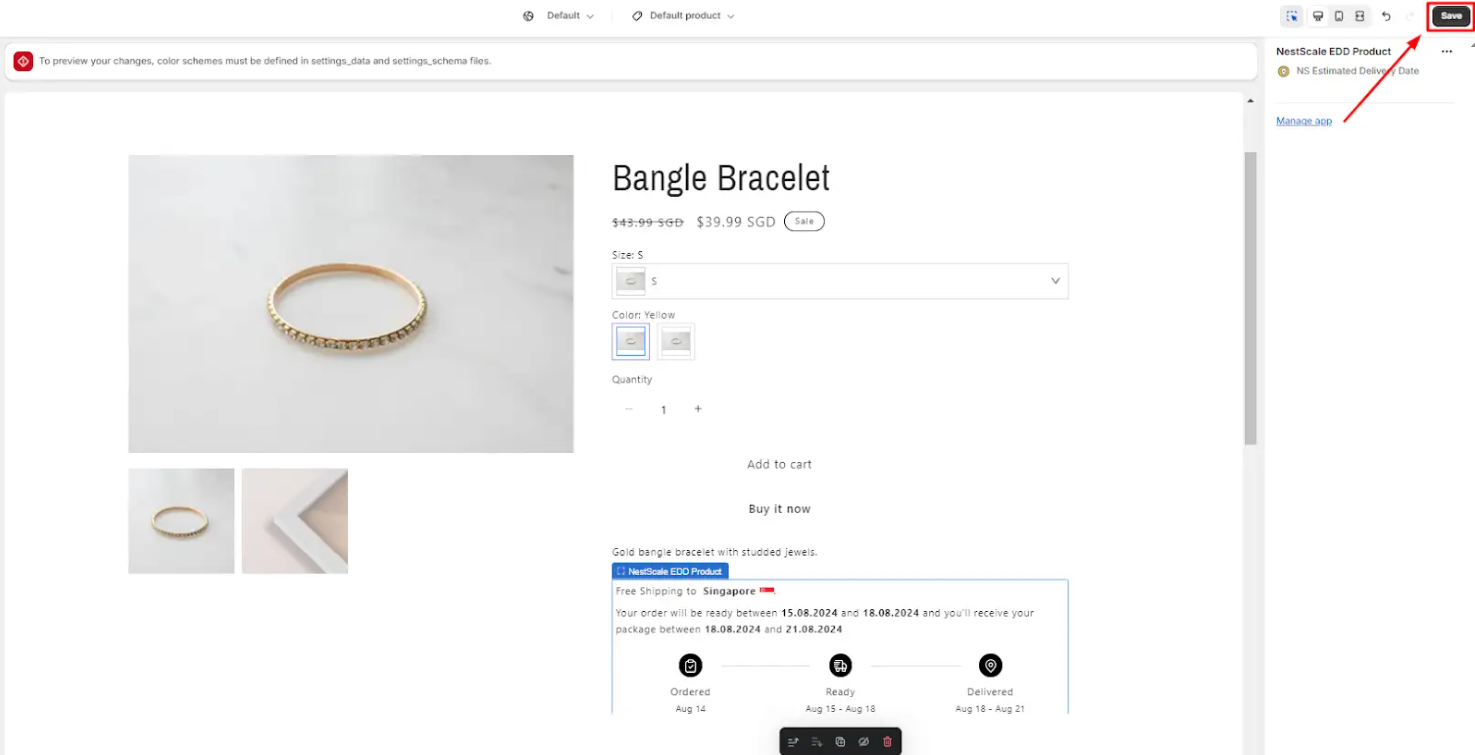
- On the left sidebar, click on Add block > select NS Estimated Delivery Date
- Click on the Save button to complete embedding
Note: You can adjust the position of the delivery message widget on your Product page
Note: Make sure your theme is updated to the latest version to ensure full compatibility with the NS Estimated Delivery Date app.
Step 2: Set Up Estimated Delivery Dates – Global Rules
Let’s configure the estimated delivery time for all products across your store.
- Go to Global Rules
- In the Widget Settings tab, you can customize:
- Text settings
- Visual appearance
- Padding
- Date format
- Timezone settings
- Out-of-stock messages
- In the Estimated Delivery Time tab, you can configure:
- Date settings
- Holidays
- Cut-off time (available on paid plans)
👉 Important: Be sure to click the Save button at the top of the page after finishing your setup on each tab.
For step-by-step guidance, visit: Setting Up Product Estimated Delivery Dates
That’s it! Your delivery date widget will now appear on your product pages.
Want to unlock more advanced features?
Upgrade to a paid plan to access:
- Product Rules – Set delivery times by individual product
- Collection Rules – Set delivery times by collection
- Delivery Country – Set delivery times by destination country
- Language Configuration – Translate the widget into multiple languages
📌 Learn more: Billing & Plan Information
Need any help?
If you need any assistance with NS Estimated Delivery Date, feel free to contact us via live chat in-app or email [email protected]. Our support team is happy to help