 NestAffiliate
  NestDesk
  NestScale Product Variants
 In this guide, we’ll walk you through how to set a default template in NS Order Printer PDF Invoice app. Let’s dive in!
How to Set a Default Template
Step 1: Install the App
Make sure you have the NestScale Order Printer PDF Invoice app installed on your Shopify store.
Step 2: Set a Default Template
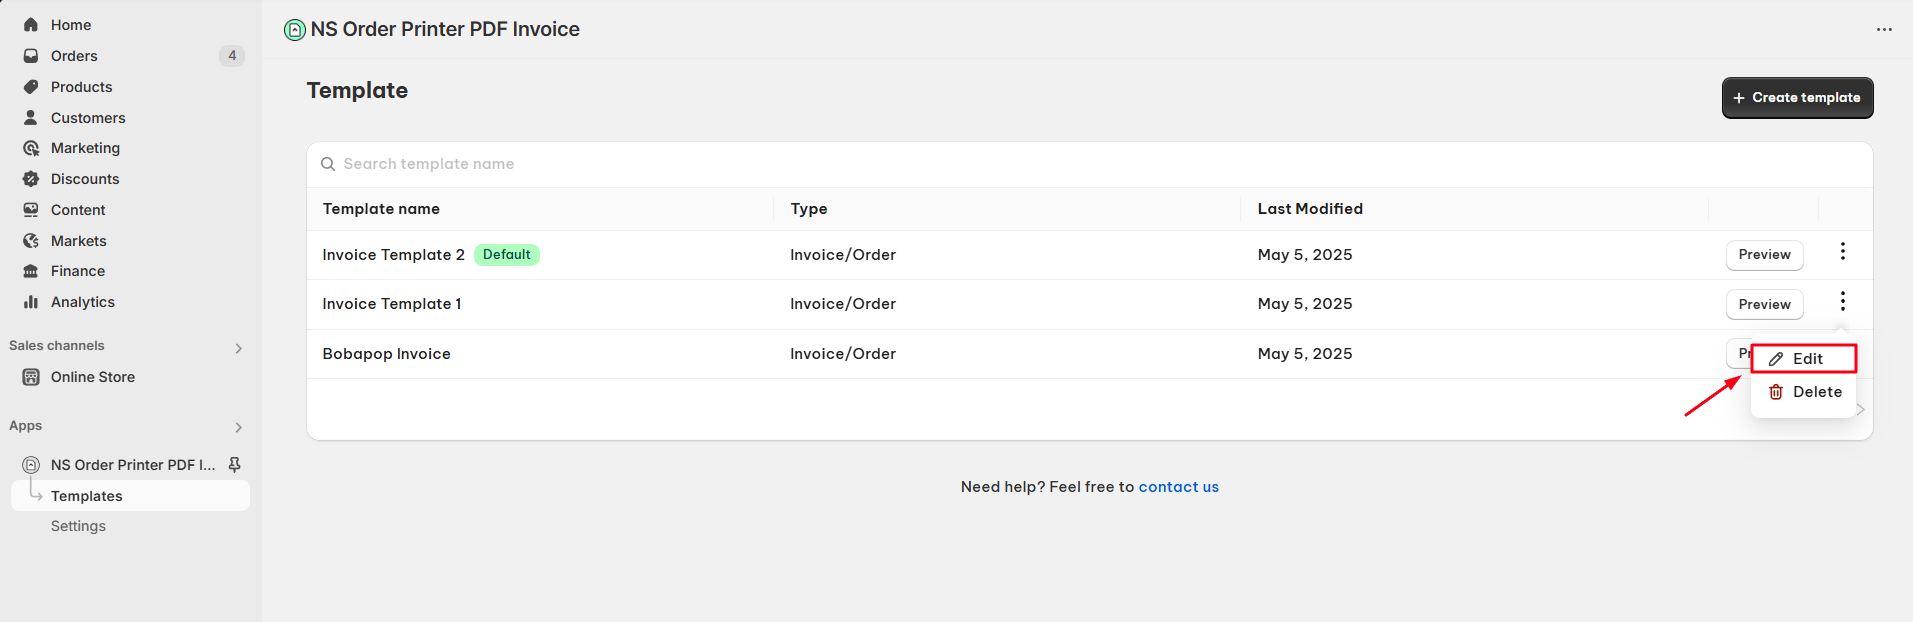
- Navigate to the Templates section.
- Browse the list and select the template you want to set as default.
- Click the three-dot icon next to the template > select Edit.
- Check the box “Use as default”.
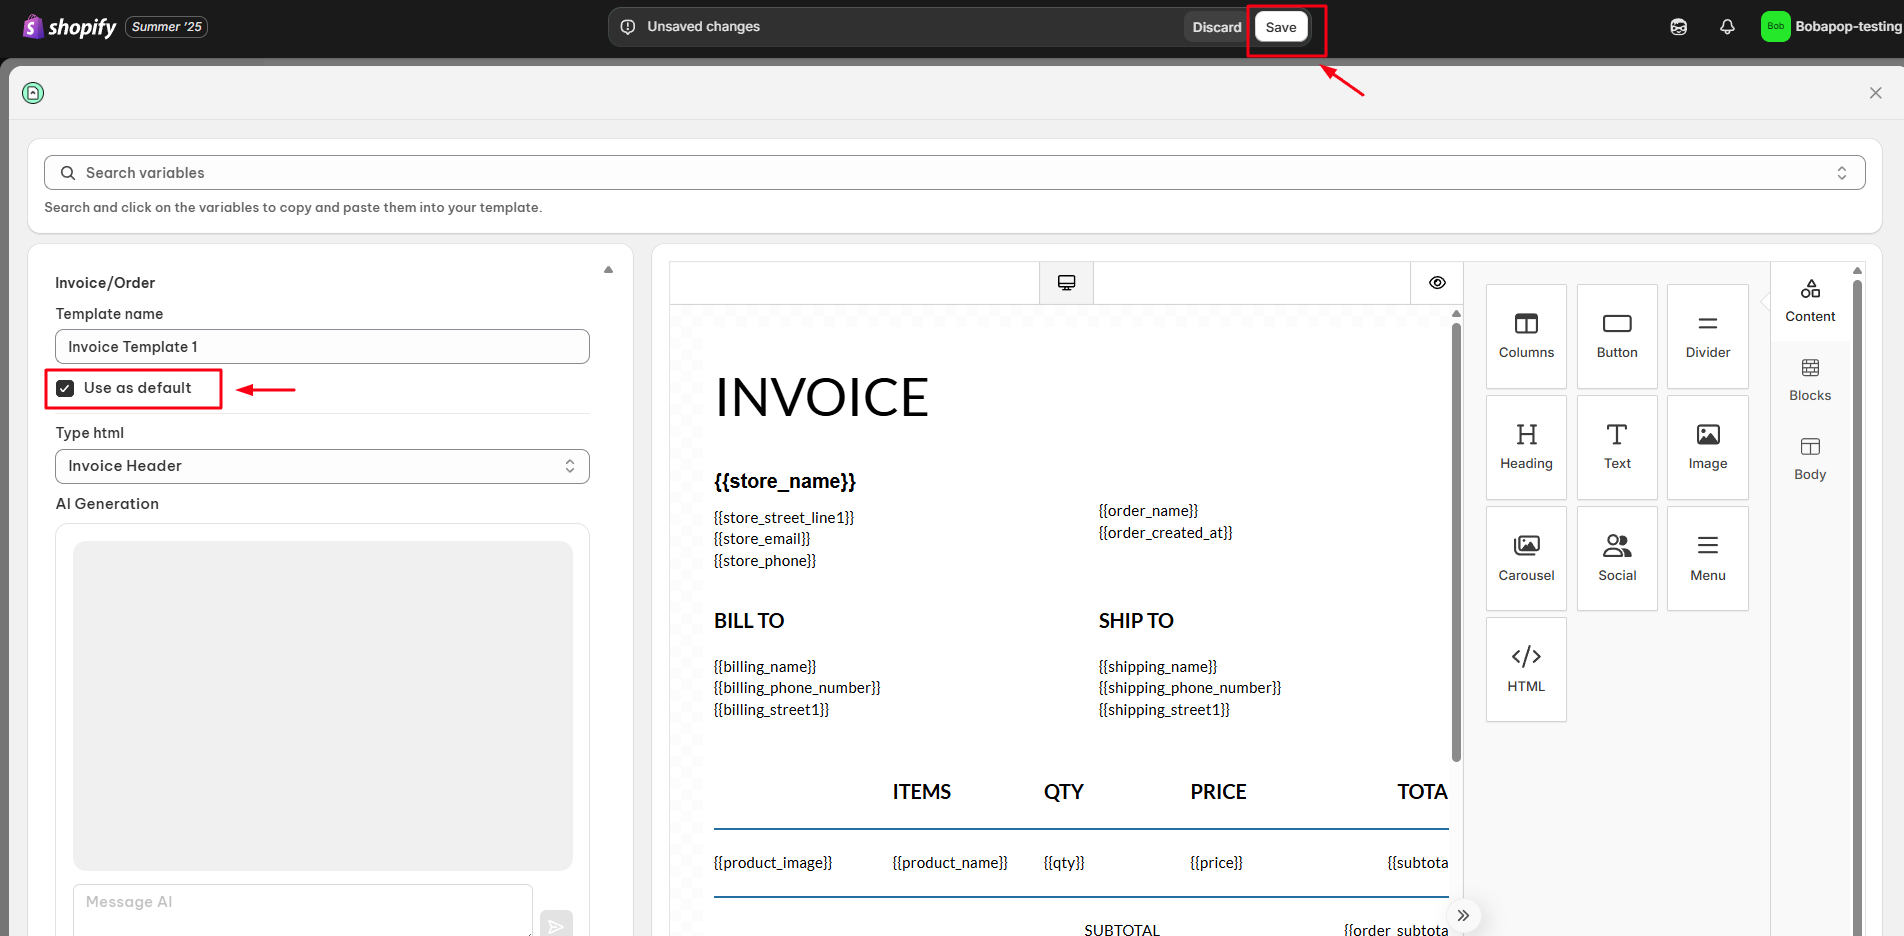
- Click the Save button at the top of the page.
Once saved, you’ll be redirected to the Templates list page. The selected template will now display a green “Default” label.
.
The default template is now used when previewing or downloading invoices directly from the Shopify admin order page.
Important Notes
- There are three types of templates: Invoice/Order, Packing Slip, and Refund. You can only set one default template per type.
Step 3: Set a Default Template in Shopify Email Notifications
If you want to embed the invoice file in your Shopify email notifications:
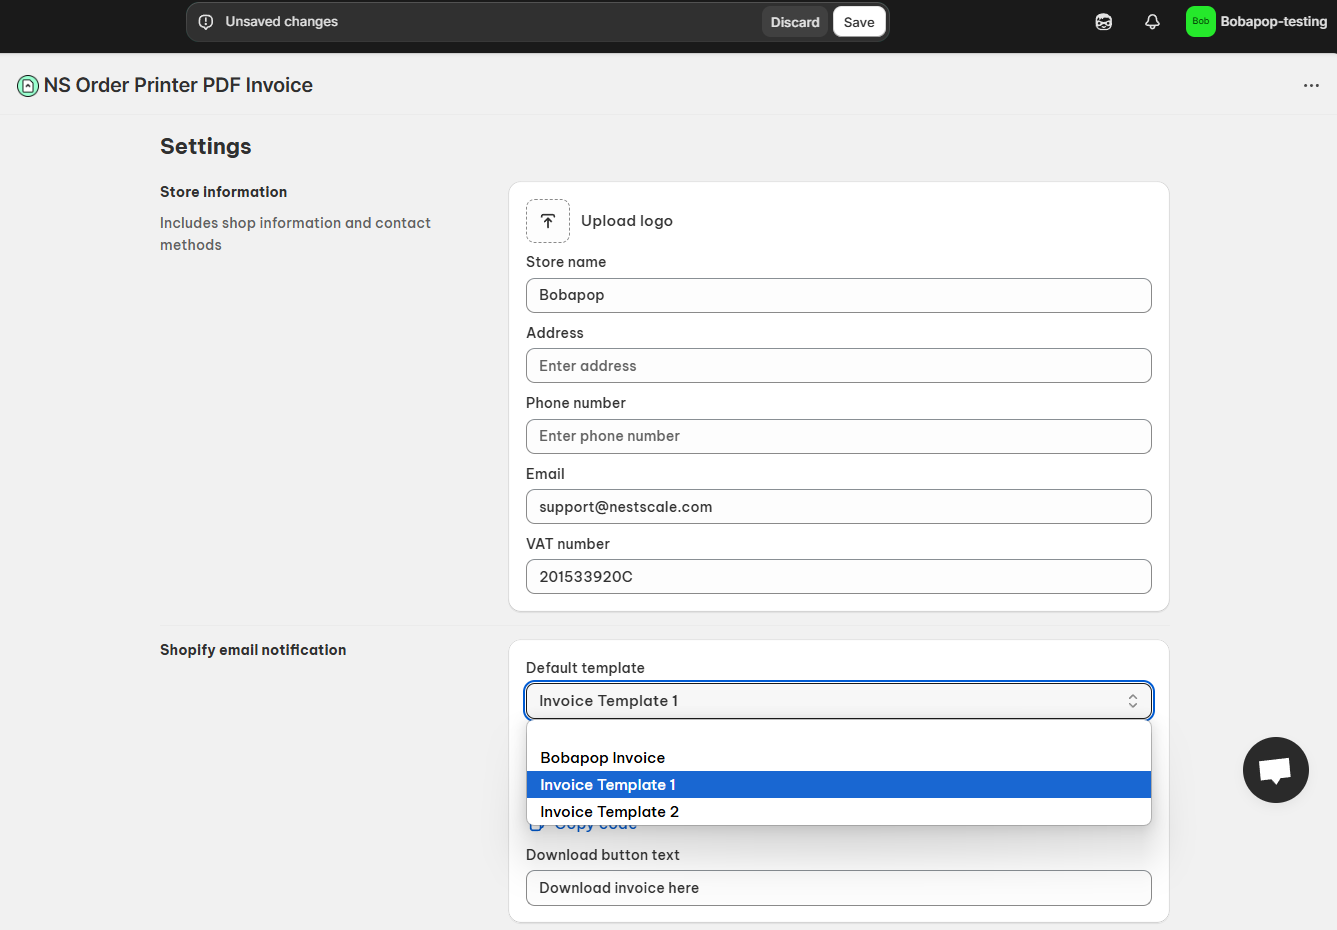
- Go to the Settings section.
- Navigate to Shopify Email Notification.
- Choose the Default template.
- Click the Save button at the top of the page.
Step 4: Set a Default Template on the Shopify Order Status Page
To embed the invoice file on the Shopify order status page:
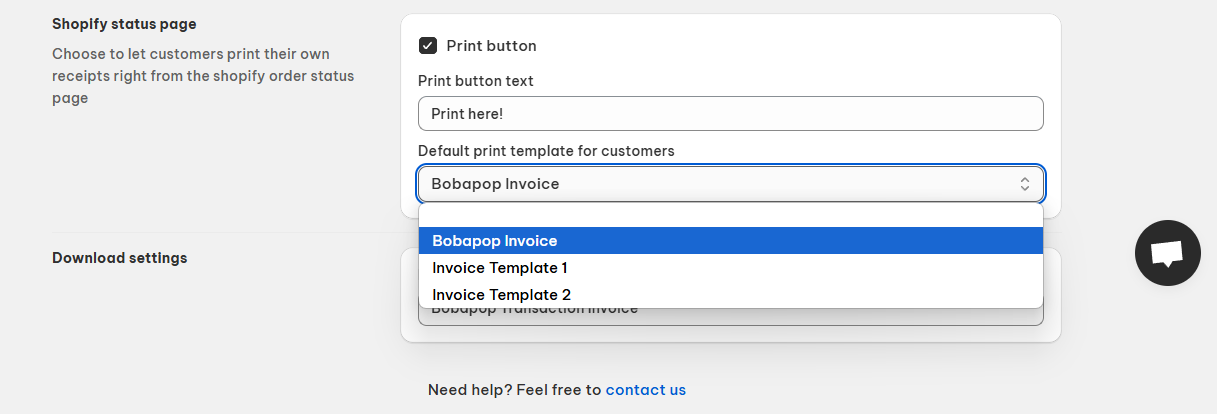
- Go to the Settings section.
- Navigate to Shopify Order Status Page.
- Select the Default print template.
- Click the Save button at the top of the page.
Need Help?
We’re here for you! Contact us via live chat in the app or email us at [email protected] for any assistance.