 NestAffiliate
  NestDesk
  NestScale Product Variants
 With the NS Order Printer PDF Invoice app, you can easily add a Print button to your Shopify order status page – allowing customers to download and print their invoices instantly.
In this guide, we’ll walk you through the steps to set it up. Let’s dive in!
How to add a print button on Shopify order status page
Before you begin:
Make sure you’ve already created a template in the app.
If not, follow this guide to create your first invoice template.
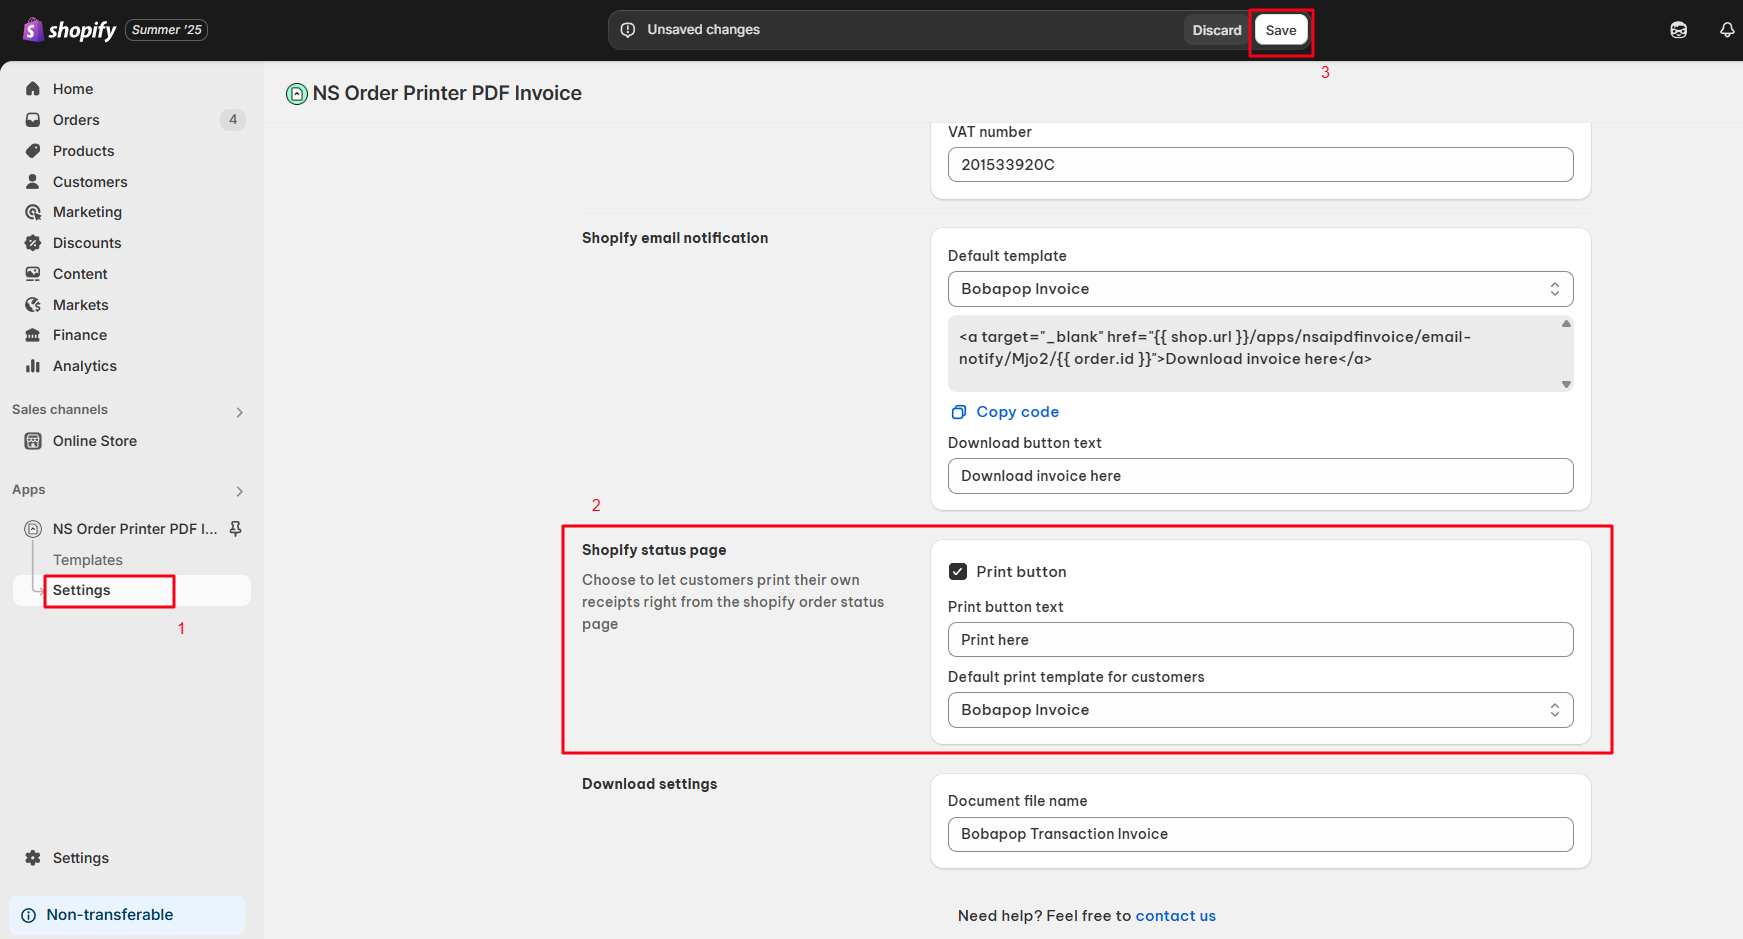
Step 1: App Setup
- Open the NS Order Printer: PDF Invoice app.
- Go to the Settings tab.
- Scroll to the Shopify Status Page section.
- Do the following:
- Tick the “Print button” checkbox
- Customize the “Print button text”
- Select a default print template
- Tick the “Print button” checkbox
- Click Save at the top of the page.
Step 2: Shopify Admin Setup
- Go to your Shopify admin > Settings > Checkout
- In the Configurations section, click Customize.
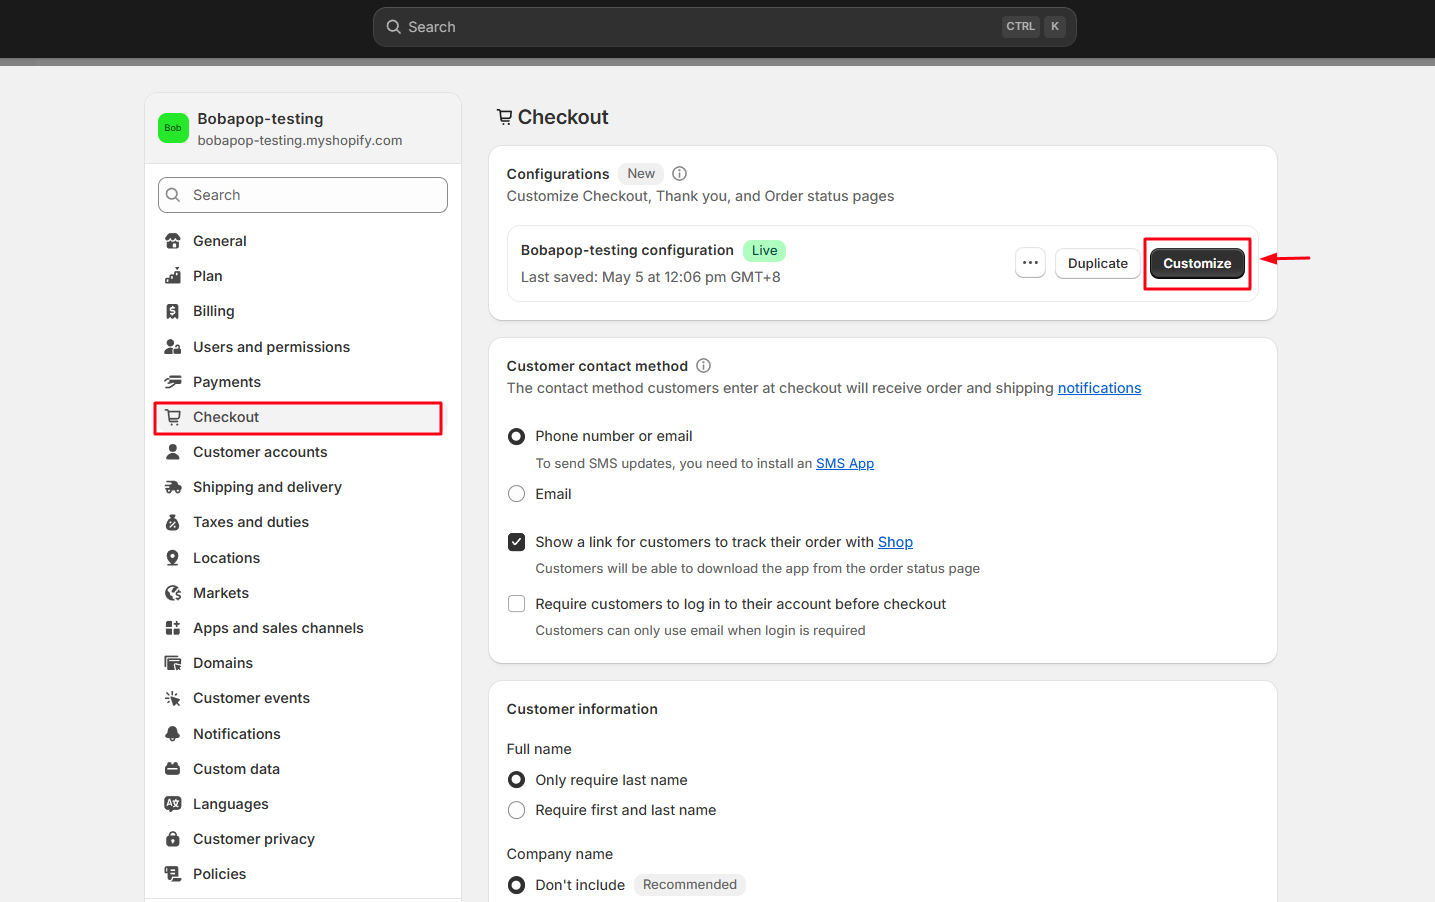
- Switch to Order Status Page mode.
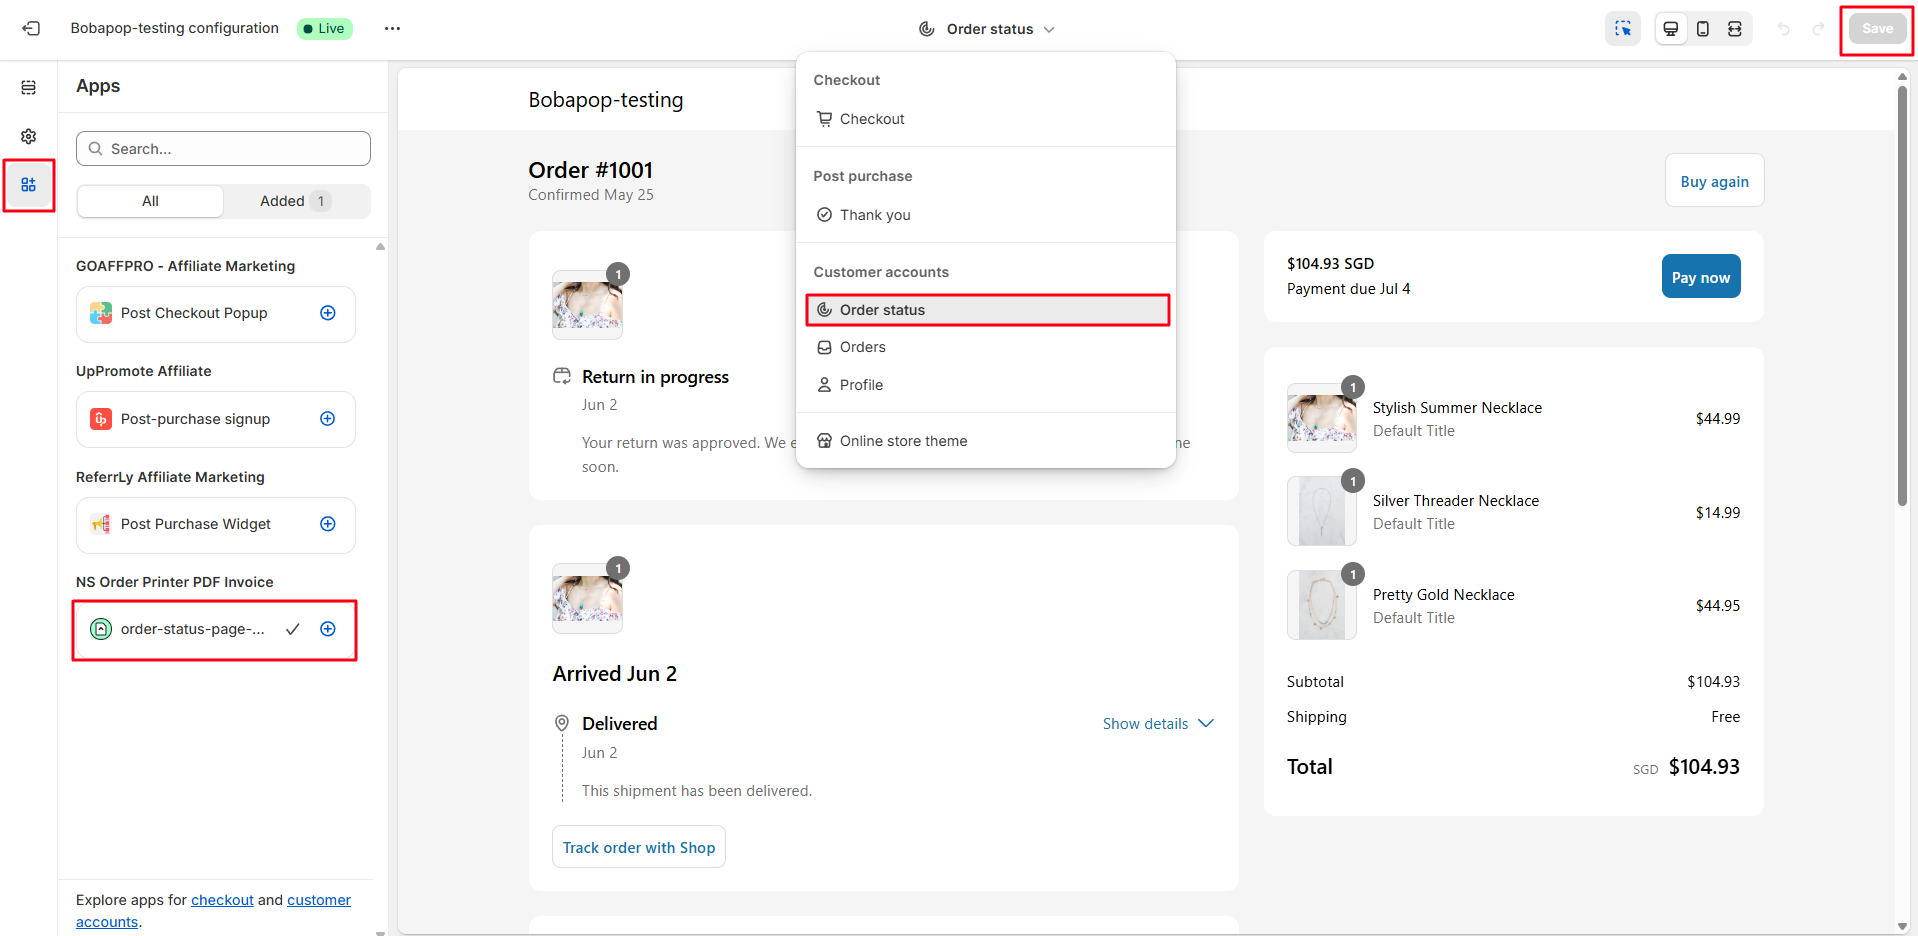
- In the left sidebar, click Apps > add the NS Order Printer PDF Invoice block.
You can move the Print button to any position you wish on the Shopify order status page.
- Click Save at the top right corner.
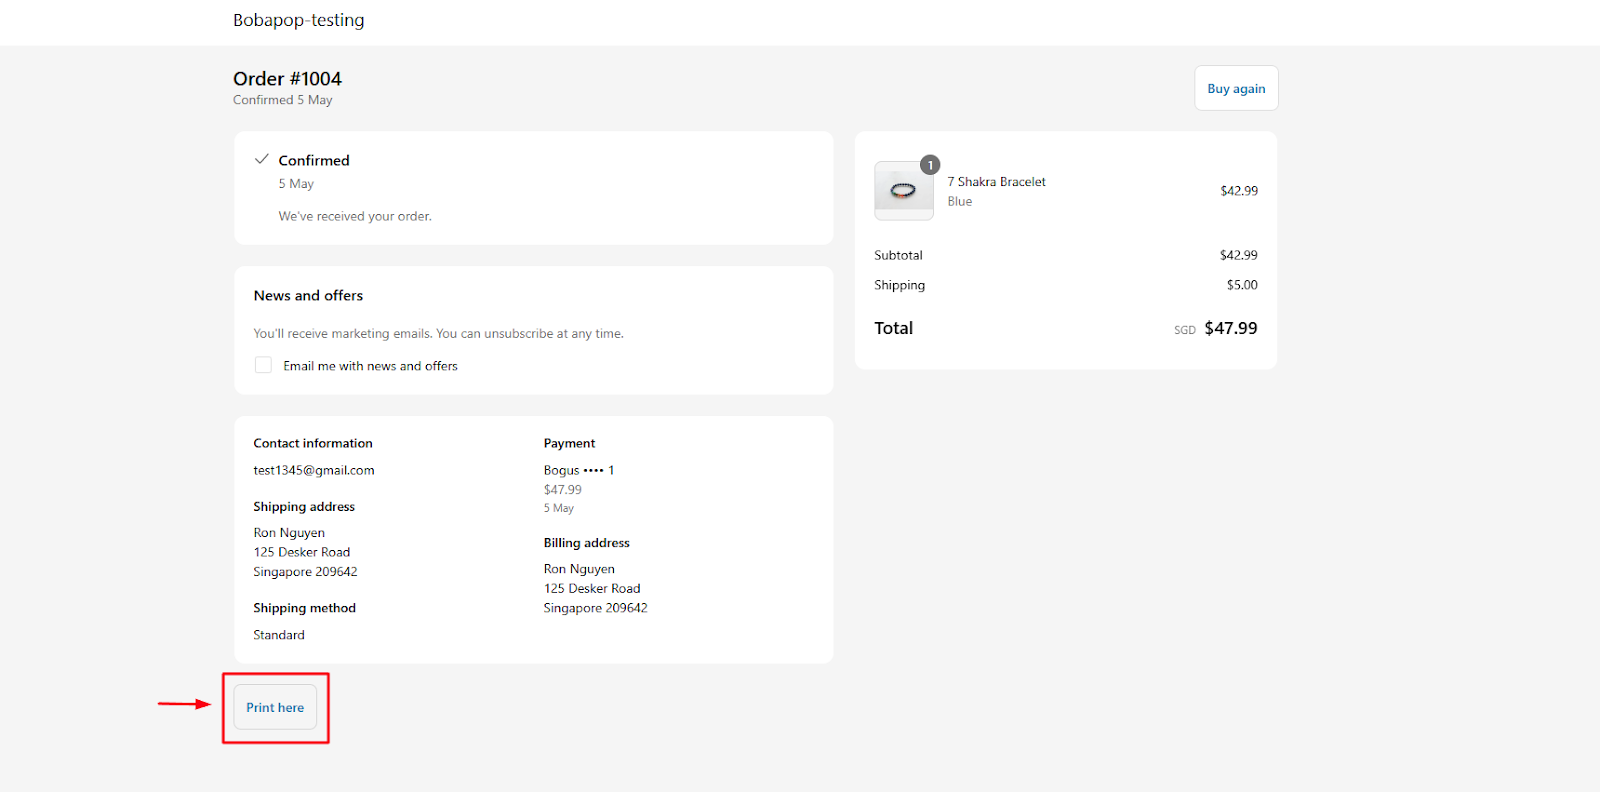
That’s it! You’ve successfully added a Print button to your order status page.
Your customers can now download their invoices with a single click.
Need any help?
Contact our support team via live chat inside the app or send an email to Support NestScale Our dedicated team is happy to help!