 NestAffiliate
  NestDesk
  NestScale Product Variants
 In this post, you will learn how NestScale Creative Analysis works and help the advertiser optimize their creatives effectively. Let’s get started now!
How to use NestScale Creative Analysis
Creative Analysis Dashboard
Configuration
On the top of the Creative Analysis page, you can click on the icon beside Configuration to choose the Ad account you want to analyze creatives.


Note: Click on the toggle Only include active ads for the report to hide inactive ads on the performance report > select Apply
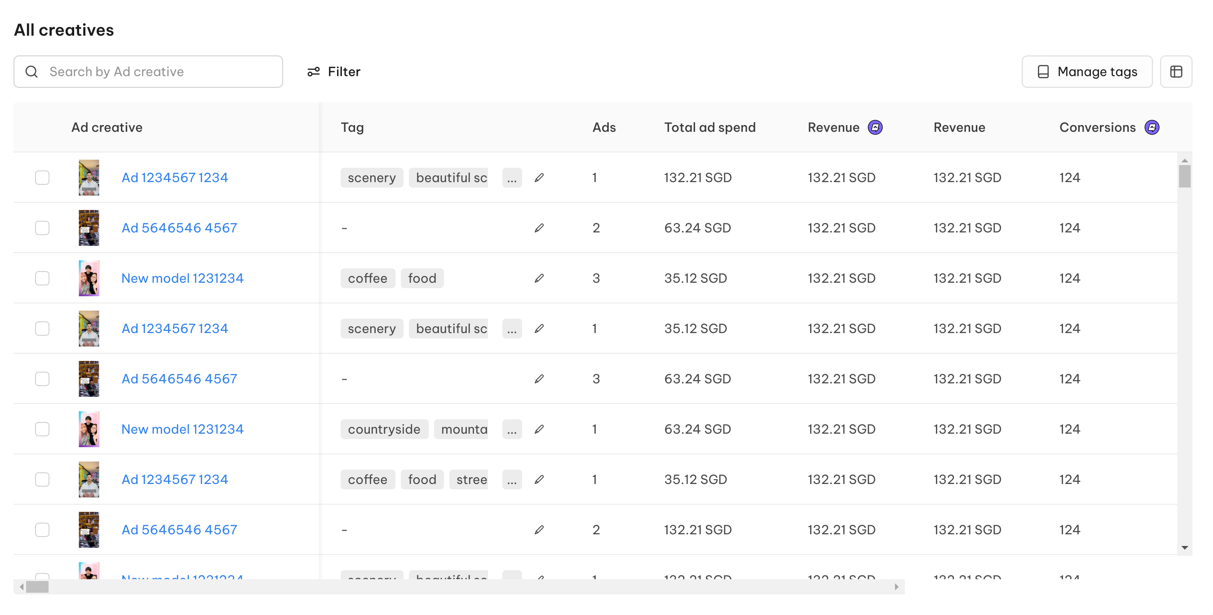
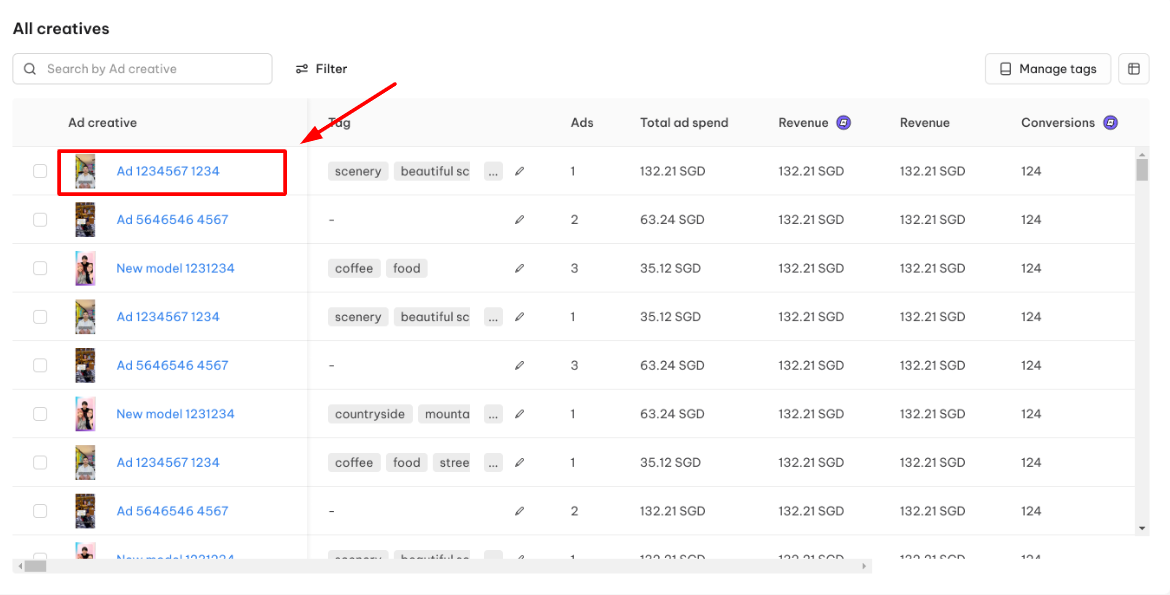
All Creatives
All Creatives Table Report is your one-stop destination for analyzing the detailed performance of your ad creatives.
The data in this report will be updated following the settings for Filter and Date Picker
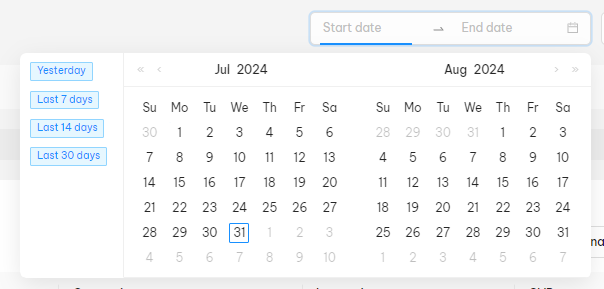
- Date Picker
This feature allows you to select a time range for the creatives, with a maximum date range of 30 days.
- Filter
Under All Creatives performance, you can choose the display condition for metrics to view the table column by clicking the icon Filter beside the Search box

When the slidebar appears on the left side, as illustrated below, simply select Tags and Metrics Condition
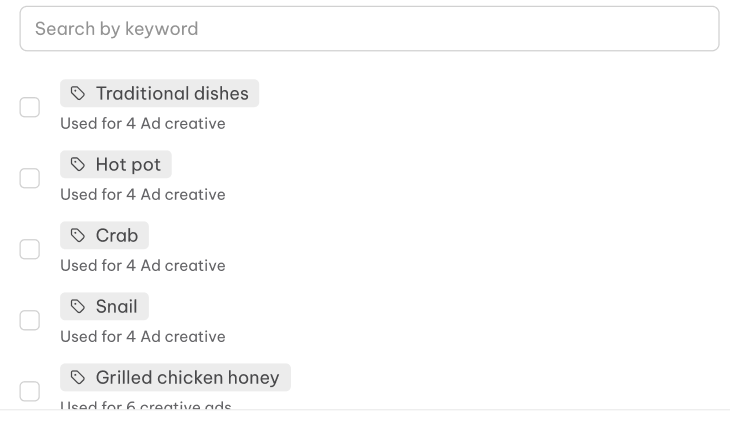
- Tags: Only display ad creatives with the selected tags
>> Read more: Tags Management
- Metrics:
- Tick the box And – Or for choosing the condition of metric filters
- Select Add metric filter > choose the metrics and type the value:
Greater than or equal to
Greater than
Less than or equal to
Less than
Equal to
- Click on Apply filters to complete choosing the filter for your report table

Performance Chart
Performance Chart gives you a clear view from comparing creatives through some key metrics by Tags or by Creative ID

1. From the Add chart pop-up, enter these required fields:
- Choose Chart type:
- Line chart
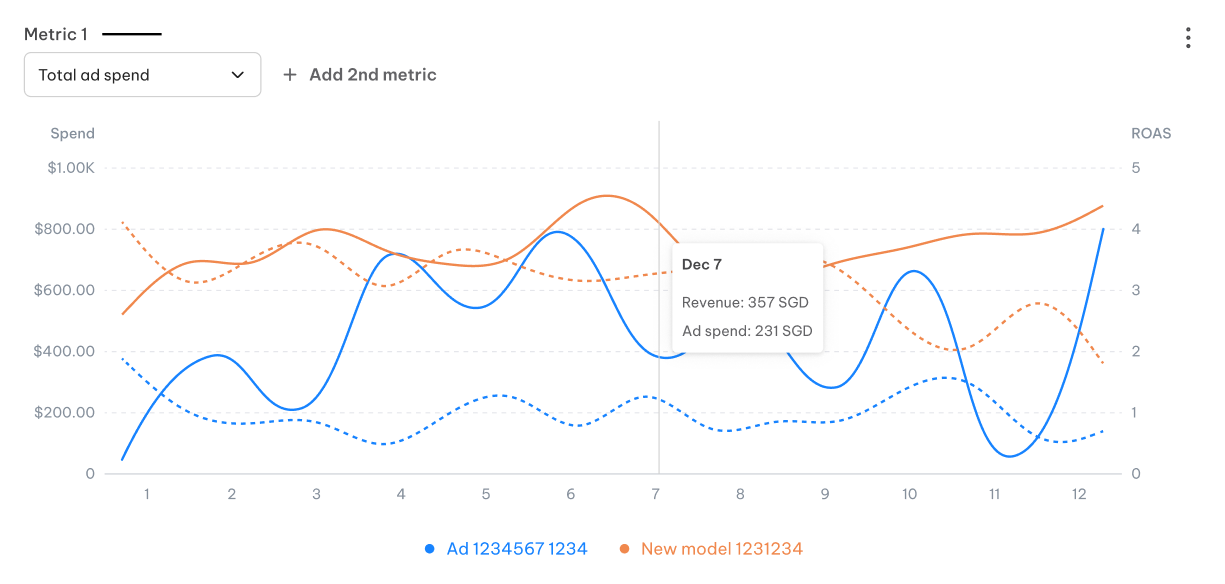
- Column chart
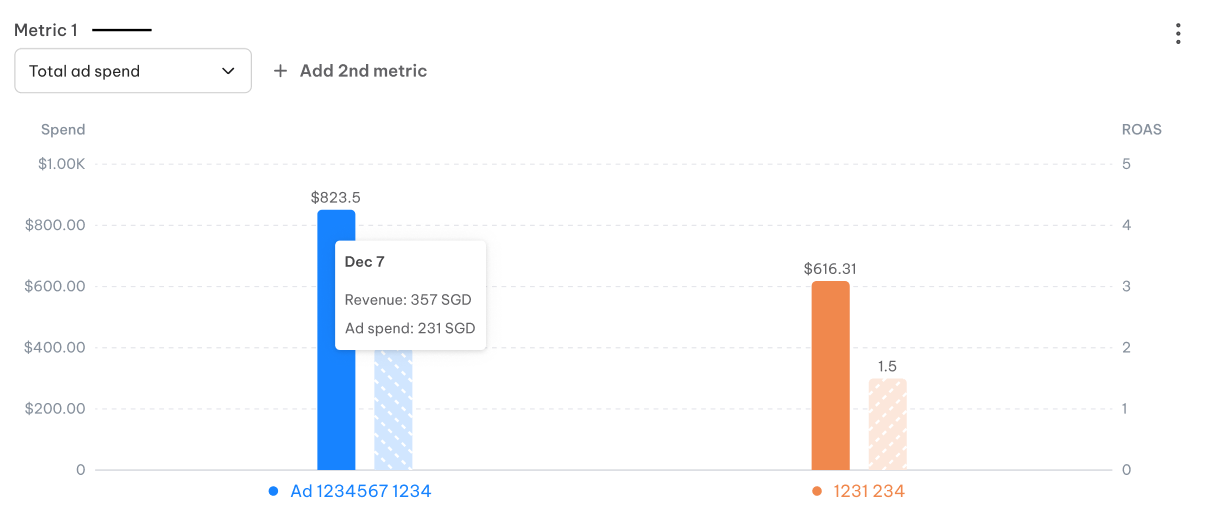
- Tick on compare creative group by:
- Creative ID
- Tags
- Select metrics (you can select maximum 2 metrics)
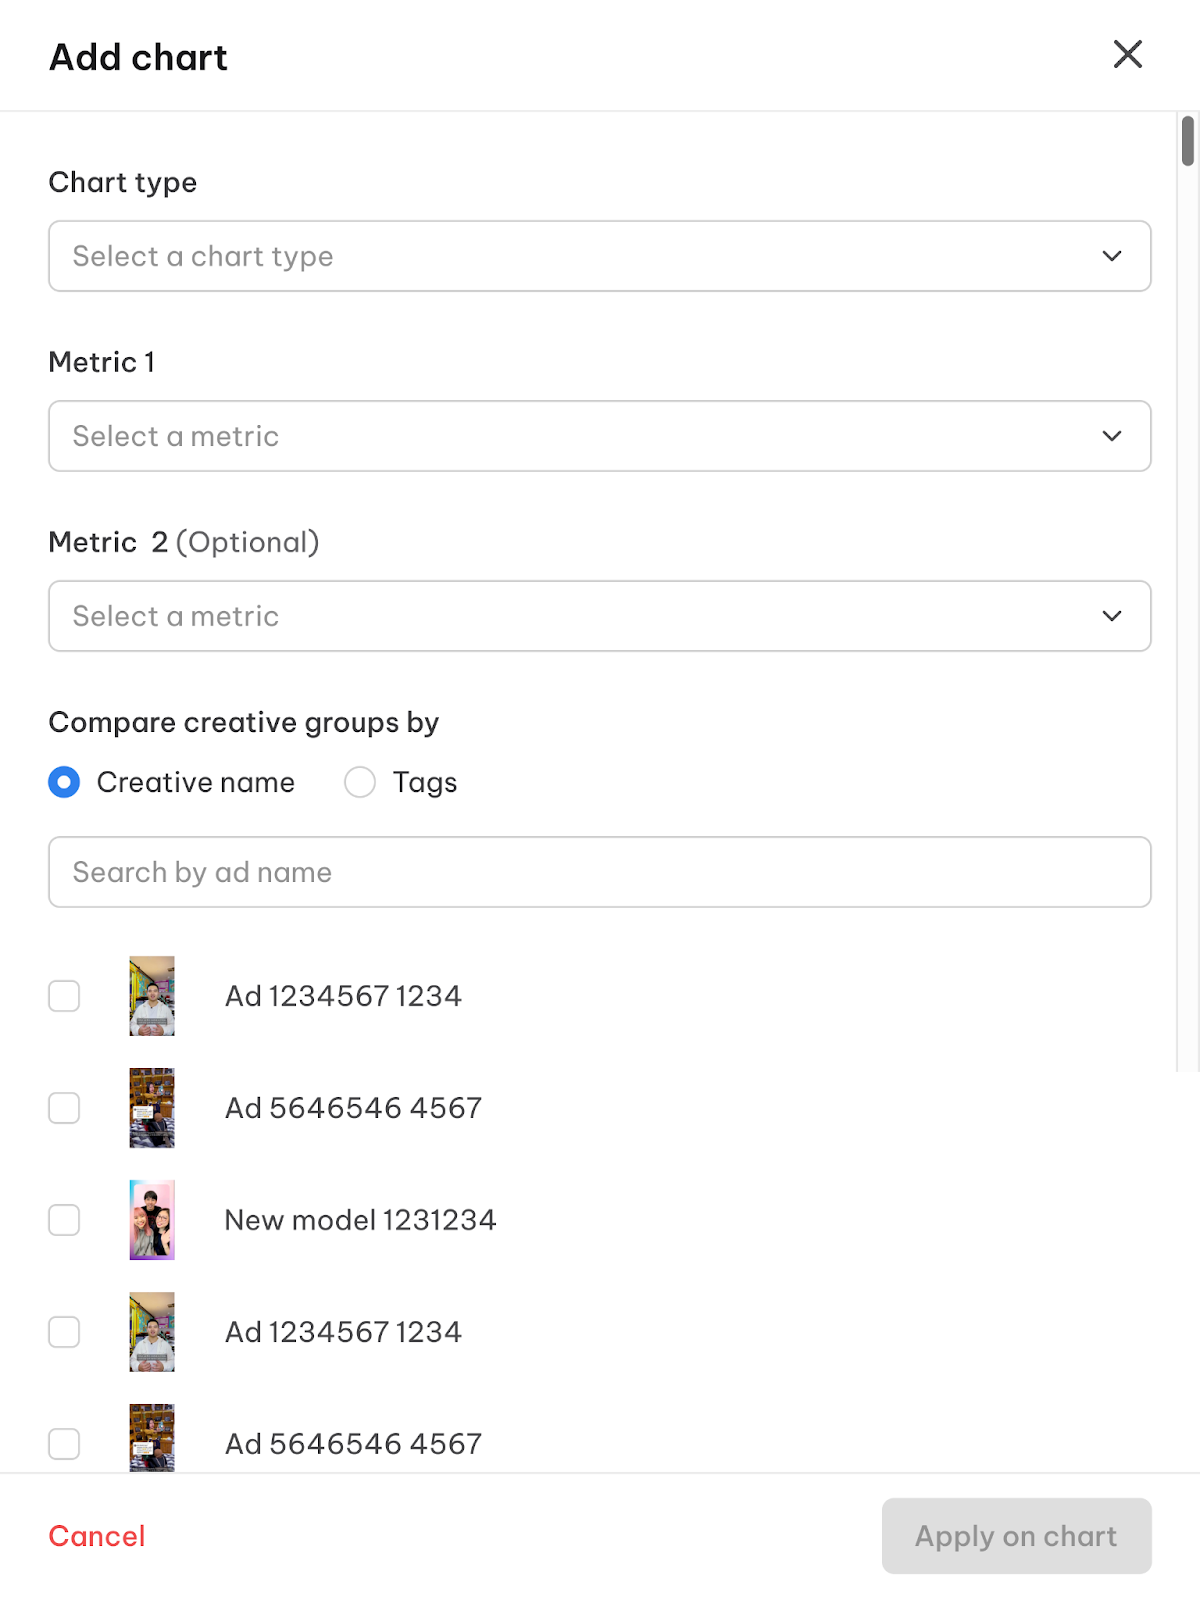
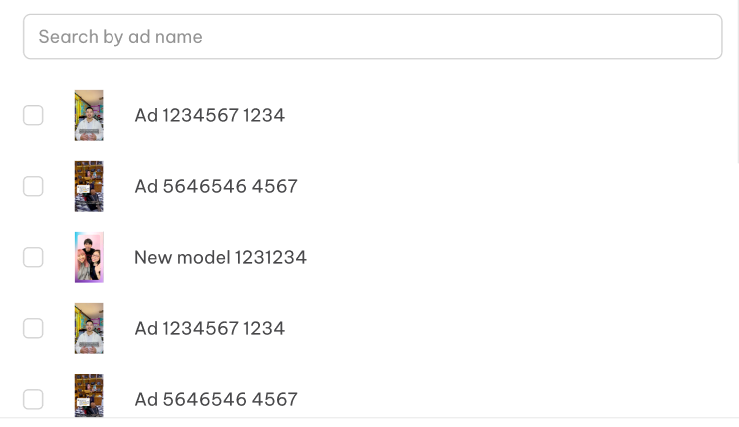
- Tick on creative IDs/tags you want to compare
2. Click the button Apply on chart

How to customize NestScale Creative Analysis displayed columns?
You can customize the table column including your desired metrics by clicking on the custom symbol beside Manage tags icon

When the pop-up window appears, as illustrated below, simply tick the boxes to select the metrics you wish to showcase on your report.
Note: Total ad spend metric is a default metric and cannot be hidden on your report.
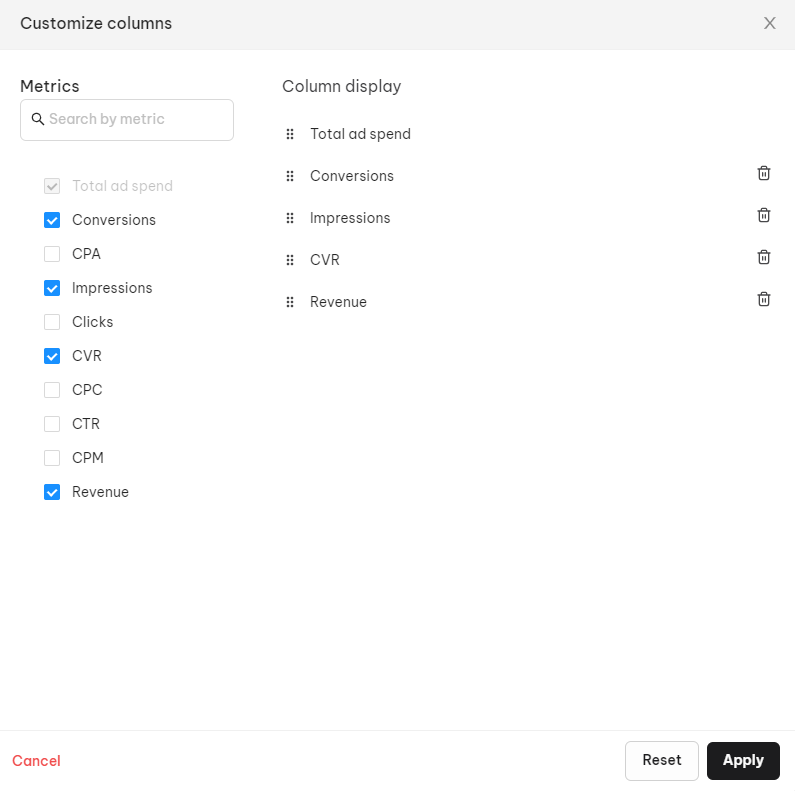
To organize those metrics displays, you can click on the drag-and-drop icon under the Column display section. After that, click on Apply button to complete.


Detailed View of All Creatives Performance Report
Detailed View
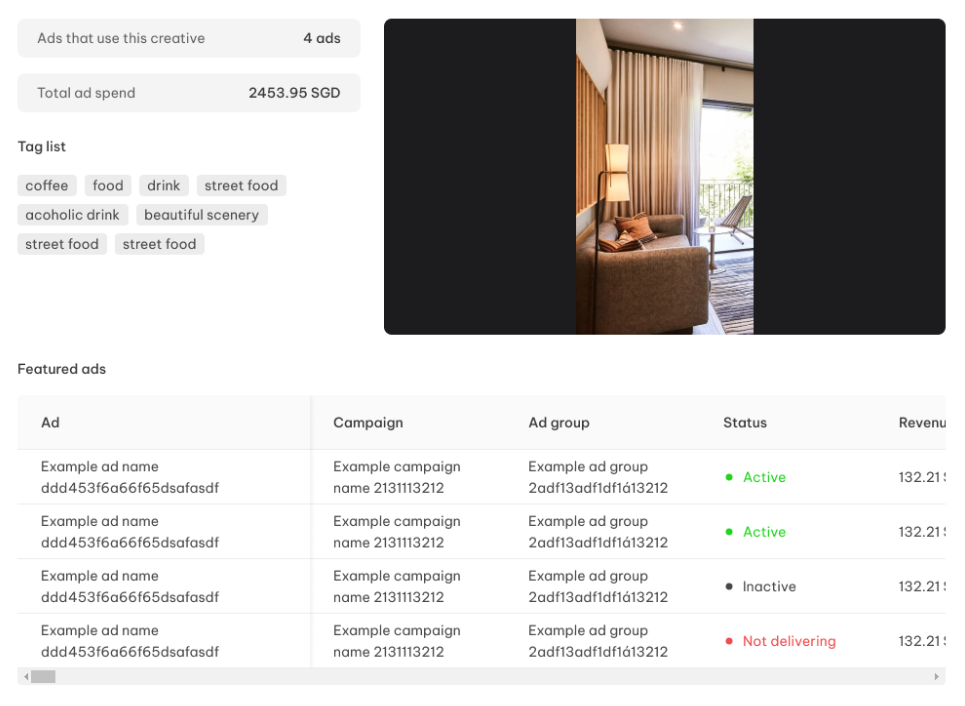
In case you want to view the detailed performance of an ad creative, simply click on its name.
The Detailed Performance Report pop-up display:
- Number of Ads using this creative
- Total ad spend
- Tag list
- Featured ads (outcome metrics of ads using this creative)
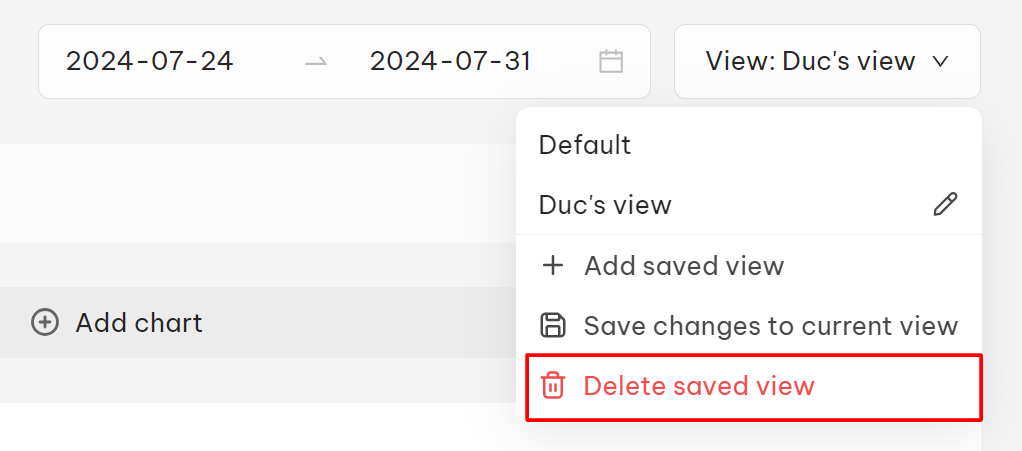
Saved View
Create saved view
Each time users log in to NestScale Creative Analysis, the app displays the performance report of their first integrated Ad account by default without the last changed metric filters and time range.
If you want to quickly check the data of other Ad accounts without resetting time or metrics conditions when logging in to the app, you can create a saved view:
- Click on View: Default > select + Add saved view

- Enter the saved view’s name > choose Confirm button

Edit saved view
You can edit a saved view’s information:
- Saved view name: click on the Edit symbol beside its name

- Make changes directly in the current saved view > click on Save changes to current view from the dropdown to complete

Delete saved view
- Under this saved view, click on Delete saved view > select Confirm button from the confirmation pop-up
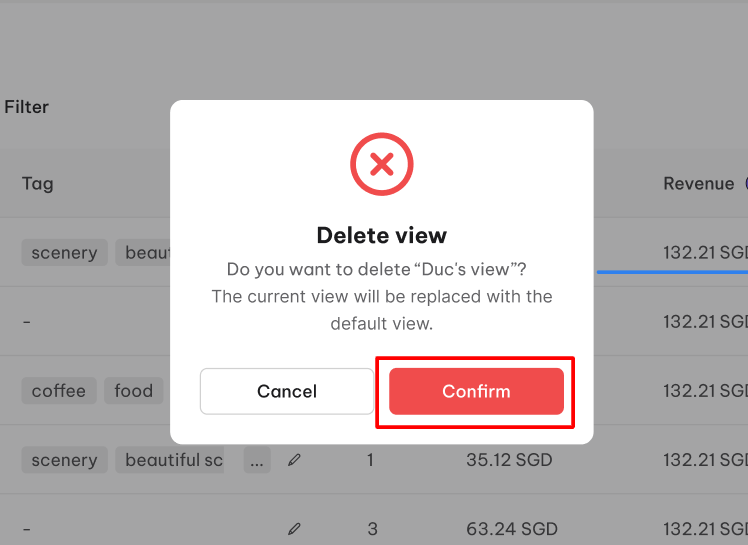
A successfully delete notification pop-up will show up on the bottom right corner of your screen:

Need any help?
Please contact our support team via live chat or email at [email protected]. We are happy to help you as soon as possible!