 NestAffiliate
  NestDesk
  NestScale Product Variants
 In this article, learn how to install, configure and enable our plugin.
Let’s walk through three main parts below:
- Plugin installation
- Configuration
- How to use the plugin
Watch our instruction video and read the step-by-step guides to have a full understanding.
How to install our plugin
Automatic installation
Step 1:
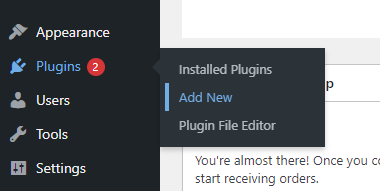
From your WordPress admin dashboard, select Plugins from the left side menu and click Add New at the top of the page.

Or you can hover over Plugins and choose Add New.
Step 2:
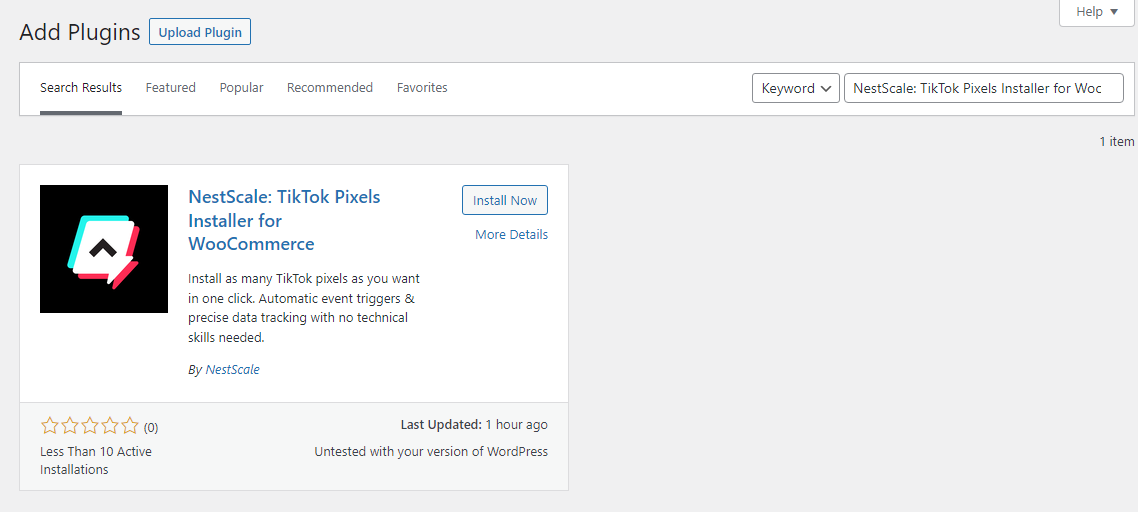
On the Add Plugins page, enter NestScale: TikTok Pixels Installer for WooCommerce in the search box. Then click Install Now > Click Activate to activate the plugin. Your plugin is now installed.
Step 3:
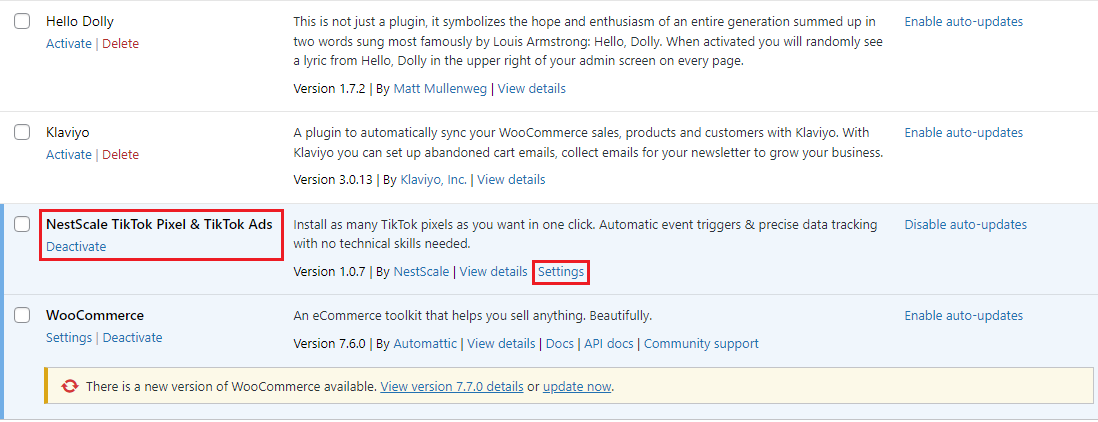
Find NestScale TikTok Pixels & TikTok Ads on the Plugins page and click Settings.
Step 4:
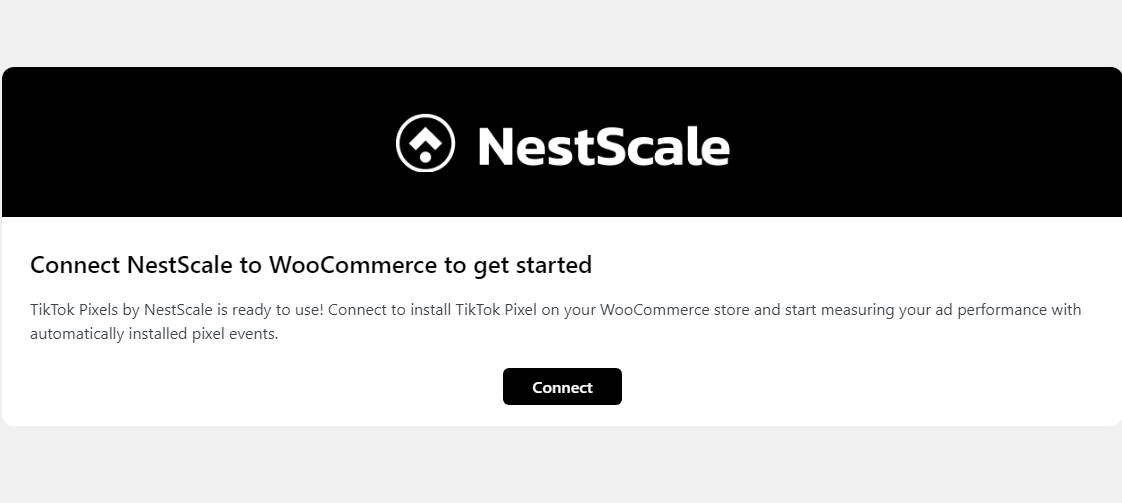
Connect NestScale to WooCommerce to get started.
Manual installation
Step 1:
Download the plugin zip file from the WordPress download page https://wordpress.org/plugins/nestscale-tiktok-pixel-tiktok-ads/
Step 2:
From your WordPress admin dashboard, on the sidebar menu, click Plugins > Add New
Then click Upload Plugin > Choose File
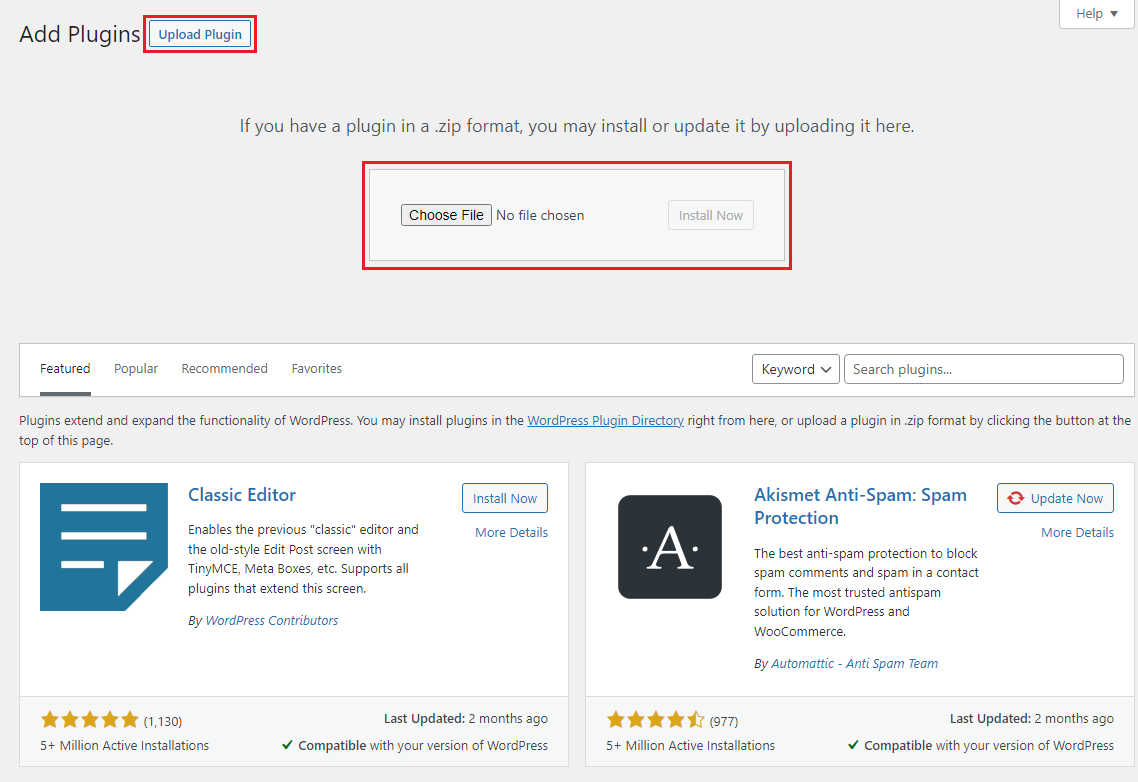
Step 3:
Once the uploading is done, click Install Now > Click Activate Plugin to finalize plugin installation.
Step 4:
Find TikTok Pixel plugin on the left sidebar or on the Plugins page and click Connect to begin.

How to configure our plugin
Create a NestScale account
Before you can use our plugin, you must have a NestScale account.
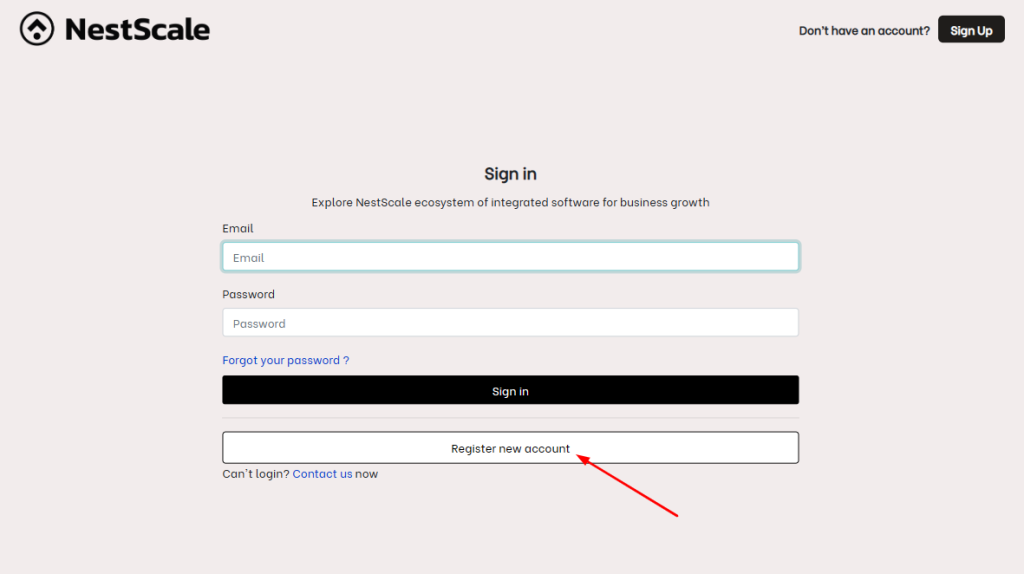
Step 1: From the welcome screen, click Connect.
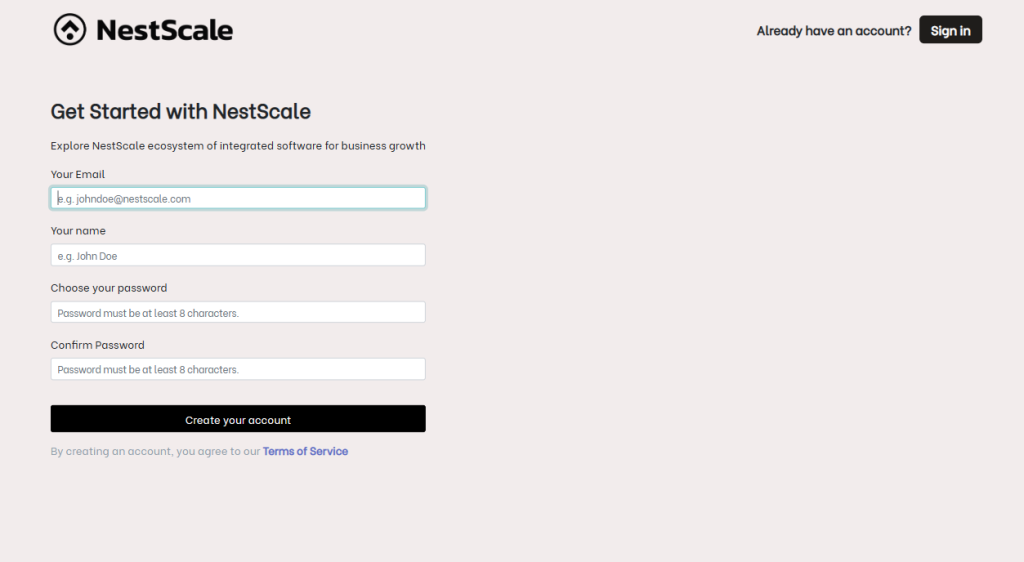
Step 2: You will be redirected to the NestScale login page. Click Register new account.
Step 3: Fill in the information and create a NestScale account. You will be able to access the plugin once you log in successfully.
Connect your TikTok Ads Manager account
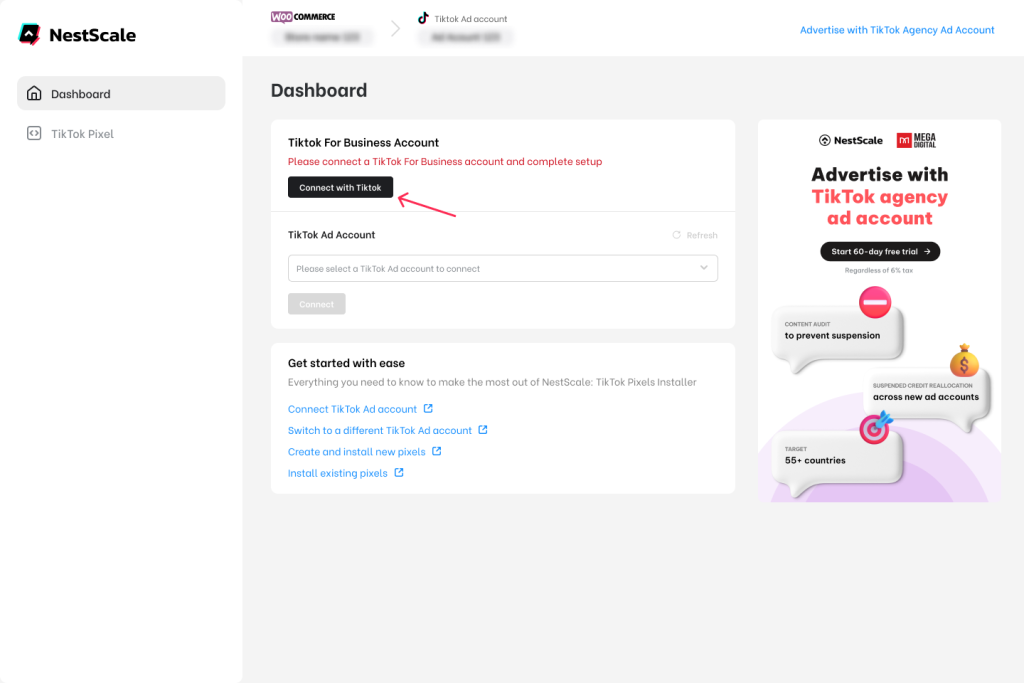
After you have logged in, please connect your TikTok Ads Manager account to the extension.
Step 1: From your Dashboard, click the Connect with TikTok button.
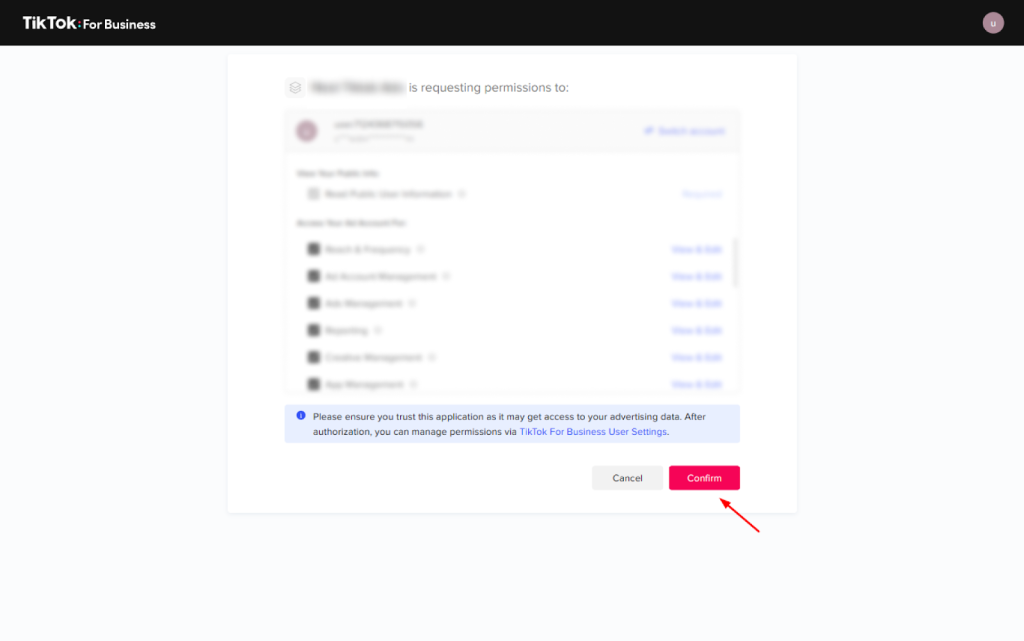
Step 2: You will be redirected to the TikTok authentication page. For the extension to work properly, please complete the TikTok authentication process and authorize all the necessary permissions.
Step 3: After your TikTok for Business account is connected to the extension, please select your TikTok Ads Manager account and click Connect.

Now you can see your pixel details and install/uninstall pixels on your website.
How to use our plugin
Create and install new pixels
To install new pixels:
Step 1: Click on TikTok Pixel on your sidebar menu.
Step 2: Click the Install new pixel button.
Step 3: Enter your pixel name.
Step 4: Click Install.
To check if your new pixel has been installed successfully:
- You should see your new pixel with Installed status on the TikTok Pixels table.
- Go to your store website and click on TikTok Pixel Helper to see if the extension can detect your new pixel.
Install existing pixels
If you already have TikTok pixels on your TikTok Ads Manager, you still can install or uninstall them using NestScale: TikTok Pixels Installer.
To install your existing pixels:
Step 1: Click on TikTok Pixel on your sidebar menu.
Step 2: Select the pixel that you want to install.
Step 3: Click on Install.
To check if your new pixel has been installed successfully:
- You should see your pixel with Installed status on the TikTok Pixels table.
- Go to your store website and click on TikTok Pixel Helper to see if the extension can detect your new pixel.
Check pixel events with TikTok Pixel Helper
Although this is not a mandatory step, it is necessary that you can check your pixel events with TikTok Pixel Helper, which can be easily installed on your browser.
You can install TikTok Pixel Helper on Edge and Chrome by clicking on this link: TikTok Pixel Helper – Chrome Web Store
If a website has pixels, you can check more details by clicking on the extension on your browser toolbar.
Uninstall pixel
To uninstall any pixel:
Step 1: Click on TikTok Pixel on your sidebar menu.
Step 2: Select the pixel that you want to uninstall.
Step 3: Click on Uninstall.
To check if your new pixel has been uninstalled successfully:
- You should see your pixel with Not installed status on the TikTok Pixels table.
- Go to your store website and click on TikTok Pixel Helper to check whether the pixel is no longer detected.
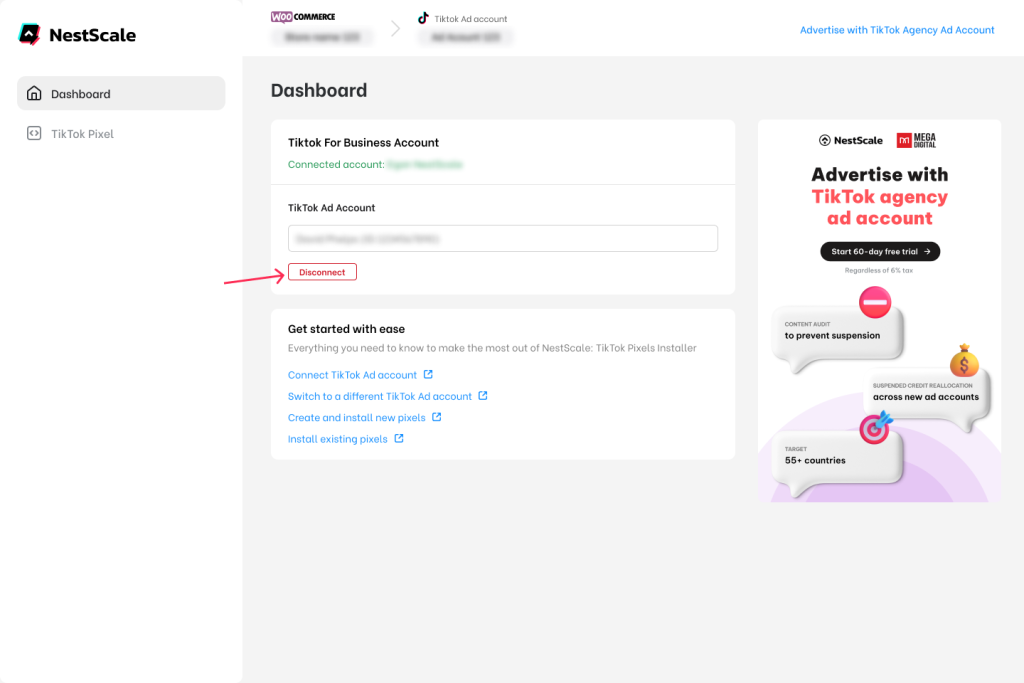
Switch TikTok Ads Manager account
To switch to a different TikTok Ads Manager account:
Step 1: On your Dashboard, click Disconnect.
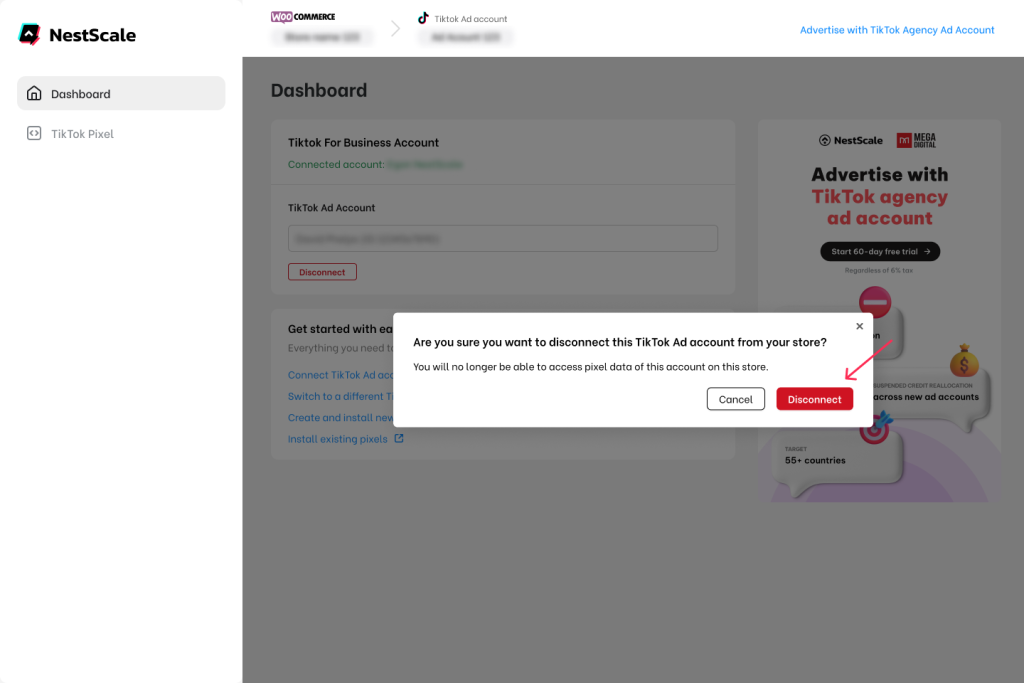
Step 2: Confirm by clicking Disconnect again when a confirmation pop-up appears.
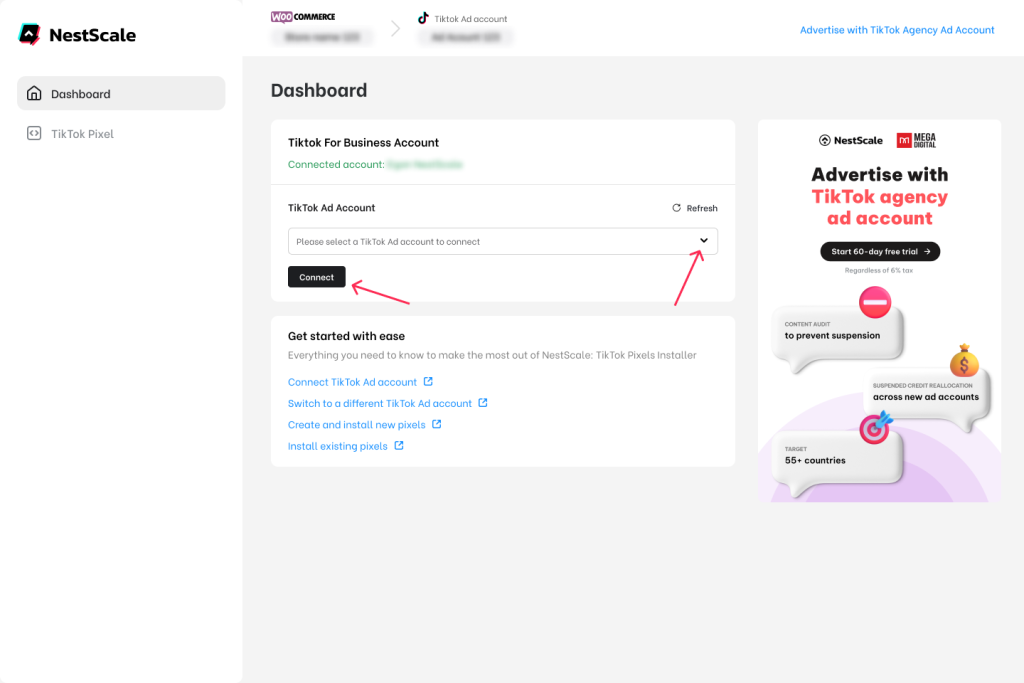
Step 3: When your TikTok Ads Manager is disconnected successfully, you can select another TikTok Ads Manager account from the selection dropdown.
Step 4: Click Connect.
FAQs
How much does this plugin cost?
It’s completely free. Happy to share this plugin with the world!
How do I test if everything is working?
You can check your pixel events with TikTok Pixel Helper, which can be easily installed on your browser.
You can install TikTok Pixel Helper on Edge and Chrome by clicking on this link: TikTok Pixel Helper – Chrome Web Store
Need help with installation?
If you have any questions, you can ask for help via email at [email protected] or chat with us via the live chat system inside the plugin dashboard.